Newsletter Tech
16 February 2021 | 262 min read
📚 Summary
![]()
[EN-US] What is Next.js?
🎬 See the full video by clicking here
👩🏼💻 Click here to view the repository
Next.js is a React framework with a focus on production and efficiency created and maintained by the Vercel team, Next seeks to bring together several features such as hybrid and static content rendering, TypeScript support, pre-fetching, route system, feature packs and several plugins and examples to accelerate your development providing a complete structure for you to start your project. Next.js is an open source framework under the MIT license and is being used by several companies with good growth in the market.
With all these pre-configured facilities it is assimilated to a create react app where you start the project very fast and without worrying about webpack settings, folder structures, route configuration and so on.
About Next.js:
Main features of Next.js
Next.js and Server Side Rendering
Mini introductory class on Next.js
How to start a project with Next.js
Indication of plugins and packages
Main features of Next.js
Hybrid SSG and SSR: Render the pages during the build (Static Site Generation) or on each request (Server-side Rendering) in the same project.
Hot Code Reloading: Any changes made to your code during development will be reflected in the local application in real time, updating automatically.
Automatic Routing: The URLs in Next js are mapped based on the pages folder, so any file in this folder becomes a page, without the need for extra configuration. (you can customize this if you need to)
Automatic Code Splitting: This functionality allows pages to be rendered only with the packages they need. Let's say that only one page of your website uses Ant Design, this package will only be linked to this page. This ensures that each page has only the code necessary for its rendering, decreasing the size (kB) of each page and improving the rendering speed. There was a contribution from the Google team to improve this functionality recently.
TypeScript support: Integrated automatic configuration and compilation similar to an IDE.
Internationalization: As a standard, Next.js already has a structure for identifying different languages, working with exclusive routes and translations via locale.
Image Optimization: Next's native component for optimizing your images with resizing, lazyload, images in a modern format and easy to implement.
Next.js and Server Side Rendering
The big difference at the beginning of Next was the possibility of using rendering on the server side (SSR) this solves a problem in applications and websites built with React that mainly need SEO. In some React applications you will find that it is not always efficient to load all content on the client side (client-side) which is the React standard. Currently Next js is able to work in a hybrid way with SSG and SSR.

[EN-US] Angular
🎬 See the full video by clicking here
👩🏼💻 Click here to view the repository
Angular is a JavaScript (Typescript) based framework developed by Google for building web applications. Angular was established in 2009 as AngularJS, which used JavaScript as it’s a programming language, but in 2016, Google completely rewrites Angular. Since then, Angular Use Typescript as its language, typescript, is similar to JavaScript, and it is also considered as the superset of JavaScript.
Angular is a front-end Web Framework so we can only make client-side dynamic WebPages using Angular, and Google itself uses this beautiful and powerful framework to build client-side dynamic pages. One of the main features of angular is, we can use angular to build a single page application because it’s based on MVC architecture. Angular supports two-way data binding that requires in real-time application.
Advantages
With angular, we can quickly develop an application.
Support MVC architecture.
Two ways binding a perfect choice for real-time applications
The ideal framework for single-page applications
Fast-growing community
Enhanced design Architecture
Disadvantages
Steep learning curve
Slow processing
Limited SEO Option
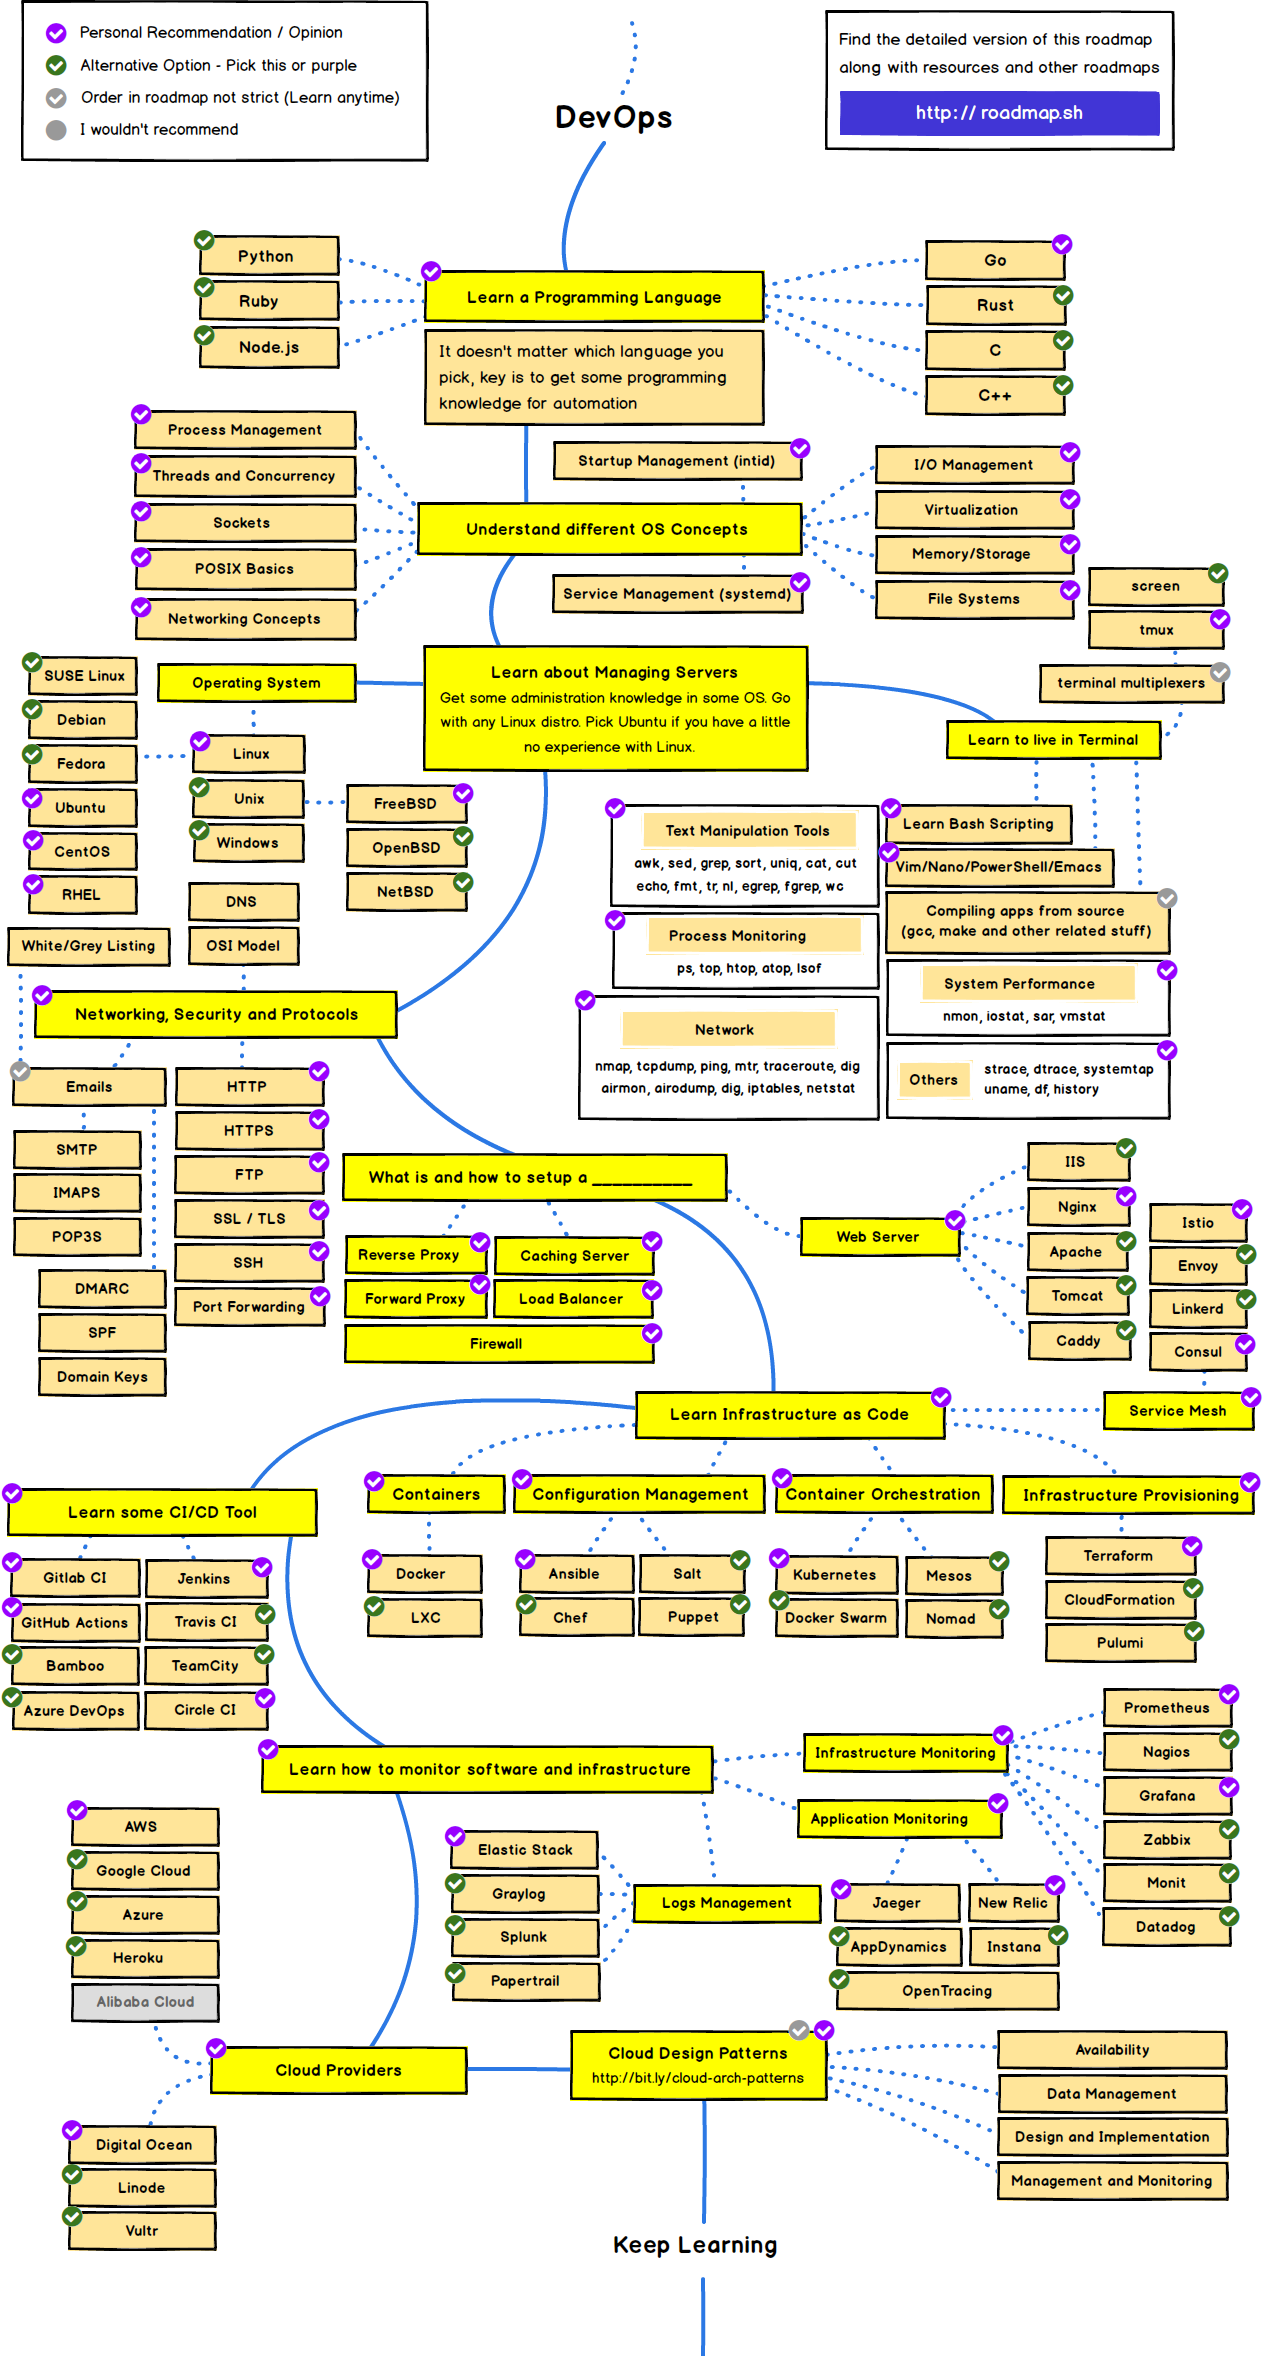
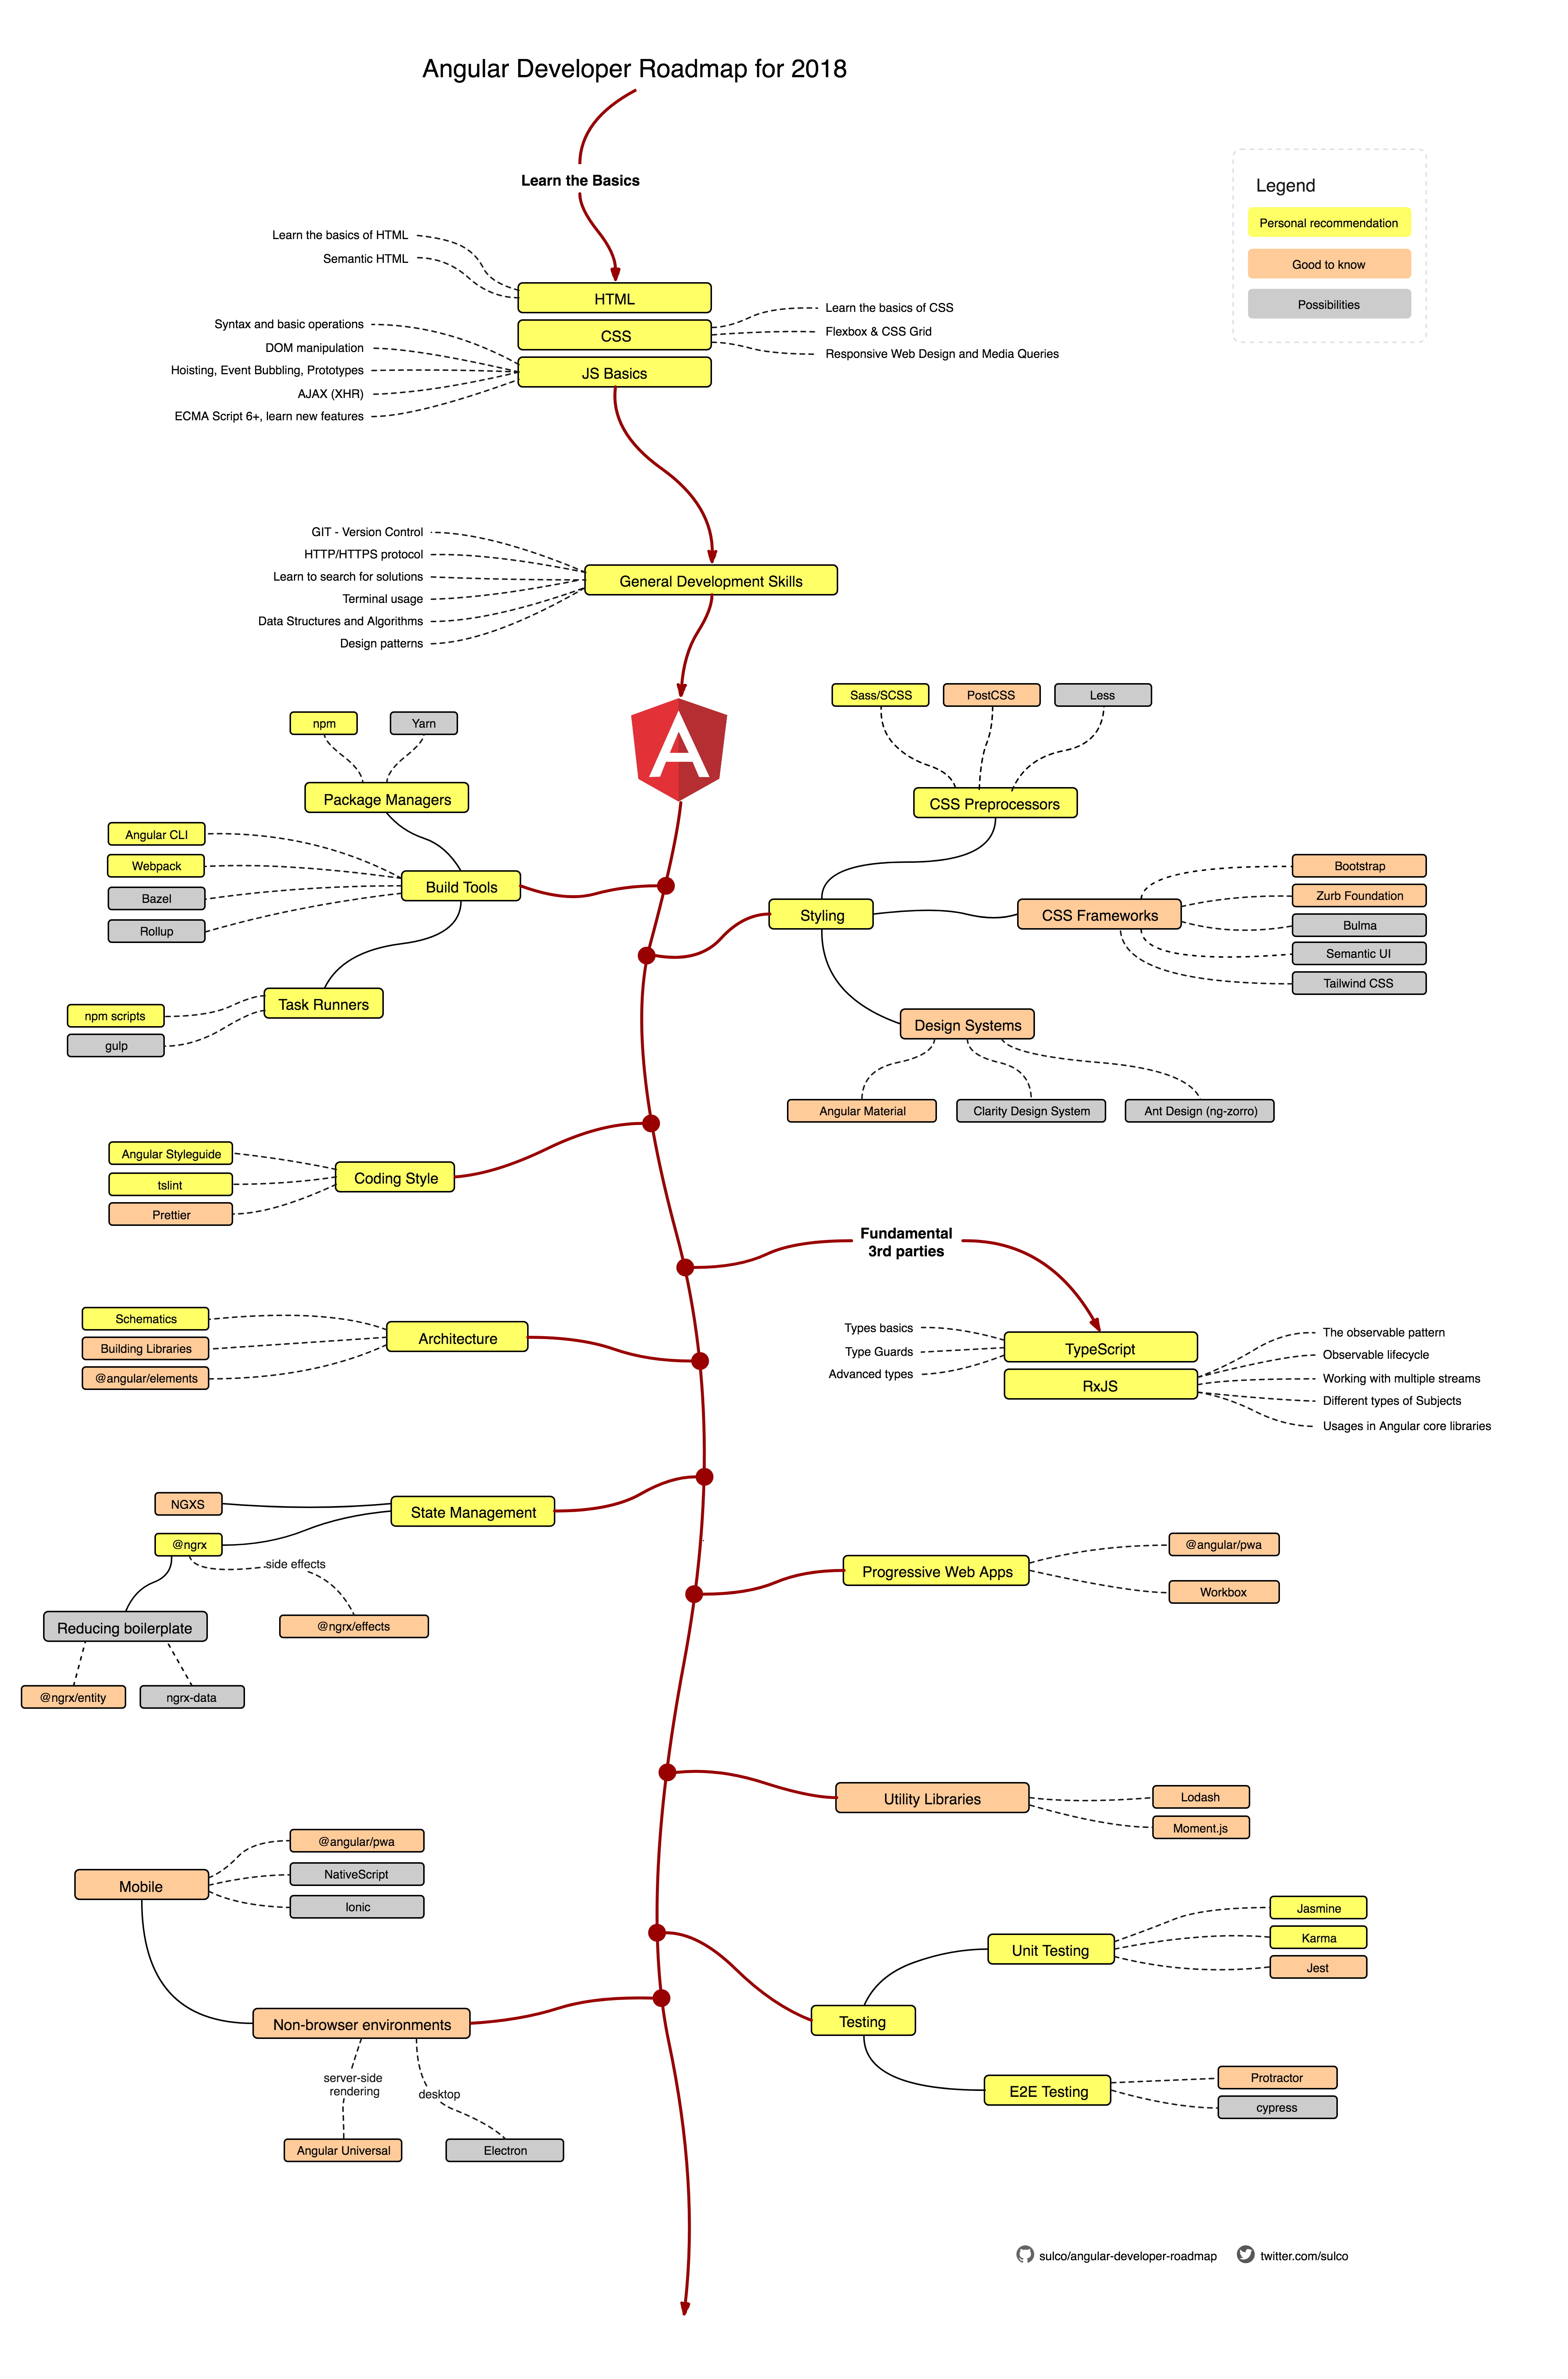
Roadmap

[EN-US] React
🎬 See the full video by clicking here
👩🏼💻 Click here to view the repository
One of the most popular front-end web development frameworks is Reactjs which is developed by Facebook. Though React is not a web development framework but an open-source JavaScript library that is highly used for developing user interfaces.
Using react you can create single page application, and even a mobile app. As React is a library, so it does not support many features like other Front-end frameworks, that’s why to build a proper single page application, React integrates with other libraries for state management, routing, and interaction with API.
Advantages
it’s virtual DOM support fast manipulation in the document.
It can be integrated with other libraries
Support for mobile web-application
Reusable components
Easy to use tools
Disadvantages
Does not have well-organized documentation
Complex structure than JavaScript.
Less focus on UI

[EN-US] Vue
🎬 See the full video by clicking here
👩🏼💻 Click here to view the repository
Vue is another most popular open-source JavaScript framework mainly used for creating a single page application. Vue.js came into existence in February 2014 and is developed by Evan You. This framework uses “high decoupling,” which facilitate developers to create attractive and easy to use user interfaces (UIs). It is based on Model-View-View model (MVVM) architecture.
Advantages
Fast Development
Small size
Easy to maintain and to learn
Can be integrated with other applications
Virtual DOM rendering and performance
Components reusability
Solid tooling ecosystem
Disadvantages
Does not have stable tools
Does not support by tech-giants
Less plug-in and components
[EN-US] GraphQL vs. REST | What are the diferences?
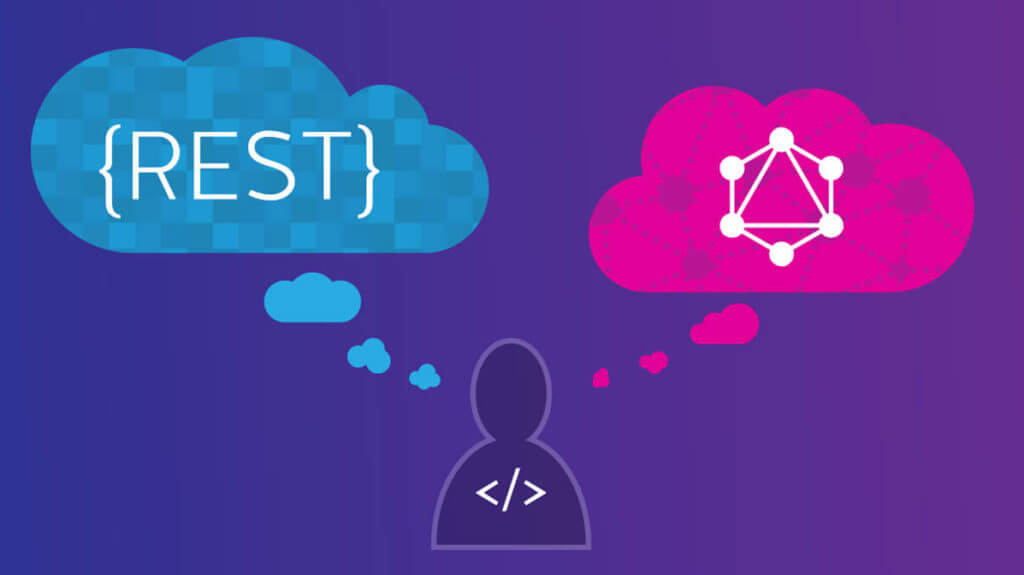
GraphQL refers to a query language and runtime for application programming interfaces, known for providing users with the precise data they are looking for. GraphQL allows developers to create flexible and fast APIs and can be deployed in an integrated development environment known as GraphiQL. GraphQL is widely considered a viable alternative to REST. Developers using GraphQL can create requests capable of fetching data from multiple sources in one API call.
GraphQL users can add or remove fields in an API without making any changes to existing queries. Users can use their chosen API development methods and rely on GraphQL to maintain the desired functionality for customers.
What are the benefits of GraphQL? These are the main advantages of using GraphQL:
Declarative data search GraphQL uses the search for declarative data for its queries. This is advantageous for users, as data can be selected, including its fields and entities, with a single query request on data relationships. GraphQL dictates which fields are required by your UI, functioning in principle as a solution in which the UI is looking for data.
GraphQL queries are efficient in partial data selection for UI operations to retrieve data in a single request. Customers using GraphQL are aware of data requirements, and servers are aware of data structures and requirements for using data from a source.
Solves overfetching GraphQL does not perform any excessive data searching. This is different from a RESTful API configuration in which a client generally extracts data excessively if there is an identical API. In GraphQL, the mobile client has the option of selecting different sets of fields. This allows GraphQL users to search only for the specific information needed for a user query.
GraphQL is versatile GraphQL is more versatile than most developers consider. It is decoupled from the back-end and front-end solutions and has JavaScript reference implementation. It facilitates the use of the server side and the client side in JavaScript libraries, including Express, Angular, Hapi, Koa and Vue and several others. GraphQL is capable of working similarly to the language-independent interface of REST.
What are the disadvantages of GraphQL? These are the main disadvantages of a GraphQL API.
Problems handling complex queries GraphQL queries can create performance-related problems, while allowing customers to execute specific requests. Problems occur if and when a customer requires many fields nested simultaneously. This is one of the reasons why many users choose the REST API when performing complex queries, as it allows them to search for data through various terminals using precise queries. Despite the need for multiple network calls, avoiding GraphQL performance problems can be a safer option.
Not the best option for small applications A smaller application may not require GraphQL, as it can benefit from the simplicity of REST. GraphQL is best suited for use cases where there are many multiple services. REST is also preferable as the best option for establishing connections for resource-oriented applications, as they do not need flexible GraphQL queries.
Cache is complex GraphQL does not use HTTP caching processes that make it easy to store request content. The cache allows users to reduce the amount of traffic to a server, making regularly accessed information more easily available.
Steep learning curve GraphQL is considered by many to be difficult to understand due to its steep learning curve. Users may need to learn the schema definition language to start using GraphQL. It may not be possible for all projects to allocate time and effort to gain familiarity with GraphQL. As a result, they tend to opt for the easiest to understand REST. Understanding GraphQL queries can take considerable time, although there are several useful resources.
What is REST?
REST, which stands for Representational State Transfer, is an architectural style for setting standards between web and computer systems. Facilitates the most natural communication between computer systems. RESTful systems are characterized by their statelessness and the tendency to differentiate server and client concerns. In a REST architecture, users can achieve a client and server independent implementation. This means that the client-side code can be changed without having any effect on server operations. In addition, the server side can be changed without having any effect on client operations.
What are the benefits of REST? Here are the main advantages of a REST API.
REST is scalable REST is a protocol known for its scalability and preferred by many for this reason. It draws a line between the server and the client, allowing for easier sizing of a product.
It is quite portable and flexible REST is also known for its flexibility and portability. Users find it easier to port data from one server to another or make changes to a database at any time. Developers can choose to host front-end and back-end on separate servers, allowing for better management.
Offers more independence As the client and the server are separated in a REST protocol configuration, developers find it much easier to implement developments in different areas of any project independently. In addition, a REST API is able to easily adapt to different platforms and syntax. As a result, developers can make use of different environments during the development phase.
What are the disadvantages of REST? Here are the disadvantages of a REST API.
Client server A limitation of REST stems from the fact that it depends on the concept of server and client separate from each other and can grow independently.
Stateless REST APIs are stateless in nature and allow developers to make independent calls. Each of your calls has all the necessary data for completion.
General requests REST has not been state and this type of API can increase request overheads, since the bulky loads of incoming and outgoing calls are handled. A REST API must be optimized for caching data.
Interface Decoupling a client from the server requires a uniform interface that facilitates independent application evolution without requiring the services, actions, or models of the application, which are included in the API layer.
On-demand code Code on Demand is a feature that allows applets and code transmission through the API to be used in the application.
Layered structure REST APIs have different architectural layers that create a hierarchical structure for modular and scalable applications.
GraphQL vs REST | What are the diferences? HTTP status codes The common status code for each GraphQL request, error or success is 200. It is quite different from the REST APIs, where different status codes point to different responses, that is, 200, 400 and 401 represent success, incorrect and unauthorized request, respectively.
Monitoring Monitoring is more convenient with HTTP status codes and REST APIs. Performing a health check on a given endpoint gives users an idea of the API uptime status. For example, a 200 status code means that an API is running. This is in stark contrast to GraphQL, since the analysis of the response body must be performed using a monitoring tool to detect possible errors that are being returned.
Cache In the REST API, it is possible to cache all server-side GET endpoints with a content delivery network. Endpoints are cached by browsers and marked for regular calls in the future. GraphQL is not compatible with HTTP specifications and is available through a single terminal. As a result, queries are not cached in a manner similar to the REST APIs.
Schema REST APIs do not depend on schema-type systems. On the other hand, GraphQL uses a type system to create API definitions. Fields mapped to types define a schema, which is a classification agreement between client and server.
GraphQL vs REST comparison table
The table below shows the most fundamental differences between GraphQL and REST.
| GraphQL |
|---|
| New |
| Larger apps |
| Customer-oriented |
| Mutation, query |
| No overfetching |
| Schema |
| Single API data fetch |
| Growing |
| Fast performance |
| Rapid development |
| Only with libraries |
| Fewer errors |
| REST |
|---|
| Mature |
| Small and medium apps |
| Server-based architecture |
| CRUD |
| The data is not linked to resources or methods |
| Endpoints |
| Multiple API calls with fixed data |
| More time needed for multiple calls |
| Slow performance |
| Best suited for complex queries |
Conclusion
GraphQL is a query and runtime language for application programming interfaces.
[EN-US] AWS vs. Azure vs. Google: Cloud Comparison
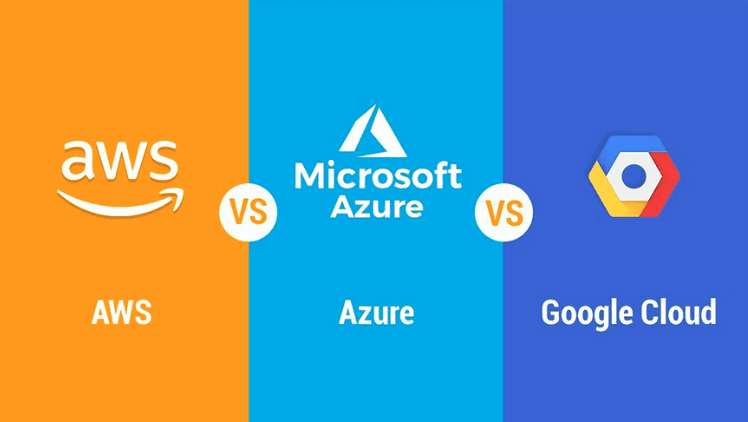
The top three cloud computing providers, AWS, Microsoft Azure and Google Cloud, have strengths and weaknesses that make them ideal for different use cases.
The competition for leadership in public cloud computing is a close race between the giants AWS vs. Azure vs. Google.
Clearly, for infrastructure as a service (IaaS) and platform as a service (PaaS), they maintain a high position among the many companies in this segment.
AWS practically dominates the market. In a 2018 report, Synergy Research Group noted that spending on cloud infrastructure services increased by a surprising 51% compared to the previous year's quarter, noting: “AWS's global market share has remained stable at around 33% in the last twelve months, even with the market rising, almost tripled in size ”.

Meanwhile, Microsoft is particularly strong on SaaS, while Google Cloud is positioned for aggressive growth - and is known for offering discounts.
Amazon Web Services has a range of tools that keep growing. Unparalleled features. However, the cost structure can be confusing.
Microsoft Azure has a cloud infrastructure with exceptional capacity. If you are an enterprise customer, Azure is definitely for you - few companies have a corporate history (and Windows support) like Microsoft.
Google Cloud entered the cloud market later and has no corporate focus. But its technical expertise is deep and its market-leading tools in artificial intelligence, machine learning and data analysis.
AWS vs. Azure vs. Google: general pros and cons Many experts recommend that companies assess their public cloud needs on a case-by-case basis and analyze which one offers the best for their needs. Each major supplier has strengths and weaknesses that make them a good choice for certain projects. Want to see?
Pros and cons of AWS
Amazon's greatest strength is its dominance of the public cloud market. In your Magic Quadrant for Cloud Infrastructure as a Service, Worldwide, Gartner noted: “AWS has been a market share leader in cloud IaaS for over 10 years”.

Part of the reason for its popularity is undoubtedly the enormous scope of its operations. AWS has a huge and growing range of services available, as well as the most comprehensive network of data centers worldwide. The Gartner report summed it up, saying, "AWS is the most mature and enterprise-ready provider, with the deepest resources to manage a large number of users and resources."
Amazon's big weakness is related to cost. Many companies find it difficult to understand the company's cost structure and manage those costs effectively when performing a high volume of workloads in the service.
When to choose AWS AWS is a great choice for analytical and web workloads, even large-scale data center migrations, AWS provides a range of services.
When it comes to computing, AWS provides the widest range of VM types. Currently, AWS also has the highest computing and storage options available on the market. Its wide variety of VM types (136 VM types and over 26 VM families) allows customers to run everything from small workloads on the web to the largest workloads.
For machine learning and AI workloads, AWS also provides the highest settings for GPU-enabled VM types. For workloads requiring one-time rentals for compliance and regulatory reasons, AWS now also provides
Block storage comes with a variety of options, such as dynamic resizing, different disk types (magnetic and SSD). Unlike other CSPs, AWS does not restrict IOPS by volume size. You can provision IOPS for an extra cost even for small disks.
In front of the managed relational database, AWS supports managed databases for MySQL, PostgreSQL, MariaDB, Oracle (SE and EE) and MS SQL (Web and Enterprise editions). In addition, they have their own MySQL and PostgreSQL compatible database, which offers Oracle-like performance for a low investment.
For NoSQL databases, AWS has been offering its DynamoDB product for over half a decade. AWS is an advocate and provides a variety of NoSQL databases created for this purpose. This includes DynamoDB, Neptune and Elasticache.
For network security, AWS has launched managed services to protect against DDoS (AWS Shield) and Web Application Firewall (WAF), along with AWS Inspector, AWS Config and CloudTrail for managing and auditing inventory and policies. GuardDuty provides threat detection.
AWS serves U.S. government workloads in separate US GovCloud regions (CIA and FBI).
Pros and cons of Microsoft Azure Microsoft was late to the cloud market, but took a step forward, essentially adopting local software - Windows Server, Office, SQL Server, Sharepoint, Dynamics Active Directory, .Net and others - and adapting it again for the cloud.
Azure Services

A big reason for Azure's success is the integration with Microsoft applications / software. Since Azure is fully integrated with these other applications, companies that use a lot of Microsoft software often find that it also makes sense to use Azure.
When to choose Azure Azure is a cloud platform of great importance on the market with a variety of features, which can be a preferred platform for customers who are already using Microsoft products. Although Azure supports several services based on open source products, Microsoft's cloud portfolio is what sets it apart from customers.
Azure has more than 151 types of VMs and 26 families that support everything from small workloads to HPC, Oracle and SAP workloads. Azure has Windows and several types of Linux (RHEL, CentOS, SUSE, Ubuntu). Azure has a separate family of instances for ML / AI workloads.
If you need to run next-generation workloads that require up to 128 vCPU and 3.5 TB memory, Azure can do it. If you have existing licenses for Windows OS, MS-SQL and bring them to the cloud (BYOL) through the Microsoft License Mobility Program, Azure is the option.
Azure was also the first cloud player to recognize the hybrid cloud trend. Azure also provided support for hybrid storage devices like StorSimple, which was unique in the public cloud space.
If you have a data center with predominantly Microsoft workloads and need to migrate on a large scale to the cloud, taking advantage of the well-known tools, Azure provides tools and services, such as Azure Site Recovery.
When it comes to SQL and NoSQL databases, Azure has a very complete set of services. It provides MS SQL Server and Managed SQL Datawarehouse. Azure also provides managed databases for MySQL, PostgreSQL and MariaDB.
It provides an API compatible with MongoDB, Cassandra, Gremlin (Graph) and Azure Table Storage. If you need to run multiple managed data models, including document data models, graphs, key-values, tables and column families in a single cloud, Cosmos may be the best option.
In addition to the pay-per-use credit card billing model and other billing modes, customers with existing corporate accounts can purchase pre-subscriptions to Azure as part of their annual renewals. This is useful for customers who want to budget annual cloud spending in advance. Avoiding uncertainty and additional mid-year budget approvals.
Mobility of cloud licenses for Microsoft products is also relatively easy for customers with multiple Microsoft products running on-premises.
Pros and cons of Google Cloud Platform
The Google Cloud Platform (GCP), despite being late in the game and with the lowest market share of public cloud providers, is showing growth in recent years.

Google Cloud Platform Services
It has several features that put you ahead of your competitors in certain areas. GCP is also catching on, not only with new customers who are already part of the ecosystem, but also the first cloud users who want to expand their scenario to Google as part of a multi-cloud strategy. Google also started with PaaS services, but has been constantly expanding its product portfolio.
When to choose GCP From a computing point of view, Google has the least number of VM sizes (28 instance types in 4 categories). However, it does have a feature that makes these numbers a little irrelevant.
Google allows users to create their own custom sizes (CPU, memory) so that customers can match the size of workloads in the cloud with the size on site. Billing is also based on the total CPU and memory used, rather than individual VMs. This reduces wasted unused capacity.
Another unique feature is that GCP allows almost all instance types to connect GPUs. This can turn any standard or custom instance into an ML-ready VM. Google was also a leader in billing per second, which forced other CSPs to follow suit. Compared to the usual hourly billing standard, billing per second greatly reduces any waste of capacity. This results in savings of up to 40% overall.
Google also linked or purchased third-party cloud migration tools. These tools, such as CloudEndure, Velostrata and CloudPhysics, help customers evaluate, plan and live migrate their VMs to GCP.
Network is the highlight of GCP. They have a low latency global network. Even from the customer's perspective, a VPC network spans all of its regions. Other CSPs limit VPC networks to one region. This makes it easier for GCP customers to create applications that serve customers globally, without creating complex infrastructure design mechanisms across regions and data replication.
For NoSQL Banks, GCP has a product called BigTable. BigTable is a NoSQL database managed on a petabyte scale, used by Google in its own products, such as Gmail.
From a billing point of view, Google offers automatic discounts, such as sustained usage discounts, which lower the price on demand if a VM runs more than a certain number of hours in a month. If you want the most economical cloud provider, GCP is a great option.
Conclusion Each provider has features and advantages that meet specific customer needs. While all cloud providers will continue to provide certain common services (such as a managed MySQL database), each CSP will create differentiated and exclusive services to address very specific customer needs.
From the customer's perspective, these services will also become a way to adopt a multi-cloud strategy. As an example, a customer may want to use GCP for an application that needs Spanner capabilities, while using AWS for their AI services and Azure for specific Windows workloads.
The trend is to get customers to combine resources and providers to arrive with a high availability and operational capacity solution.
[EN-US] Cybersecurity Statistics, Predictions, and Solutions for 2021

In 2020, Cybersecurity has become more important than ever for businesses all over the world. Following various statistics published across the media, we can clearly see that no one is immune against cyber-attacks: major players investing massively in their companies’ cybersecurity, small businesses, and individuals.
Covid-19 pandemic definitely left a huge impact on the overall cybersecurity situation. First, the global lockdown forced many companies to shift to remote work. Cybercriminals took advantage of vulnerable home networks. Many organizations encountered data breaches at the beginning of the work-from-home shift. For instance: 80% of companies reported an increase in cyberattacks in 2020.
Most of the malware was received from email (94% of cases) At the beginning of April 2020, Google reported it was blocking every day 18 million malware e-mails related to COVID-19. Between January and April 2020, the attacks on cloud services increased by 630% Apparently, the healthcare and financial industries were the most affected ones, as they deal with huge amounts of personal data. For instance, various researches show that: In 2020, 27% of all cyberattacks targeted healthcare and financial sectors.
From the beginning of February to the end of April 2020, attacks against the banks rose by 238% (when COVID-19 have started spreading). Most of the financial institutions (82%) reported that it is more and more difficult to fight against cybercriminals, as they become more and more sophisticated. Even though the businesses are trying to adapt to the growing threats coming from cybercriminals, cybersecurity specialists are not optimistic at all, as their researches show that cybercriminals are changing their way of acting even more, and are not planning to slow down. Here are just some figures and predictions for 2021, presented by
Cybersecurity Ventures: By 2021, Cybercrime is expected to cost the world $6.1 trillion annually (more than twice compared to 2015), making it the world’s third-largest economy, after the USA and China.
The cybersecurity experts predict a cyberattack incident to happen every 11 seconds in 2021 (4 times more than in 2016) In 2021, 1st place in the nomination “The Fastest Growing Kind Of Cyber-crime” will go to Ransomware. As the worldwide costs caused by such kind of damages will reach $20 billion (57 times more than in 2015). Taking into account all the mentioned statistics and predictions, it is obvious that organizations and individuals must rethink completely their cybersecurity approaches and strategies.
So what can we all do to resist the cybercrimes more effectively?
Empower your Employees…with Knowledge It has been proved that 90% of cyber-attacks are related to human errors. Often, people take cybersecurity for granted, and most of the employees are not even aware of cyber-attack types and risks…until it is too late. Any employee, who is not well-informed about cybersecurity, can unwillingly fall victim to cyber-attacks, placing your company and clients at risk. That’s why it is crucial to educate the employees, especially today when many of them are working from home. So start spreading cybersecurity awareness right now: provide your employees with all the necessary information concerning cyber threats and bad consequences caused by those; organize cybersecurity training sessions and phishing experiments. Stay in control of the process: make your employees use only secure software and strong passwords, explain to them why they should get the approval of the IT department before installing any software, and why they might have limited access to some data, in some cases.
Protect Proactively
Preventing any damage is always better than repairing it. Cyber-criminals will constantly search the weak points in your company’s cybersecurity infrastructure, that is why you always have to be ahead of them, detecting an attack before it happens. This way of thinking will help you to reduce the damage and avoid major problems. Take all the necessary precautions to ensure your data is protected.
Any Backup Plans?
Researches show that many companies didn’t think about any back-up plans and tactics in the case the attackers have succeeded to steal the data. Again, educate your employees: everyone should be aware of his own responsibilities in all the possible scenarios Constantly control and monitor the entire data stored and shared inside and outside your company’s network. Even though the attacks on cloud storage have increased drastically, never forget to back up your entire content. But how to make sure that the data stored on your computers and cloud services is really protected…even if it was stolen? The answer is simple. Make it useless for the thieves!
Apparently, as we have seen, following all the figures listed above, your data is ultra-protected not when it cannot be breached (because it always can), but when it cannot be read by unauthorized users. Today there are various new technologies that render data useless to unauthorized users and protect your data no matter where it is stored.
For example, Cybervore offers a patented breakthrough technology, which combines authentication, AES 265 encryption, and fragmentation. It is a cybersecurity software called Fragglestorm™ :
https://www.cybervore.com/fragglestorm
A secure method where data is encrypted, sliced, or split into a defined number of fragments that are replicated, and only the authorized user has access. This offers a way to significantly increase data protection and integrity, and ensure a user’s data privacy across any on-premise device and cloud storage service.
Meta-Lists
- atariarchives.org atariarchives.org makes books, information, and software for Atari and other classic computers available on the Web.
- Bento
- Bitsavers.org
- Bookboon: IT & Programming Cookie required. (email address requested, not required)
- conceptf1.blogspot.com
- Free Smalltalk Books, collected by Stéphane Ducasse
- Free Tech Books
- Goalkicker - Programming Notes for Professionals books
- IBM Redbooks
- InfoQ Minibooks
- InTech: Computer and Information Science
- JSBooks - directory of free javascript ebooks
- Learn X in Y minutes
- Learneroo Resources to Learn Programming
- Microsoft Guides to Software
- Microsoft Press: Free E-Books
- Microsoft Technologies 1, including books on Windows Azure, SharePoint, Visual Studio Guide, Windows phone development, ASP.net, Office365, etc. collection by Eric Ligman
- Microsoft Technologies 2, including books on Windows Azure, SharePoint, Visual Studio Guide, Windows phone development, ASP.net, etc. collection by Eric Ligman
- O'Reilly's Open Books Project
- Papers we love
- Programming - Wikibooks
- Red Gate Books
- Stef's Free Online Smalltalk Books
- TechBeamers.com
- TechBooksForFree.com
- The Definitive C++ Book Guide and List
- Theassayer.org
- tutorialspoint
Graphics Programming
- 3D Game Shaders For Beginners - David Lettier (Git) (HTML)
- Blender 3D: Noob to Pro - Wikibooks
- Blender Manual
- Computer Graphics from scratch - Gabriel Gambetta (:construction: in process)
- DirectX manual (draft)
- GPU Gems
- Graphics Programming Black Book - Michael Abrash
- Introduction to Modern OpenGL - Alexander Overvoorde (HTML, EPUB, PDF) (C++)
- Introduction to TouchDesigner 099 (Leanpub account or valid email requested)
- Learn Computer Graphics From Scratch! - Scratchapixel (:construction: in process)
- Learn OpenGL - Joey de Vries
- Learn OpenGL RS - Benjamin Wasty et al. (:construction: in process) (Rust)
- Learning Modern 3D Graphics Programming - Jason L. McKesson (draft)
- Notes for a Computer Graphics Programming Course - Dr. Steve Cunningham (PDF)
- OpenGL - Concepts and illustrations.
- ShaderX series - Wolfgang Engel
- Tutorials for modern OpenGL
- WebGL Insights - Patrick Cozzi and Contributors
Vulkan
- Vulkan Tutorial - Alexander Overvoorde (EPUB, HTML, PDF) (C++)
- Vulkan Tutorial Java - Cristian Herrera et al (Java)
- Vulkan Tutorial RS - Benjamin Wasty et al. (:construction: in process) (Rust)
- Vulkano - Tomaka et al. (HTML) (Rust)
Graphical User Interfaces
- Programming with gtkmm 4
- Search User Interfaces - Marti A. Hearst
- The GLib/GTK+ Development Platform - Sébastien Wilmet (PDF)
GraphQL
Language Agnostic
Algorithms & Data Structures
- A Field Guide To Genetic Programming - Riccardo Poli et al. (PDF)
- Algorithm Design - Jon Kleinberg and Éva Tardos (PDF)
- Algorithmic Graph Theory
- Algorithms - Wikibooks
- Algorithms, 4th Edition - Robert Sedgewick and Kevin Wayne
- Algorithms and Automatic Computing Machines (1963) - B. A. Trakhtenbrot
- Algorithms and Complexity - Herbert S. Wilf (PDF)
- Algorithms Course Materials - Jeff Erickson
- Algorithms Notes for Professionals - Compiled from StackOverflow Documentation (PDF)
- Analysis and Design of Algorithms - Sandeep Sen, IIT Delhi
- Animated Algorithm and Data Structure Visualization (Resource)
- Annotated Algorithms in Python: Applications in Physics, Biology, and Finance - Massimo di Pierro
- Binary Trees (PDF)
- Data Structures - Prof. Subhashis Banerjee, IIT Delhi
- Data Structures (Into Java) - Paul N. Hilfinger (PDF)
- Data Structures and Algorithms: Annotated Reference with Examples - G. Barnett and L. Del Tongo
- Data Structures Succinctly Part 1, Syncfusion (PDF, Kindle) (email address requested, not required)
- Data Structures Succinctly Part 2, Syncfusion (PDF, Kindle) (email address requested, not required)
- Elementary Algorithms - Larry LIU Xinyu
- Foundations of Computer Science - Al Aho and Jeff Ullman
- Geometry Algorithms - Dan Sunday
- Lectures Notes on Algorithm Analysis and Computational Complexity (Fourth Edition) - Ian Parberry (use form at bottom of license)
- LEDA: A Platform for Combinatorial and Geometric Computing - K. Mehlhorn et al.
- Linked List Basics (PDF)
- Linked List Problems (PDF)
- Matters Computational: Ideas, Algorithms, Source Code (PDF)
- Open Data Structures: An Introduction - Pat Morin
- Planning Algorithms
- Problems on Algorithms (Second Edition) - Ian Parberry (use form at bottom of license)
- Purely Functional Data Structures (1996) - Chris Okasaki (PDF)
- Sequential and parallel sorting algorithms
- Text Algorithms (PDF)
- The Algorithm Design Manual
- The Art of Computer Programming - Donald Knuth (fascicles, mostly volume 4)
- The Design of Approximation Algorithms (PDF)
- The Great Tree List Recursion Problem (PDF)
- The Kademlia Protocol Succinctly - Marc Clifton
- Think Complexity - Allen B. Downey (2nd Edition) (PDF, HTML)
Artificial Intelligence
- Introduction to Autonomous Robots - Nikolaus Correll (PDF)
- The Quest for Artificial Intelligence: A History of Ideas and Achievements - Nils J. Nilsson (PDF)
Cellular Automata
- A New Kind of Science - Stephen Wolfram
Cloud Computing
- Azure for Architects, Third Edition (PDF) (email address or account required)
- Azure Functions Succinctly, Syncfusion (PDF, Kindle) (email address requested, not required)
- Cloud Computing for Science and Engineering - Ian Foster, Dennis B. Gannon (:construction: in process)
- Cloud Design Patterns
- Designing Distributed Systems (account required)
- Learn Azure in a Month of Lunches - Iain Foulds (PDF)
- Monitoring Modern Infrastructure (account required)
- Multi-tenant Applications for the Cloud, 3rd Edition
- OpenStack Operations Guide
- Streamline microservice management with Istio Service Mesh (account required)
- The Developer’s Guide to Azure
Competitive Programming
- Competitive Programmer's Handbook - Antti Laaksonen (PDF)
- Competitive Programming, 1st Edition - Steven Halim (PDF)
- Competitive Programming, 2nd Edition - Steven Halim (PDF)
- Principles of Algorithmic Problem Solving - Johan Sannemo (PDF)
Compiler Design
- An Introduction to GCC - Brian Gough
- Basics of Compiler Design (Anniversary Edition) - Torben Mogensen
- Compiler Design in C (1990) - Allen Holub, Prentice Hall
- Compiler Design: Theory, Tools, and Examples, C/C++ Edition - Seth D. Bergmann
- Compiler Design: Theory, Tools, and Examples, Java Edition - Seth D. Bergmann
- Compiling Scala for the Java Virtual Machine - Michel Schinz (PDF)
- Compiling Techniques (1969) - F.R.A. Hopgood, Macdonald
- Crafting Interpreters (:construction:) - Bob Nystrom (HTML)
- Implementing Functional Languages: A Tutorial - Simon Peyton Jones, David Lester
- Let's Build a Compiler (PDF)
- Practical and Theoretical Aspects of Compiler Construction (class lectures and slides)
- The ANTLR Mega Tutorial
Computer Science
- Computational Thinking - Jeannette Wing, Carnegie-Mellon University (PDF)
- Computer Science I - Draft - Dr. Chris Bourke (PDF) (:construction: in process)
- Computer Science II - Draft - Dr. Chris Bourke (PDF) (:construction: in process)
- CS Principles: Big Ideas in Programming - Mark Guzdial and Barbara Ericson (HTML)
Computer Vision
- Computer Vision - Dana Ballard, Chris Brown
- Computer Vision: Algorithms and Applications - Richard Szeliski
- Computer Vision: Models, Learning, and Inference - Simon J.D. Prince
- Programming Computer Vision with Python - Jan Erik Solem
Containers
- Docker Jumpstart - Andrew Odewahn
Database
- Database Design, 2nd Ed. - Adrienne Watt, Nelson Eng (HTML, PDF, EPUB, Kindle)
- Database Explorations (PDF)
- Database Fundamentals (PDF)
- Databases, Types, and The Relational Model: The Third Manifesto (PDF)
- Foundations of Databases
- Readings in Database Systems, 5th Ed.
- Temporal Database Management - Christian S. Jensen
- The Theory of Relational Databases
Datamining
- A Programmer's Guide to Data Mining - Ron Zacharski (Draft)
- Data Jujitsu: The Art of Turning Data into Product (email address requested, not required)
- Data Mining Algorithms In R - Wikibooks
- Internet Advertising: An Interplay among Advertisers, Online Publishers, Ad Exchanges and Web Users (PDF)
- Introduction to Data Science - Jeffrey Stanton
- Introduction to Data Science - Rafael A Irizarry (Leanpub account or valid email requested)
- Mining of Massive Datasets
- School of Data Handbook
- Statistical inference for data science - Brian Caffo
- The Ultimate Guide to 12 Dimensionality Reduction Techniques (with Python codes) - Pulkit Sharma
- Theory and Applications for Advanced Text Mining
Information Retrieval
Licensing
- Creative Commons: a user guide - Simone Aliprandi
- Open Source Licensing Software Freedom and Intellectual Property Law - Lawrence Rosen
- The Public Domain: Enclosing the Commons of the Mind - James Boyle
Machine Learning
- A Brief Introduction to Machine Learning for Engineers - Osvaldo Simeone (PDF)
- A Brief Introduction to Neural Networks
- A Comprehensive Guide to Machine Learning - Soroush Nasiriany, Garrett Thomas, William Wang, Alex Yang (PDF)
- A Course in Machine Learning (PDF)
- A First Encounter with Machine Learning (PDF)
- A Selective Overview of Deep Learning - Fan, Ma, and Zhong (PDF)
- Algorithms for Reinforcement Learning - Csaba Szepesvári (PDF)
- An Introduction to Statistical Learning - Gareth James, Daniela Witten, Trevor Hastie and Robert Tibshirani
- Bayesian Reasoning and Machine Learning
- Deep Learning - Ian Goodfellow, Yoshua Bengio and Aaron Courville
- Deep Learning for Coders with Fastai and PyTorch - Jeremy Howard, Sylvain Gugger (Jupyter Notebooks)
- Deep Learning with PyTorch - Eli Stevens, Luca Antiga, Thomas Viehmann (PDF)
- Dive into Deep Learning
- Explorations in Parallel Distributed Processing: A Handbook of Models, Programs, and Exercises - James L. McClelland
- Foundations of Machine Learning, Second Edition - Mehryar Mohri, Afshin Rostamizadeh, Ameet Talwalkar
- Free and Open Machine Learning - Maikel Mardjan
- Gaussian Processes for Machine Learning
- IBM Machine Learning for Dummies - Judith Hurwitz, Daniel Kirsch
- Information Theory, Inference, and Learning Algorithms
- Interpretable Machine Learning - Christoph Molnar
- Introduction to CNTK Succinctly - James McCaffrey
- Introduction to Machine Learning - Amnon Shashua
- Keras Succinctly - James McCaffrey
- Learn Tensorflow - Jupyter Notebooks
- Learning Deep Architectures for AI (PDF)
- Machine Learning
- Machine Learning for Data Streams - Albert Bifet, Ricard Gavaldà, Geoff Holmes, Bernhard Pfahringer
- Machine Learning from Scratch - Danny Friedman
- Machine Learning, Neural and Statistical Classification
- Mathematics for Machine Learning - Garrett Thomas (PDF)
- Mathematics for Machine Learning - Marc Peter Deisenroth, A Aldo Faisal, and Cheng Soon Ong
- Neural Networks and Deep Learning
- Probabilistic Models in the Study of Language (Draft, with R code)
- Python Machine Learning Projects - Lisa Tagliaferri and Brian Boucheron (PDF, EPUB, MOBI)
- Reinforcement Learning: An Introduction - Richard S. Sutton, Andrew G. Barto (PDF)
- Speech and Language Processing (3rd Edition Draft) - Daniel Jurafsky, James H. Martin (PDF)
- The Elements of Statistical Learning - Trevor Hastie, Robert Tibshirani, and Jerome Friedman
- The LION Way: Machine Learning plus Intelligent Optimization - Roberto Battiti, Mauro Brunato (PDF)
- The Python Game Book
- Top 10 Machine Learning Algorithms Every Engineer Should Know - Binny Mathews and Omair Aasim
- Understanding Machine Learning: From Theory to Algorithms - Shai Shalev-Shwartz, Shai Ben-David
Mathematics
- A Computational Introduction to Number Theory and Algebra - Victor Shoup
- A First Course in Complex Analysis - Matthias Beck, Gerald Marchesi, Dennis Pixton, Lucas Sabalka
- A First Course in Linear Algebra - Rob Beezer
- A Friendly Introduction to Mathematical Logic - Christopher C. Leary and Lars Kristiansen
- A Gentle Introduction to the Art of Mathematics - Joseph E. Fields
- Abstract Algebra: Theory and Applications - Tom Judson
- Active Calculus - Matt Boelkins
- Advanced Algebra - Anthony W. Knapp (PDF)
- Algebra: Abstract and Concrete - Frederick Goodman
- Algebra: An Elementary Text-Book, Part I (1904) - G. Chrystal (PDF)
- Algebra: An Elementary Text-Book, Part II (1900) - G. Chrystal (PDF)
- Algebraic Topology - Allen Hatcher (PDF)
- An Introduction to the Theory of Numbers - Leo Moser (PDF)
- Analytic Geometry (1922) - Lewis Parker Siceloff, George Wentworth, David Eugene Smith (PDF)
- APEX Calculus - Gregory Hartman, Brian Heinold, Troy Siemers, and Dimplekumar Chalishajar
- Applied Combinatorics - Mitchel T. Keller and William T. Trotter
- Applied Discrete Structures - Alan Doerr and Kenneth Levasseur
- Basic Algebra - Anthony W. Knapp (PDF)
- Basic Analysis: Introduction to Real Analysis - Jiří Lebl
- Basics of Algebra, Topology, and Differential Calculus (PDF)
- Bayesian Methods for Hackers - Cameron Davidson-Pilon
- Beginning and Intermediate Algebra - Tyler Wallace
- Book of Proof - Richard Hammack (PDF)
- Calculus - Gilbert Strang
- Calculus I - Jerrold E. Marsden and Alan Weinstein
- Calculus in Context - James Callahan
- Calculus Made Easy - Silvanus P. Thompson (PDF)
- Category Theory for the Sciences - David I. Spivak
- CK-12 Probability and Statistics - Advanced
- CLP-1 Differential Calculus - Joel Feldman, Andrew Rechnitzer, and Elyse Yeager
- CLP-2 Integral Calculus - Joel Feldman, Andrew Rechnitzer, and Elyse Yeager
- CLP-3 Multivariable Calculus - Joel Feldman, Andrew Rechnitzer, and Elyse Yeager
- CLP-4 Vector Calculus - Joel Feldman, Andrew Rechnitzer, and Elyse Yeager
- Collaborative Statistics
- Combinatorics Through Guided Discovery - Kenneth Bogart
- Complex Analysis - George Cain
- Computational and Inferential Thinking. The Foundations of Data Science
- Computational Geometry
- Computational Mathematics with SageMath - Paul Zimmermann et al.
- Concepts & Applications of Inferential Statistics
- Convex Optimization - Stephen Boyd and Lieven Vandenberghe
- Coordinate Geometry (1911) - Henry Buchard Fine and Henry Dallas Thompson (PDF)
- Differential Equations - Paul Dawkins (PDF, use download menu to download)
- Differential Equations (1922) - H. B. Phillips (PDF)
- Discrete Mathematics: An Open Introduction - Oscar Levin
- Discrete Mathematics: First and Second Course - Edward A. Bender and S. Gill Williamson
- Elementary Differential Equations - William F. Trench (PDF)
- Elementary Differential Equations (with Boundary Value Problems) - William F. Trench
- Elementary Number Theory: Primes, Congruences, and Secrets - William Stein
- Elementary Real Analysis - Brian S. Thomson, Judith B. Bruckner, Andrew M. Bruckner
- Elements of Abstract and Linear Algebra - E. H. Connell
- Elements of Differential and Integral Calculus (1911) - William Anthony Granville (PDF)
- Essentials of Metaheuristics - Sean Luke
- First Course in Algebra (1910) - Herbert E. Hawkes, William A. Luby, Frank C. Touton (PDF)
- Foundations of Combinatorics with Applications - Edward A. Bender and S. Gill Williamson
- Foundations of Constructive Probability Theory - Yuen-Kwok Chan (PDF)
- Geometry with an Introduction to Cosmic Topology - Michael P. Hitchman
- Graph Theory
- How We Got from There to Here: A Story of Real Analysis - Robert Rogers and Eugene Boman
- Introduction to Probability - Charles M. Grinstead and J. Laurie Snell
- Introduction to Probability and Statistics Spring 2014
- Introduction to Proofs - Jim Hefferon
- Introduction to Real Analysis - William F. Trench
- Introduction to Statistical Thought - Michael Lavine
- Introductory Statistics for the Life and Biomedical Sciences - Julie Vu and David Harrington
- Kalman and Bayesian Filters in Python
- Knapsack Problems - Algorithms and Computer Implementations - Silvano Martello and Paolo Toth
- Lecture Notes of Linear Algebra - Dr. P. Shunmugaraj, IIT Kanpur (PDF)
- Lies, Damned Lies, or Statistics: How to Tell the Truth with Statistics - Jonathan A. Poritz (PDF)
- Linear Algebra - Dr. Arbind K Lal, Sukant Pati (PDF) (:construction: in process)
- Linear Algebra (PDF)
- Linear Algebra - Jim Hefferon
- Linear Algebra Done Wrong - Sergei Treil
- Linear Algebra, Infinite Dimensions, and Maple - James Herod
- Linear Methods of Applied Mathematics - Evans M. Harrell II and James V. Herod
- Magic Squares and Cubes (1917) - W. S. Anderson (PDF)
- Math in Society - David Lippman
- Mathematical Analysis I - Elias Zakon
- Mathematical Discovery - Andrew M. Bruckner, Brian S. Thomson, and Judith B. Bruckner
- Mathematical Logic - an Introduction (PDF)
- Mathematical Reasoning: Writing and Proof - Ted Sundstrom
- Mathematics, MTH101A - P. Shunmugaraj, IIT Kanpur
- Modern Statistics for Modern Biology - Susan Holmes and Wolfgang Huber
- Multivariable Calculus - George Cain and James Herod
- Non-Uniform Random Variate Generation - Luc Devroye (PDF)
- Notes on Diffy Qs - Jiří Lebl
- Number Theory - Holden Lee MIT
- Number Theory: In Context and Interactive - Karl-Dieter Crisman
- Odds and Ends: Introducing Probability & Decision with a Visual Emphasis - Jonathan Weisberg
- Online Statistics Education - David Lane
- OpenIntro Statistics - David M. Diez, Christopher D. Barr, Mine Çetinkaya-Rundel
- ORCCA: Open Resources for Community College Algebra - Portland Community College
- Ordinary Differential Equations - Wikibooks
- Plane Geometry (1913) - George Wentworth and David Eugene Smith (PDF)
- Planes and Spherical Trigonometry (1915) - George Wentworth and David Eugene Smith (PDF)
- Precalculus - Carl Stitz and Jeff Zeager (PDF)
- Probability and Statistics Cookbook
- Probability and Statistics EBook
- Probability: Lectures and Labs - Mark Huber
- Recreations in Math - H. E. Licks (PDF)
- Sage for Undergraduates - Gregory Bard
- Second Course in Algebra - Herbert E. Hawkes, William A. Luby, Frank C. Touton (PDF)
- Seven Sketches in Compositionality: An Invitation to Applied Category Theory - Brendan Fong and David I. Spivak (PDF)
- Statistical Thinking for the 21st Century - Russell A. Poldrack
- Statistics Done Wrong - Alex Reinhart
- SticiGui - Philip Stark
- Tea Time Numerical Analysis - Leon Q. Brin
- The Joy of Cryptography (2020) - Mike Rosulek (PDF) (:construction: in process)
- Think Bayes: Bayesian Statistics Made Simple - Allen B. Downey
- Think Stats: Probability and Statistics for Programmers - Allen B. Downey (using Python)
- Vector Calculus - Michael Corral
- Yet Another Introductory Number Theory Textbook - Jonathan A. Poritz (PDF)
Mathematics For Computer Science
- A Mathematical Theory of Communication - Claude E.Shannon
- Discrete Structures for Computer Science: Counting, Recursion, and Probability - Michiel Smid
Misc
- 10 Keys to Great Landing Pages - iThemes Media (PDF)
- 2016 European Software Development Salary Survey
- 2016 Software Development Salary Survey
- 2D Game Development: From Zero To Hero (:construction: in process)
- 97 Things Every Programmer Should Know - Extended (Leanpub account or valid email requested)
- A MACHINE MADE THIS BOOK ten sketches of computer science - JOHN WHITINGTON (PDF)
- Ansible Up & Running (first three chapters) (account required)
- Asterisk™: The Definitive Guide
- Barcode Overview (PDF)
- Bitcoin and Cryptocurrency Technologies - Arvind Narayanan, Joseph Bonneau, Edward Felten, Andrew Miller, Steven Goldfeder (PDF)
- Coding With Minecraft - Al Sweigart
- Come, Let's Play: Scenario-Based Programming Using Live Sequence Charts
- Communicating Sequential Processes - Tony Hoare (PDF)
- Confessions of an Unintentional CTO: Lessons in Growing a Web App - Jack Kinsella
- Culture & Empire: Digital Revolution (PDF)
- Design With FontForge
- Designing Interfaces - Jennifer Tidwell
- DevDocs - Documents for Developers in 1 place
- DevOps For Dummies (IBM Edition) (PDF)
- Digital Signal Processing For Communications
- Digital Signal Processing For Engineers and Scientists
- Digital Signal Processing in Python - Allen B. Downey
- "DYNAMIC LINKED LIBRARIES": Paradigms of the GPL license in contemporary software - Luis A. Enríquez
- Essential Image Optimization - Addy Osmani
- Foundations of Programming (PDF)
- Game AI Pro - Steve Rabin
- Game Programming Patterns - Bob Nystrom
- Getting Real
- Google Maps API Succinctly - Mark Lewin
- Hacknot: Essays on Software Development - Ed Johnson
- Hello SDL - Lazy Foo' Productions
- High-Performance Scientific Computing (class lectures and slides)
- HoloLens Succinctly - Lars Klint
- How Computers Work - R. Young
- How to Become a Programmer (PDF)
- How to Think Like a Computer Scientist - Peter Wentworth, Jeffrey Elkner, Allen B. Downey, and Chris Meyers
- Image Processing in C: Analyzing and Enhancing Digital Images - Dwayne Phillips
- Information Technology and the Networked Economy (PDF)
- Introduction to Scientific Programming in C++ and Fortran - Victor Eijkhout (PDF)
- IRPF90 Fortran code generator - Anthony Scemama
- Learn Programming - Antti Salonen
- Learn to Program
- Learning 30 Technologies in 30 Days: A Developer Challenge - Shekhar Gulati
- Linked Data Patterns: A pattern catalogue for modelling, publishing, and consuming Linked Data - Leigh Dodds, Ian Davis
- Magic Ink: Information Software and The Graphical Interface - Bret Victor
- Mastering Bitcoin - Unlocking digital currencies - Andreas M. Antonopoulos
- Mobile Developer's Guide to the Galaxy (Leanpub account or valid email requested)
- Modeling Reactive Systems with Statecharts
- MSIX Succinctly - Matteo Pagani
- Networks, Crowds, and Markets: Reasoning About a Highly Connected World
- Object-Oriented Reengineering Patterns - Serge Demeyer, Stéphane Ducasse and Oscar Nierstrasz
- Open Government; Collaboration, Transparency, and Participation in Practice - Daniel Lathrop, Laurel Ruma
- PDQ: Pretty Darn Quick: An Agile, All-Purpose Methodology - Jeff Franz-Lien (Leanpub account or valid email requested)
- Philosophy of Computer Science (PDF)
- Playtime with Hyperledger Composer - Shubham Chadokar (PDF)
- PNG: The Definitive Guide
- Pointers And Memory (PDF)
- Principles of Computer System Design (PDF)
- Procedural Content Generation in Games - Noor Shaker, Julian Togelius, Mark Nelson
- Programming with Unicode
- Real-World Maintainable Software - Abraham Marin-Perez
- Record-Playback Test Automation: Sahi & Selenium IDE: Critical Evaluation of Record-Playback Automation Tools - Shashikant Jagtap (Leanpub account or valid email requested)
- Scientific Programming and Computer Architecture - Divakar Viswanath
- Signal Computing: Digital Signals in the Software Domain - Michael Stiber, Bilin Zhang Stiber, Eric C. Larson (PDF)
- Small Memory Software
- Web Almanac (PDF)
- Writing Native Mobile Apps in a Functional Language Succinctly - Vassili Kaplan
MOOC
Networking
- An Introduction to Computer Networks (HTML, PDF, Kindle)
- Bits, Signals, and Packets: An Introduction to Digital Communications and Networks
- Code Connected vol.1 (PDF) (book on ZeroMQ)
- Computer Networking : Principles, Protocols and Practice (HTML, ePub, PDF, Kindle)
- Computer Networks: A Systems Approach - Larry Peterson and Bruce Davie (HTML, epub, mobi, PDF)
- Distributed systems for fun and profit
- High-Performance Browser Networking - Ilya Grigorik
- How HTTPS Works - DNSimple
- HTTP Succinctly, Syncfusion (PDF, Kindle) (email address requested, not required)
- HTTP2 Explained - Daniel Stenberg
- Introduction to HTTP - Launch School
- IPv6 for IPv4 Experts - Yar Tikhiy (PDF)
- Kafka, The definitive Guide - Neha Narkhede (PDF)
- Network Science - Albert-Laszló Barabási
- The TCP/IP Guide
- Understanding IP Addressing: Everything you ever wanted to know (PDF)
- ZeroMQ Guide
Open Source Ecosystem
- Data Journalism Handbook
- Free as in Freedom: Richard Stallman and the free software revolution - Sam Williams (PDF)
- Free for All - Peter Wayner
- Free Software, Free Society: Selected Essays of Richard M. Stallman
- Getting Started with InnerSource (email address requested, not required)
- Getting started with Open source development (PDF)
- GitLab Handbook
- How to get started with open source (ePub & ODT)
- Innovation Happens Elsewhere - Ron Goldman, Richard P. Gabriel
- Introduction to Networking - Charles Severance (PDF)
- Open Advice: FOSS: What We Wish We Had Known When We Started
- Open source in Brazil - Andy Oram
- Producing Open Source Software - Karl Fogel
- The Architecture of Open Source Applications: Vol. 1: Elegance, Evolution, and a Few Fearless Hacks; Vol. 2: Structure, Scale, and a Few More Feerless Hacks
- The Art of Community - Jono Bacon (PDF)
- The Cathedral and the Bazaar - Eric S. Raymond
- The Future of the Internet - Jonathan Zittrain
- The Open Source Way
- The Wealth of Networks: How Social Production Transforms Markets and Freedom - Yochai Benkler
Operating Systems
- A short introduction to operating systems (2001) - Mark Burgess (PDF)
- Computer Science from the Bottom Up
- How to Make a Computer Operating System (:construction: in process)
- How to write a simple operating system in assembly language - Mike Saunders (HTML)
- Operating Systems and Middleware (PDF and LaTeX)
- Operating Systems: Three Easy Pieces (PDF)
- Practical File System Design: The Be File System - Dominic Giampaolo (PDF)
- Project Oberon: The Design of an Operating System, a Compiler, and a Computer - Niklaus Wirth & Jürg Gutknecht (PDF)
- The Art of Unix Programming - Eric S. Raymond
- The Design and Implementation of the Anykernel and Rump Kernels - Antti Kantee
- The little book about OS development - Erik Helin, Adam Renberg
- The Little Book of Semaphores - Allen B. Downey
- Think OS: A Brief Introduction to Operating Systems - Allen B. Downey (PDF)
- UNIX Application and System Programming, lecture notes - Prof. Stewart Weiss (PDF)
- Writing a Simple Operating System from Scratch - Nick Blundell (PDF)
- Xv6, a simple Unix-like teaching operating system
Parallel Programming
- High Performance Computing - Charles Severance & Kevin Dowd (PDF, ePUB)
- High Performance Computing Training (LLNL materials)
- High-Performance Scientific Computing (class lectures and slides)
- Introduction to High-Performance Scientific Computing - Victor Eijkhout
- Introduction to Parallel Computing - Blaise Barney
- Is Parallel Programming Hard, And, If So, What Can You Do About It? - Paul E. McKenney
- Programming on Parallel Machines; GPU, Multicore, Clusters and More - Norm Matloff Kerridge (PDF) (email address requested, not required)
- The OpenCL Programming Book
- Using Concurrency and Parallelism Effectively – I - Jon Kerridge (PDF) (email address requested, not required)
- Using Concurrency and Parallelism Effectively – II - Jon
Partial Evaluation
- Partial Evaluation and Automatic Program Generation - (PDF) Jones, Gomard and Sestoft
Professional Development
- Clean Code Developer: An initiative for more professionalism in software development (:construction: in process)
- Confessions of an IT Manager - Phil Factor (PDF)
- Don't Just Roll the Dice - Neil Davidson (PDF)
- How to Do What You Love & Earn What You’re Worth as a Programmer - Reginald Braithwaite
- Professional Software Development For Students - Mike G. Miller
- What I've Learned From Failure - Reginald Braithwaite
Programming Paradigms
- Flow based Programming - J Paul Morrison
- Introduction to Functional Programming - J. Harrison
- Making Sense of Stream Processing - Martin Kleppmann (PDF)
- Mostly Adequate Guide to Functional Programming - Mostly Adequate Core Team
- The Pure Function Pipeline Data Flow v3.0 ---- the Grand Unified Programming Theory - Lin Pengcheng
- Type Theory and Functional Programming
Regular Expressions
- JavaScript RegExp - Sundeep Agarwal
- Python re(gex)? - Sundeep Agarwal
- Regular Expressions for Regular Folk - Shreyas Minocha
- RexEgg
- Ruby Regexp - Sundeep Agarwal
- The 30 Minute Regex Tutorial - Jim Hollenhorst
- The Bastards Book of Regular Expressions: Finding Patterns in Everyday Text - Dan Nguyen (Leanpub account or valid email requested)
Reverse Engineering
- BIOS Disassembly Ninjutsu Uncovered 1st Edition - Darmawan Salihun (PDF)
- Hacking the Xbox: An Introduction to Reverse Engineering - Andrew "bunnie" Huang
- iOS App Reverse Engineering (PDF)
- Reverse Engineering for Beginners - Dennis Yurichev (PDF)
Security
- A Graduate Course in Applied Cryptography
- Crypto 101 - Crypto for everyone
- CryptoParty Handbook
- Handbook of Applied Cryptography
- How HTTPS works - dnsimple
- How to deal with Passwords
- Intrusion Detection Systems with Snort (PDF)
- OpenSSL Cookbook
- OWASP Mobile Security Testing Guide - Bernhard Mueller et al.
- OWASP Testing Guide 4.0 (PDF)
- OWASP Top 10 for .NET Developers
- Security Engineering
Software Architecture
- Agile Planning: From Ideas to Story Cards - Launch School
- Architectural Styles and the Design of Network-based Software Architectures - Roy Thomas Fielding
- Best Kept Secrets of Peer Code Review
- Building Secure & Reliable Systems - Heather Adkins, Betsy Beyer, Paul Blankinship, Piotr Lewandowski, Ana Oprea & Adam Stubblefield (PDF)
- Data-Oriented Design
- Developing Reactive Microservices (email address requested, not required)
- Domain Driven Design Quickly
- DSL Engineering: Designing, Implementing and Using Domain-Specific Languages - Markus Voelter
- Exploring CQRS and Event Sourcing - (EPUB, PDF)
- Guide to the Software Engineering Body of Knowledge (email adddress requested)
- How to Design Programs
- How to Write Unmaintainable Code
- Kanban and Scrum - making the most of both
- Kanban for skeptics - Nick Oostvogels (Leanpub account or valid email requested)
- Microservices AntiPatterns and Pitfalls (PDF)
- Microservices vs. Service-Oriented Architecture (PDF)
- Migrating to Cloud-Native Application Architectures (email address requested) (PDF)
- Naked objects - Richard Pawson (PDF)
- OAuth - The Big Picture (email address requested)
- Object-Oriented Reengineering Patterns - S. Demeyer, S. Ducasse and O. Nierstrasz
- Practicing Domain-Driven Design - Part 1 - Scott Millett (Leanpub account or valid email requested)
- Reactive Microservices Architecture (email address requested)
- Reactive Microsystems: The Evolution of Microservices at Scale (email address requested)
- Scrum and XP from the Trenches
- Serverless apps: Architecture, patterns, and Azure implementation
- Serverless Design Patterns and Best Practices - Brian Zambrano (Packt account required)
- Shape Up - Stop Running in Circles and Ship Work that Matters - Ryan Singer (PDF)
- Site Reliability Engineering
- Software Architecture Patterns (email address requested, not required)
- Software Engineering for Internet Applications
- Source Making Design Patterns and UML
- Test Driven Development, Extensive Tutorial - Grzegorz Gałęzowski
- The Site Reliability Workbook - Betsy Beyer, Niall Richard Murphy, David K. Rensin, Kent Kawahara and Stephen Thorne
- Web API Design - Brian Mulloy (PDF)
- Working with Web APIs - Launch School
- Your API Is Bad - Paddy Foran
Standards
Theoretical Computer Science
- Building Blocks for Theoretical Computer Science - Margaret M. Fleck
- Category Theory for Computing Science (PDF)
- Category Theory for Programmers - Bartosz Milewski (PDF)
- Design of a Programmer - Prakash Hegade (PDF)
- Homotopy Type Theory: Univalent Foundations of Mathematics (PDF)
- Introduction to Computer Science - Prof. Subhashis Banerjee, IIT Delhi
- Introduction to Computing
- Introduction to Theory of Computation - Anil Maheshwari and Michiel Smid (PDF)
- Models of Computation - John E. Savage
- Practical Foundations for Programming Languages, Preview - Robert Harper (PDF)
- Principles of Programming Languages - Scott F. Smith
- Programming and Programming Languages - Shriram Krishnamurthi
- Programming in Martin-Löf's Type Theory - Bengt Nordstroem
- Programming Languages: Application and Interpretation (2nd Edition) - Shriram Krishnamurthi
- Programming Languages: Theory and Practice - Robert Harper (PDF)
- Semantics with Applications: A Formal Introduction - Hanne Riis Nielson, Flemming Nielson (PDF)
- Structure and Interpretation of Computer Programs
- Structure and Interpretation of Computer Programs
- The Black Art of Programming - Mark McIlroy
- The Craft of Programming - John C. Reynolds
- Think Complexity - - Allen B. Downey (2nd Edition) (PDF, HTML)
Web Performance
- Book of Speed - Stoyan Stefanov
- Designing for Performance - Lara Hogan
- High Performance Accelerated Websites - Anshul (HTML) (:construction: in process)
- High Performance Browser Networking - Ilya Grigorik
- Mature Optimization - Carlos Bueno (PDF)
ABAP
Ada
- A Guide to Ada for C and C++ Programmers (PDF)
- Ada Distilled (PDF)
- Ada for the C++ or Java Developer - Quentin Ochem (PDF)
- Ada Programming - Wikibooks
- Ada Reference Manual - ISO/IEC 8652:2012(E) Language and Standard Libraries (PDF)
- Introduction To Ada
- Introduction To SPARK
- The Big Online Book of Linux Ada Programming
Agda
- Agda Tutorial
- Programming Language Foundations in Agda - Philip Wadler and Wen Kokke
Alef
Android
- Android 4 App Development Essentials
- Android Notes for Professionals - Compiled from StackOverflow Documentation (PDF)
- Android Programming Succinctly, Syncfusion (PDF, Kindle) (email address requested, not required)
- Android Tutorial - Tutorials Point
- Codelabs for Advanced Android Development
- CodePath Android Cliffnotes
- Coreservlets Android Programming Tutorial
- Expert Android and Eclipse development knowledge
- Google Android Developer Training
- Styling Android
- The Busy Coder's Guide to Android Development (PDF - older versions)
APL
- A Practical Introduction to APL1 & APL2 - Graeme Donald Robertson (PDF)
- A Practical Introduction to APL3 & APL4 - Graeme Donald Robertson (PDF)
- Mastering Dyalog APL (PDF)
Arduino
- Arduino Programming Notebook - Brian Evans
- Arduino Tips, Tricks, and Techniques - lady ada (PDF)
- Getting started with Arduino – A Beginner’s Guide - Brad Kendall (PDF)
- Getting Started with Arduino products - Official Arduino Documentation (:construction: in process)
- Introduction to Arduino
- Introduction to Arduino : A piece of cake! - Alan G. Smith
- Open softwear - Fashionable prototyping and wearable computing using the Arduino - Tony Olsson, David Gaetano, Jonas Odhner, Samson Wiklund (PDF)
ASP.NET
- Architecting Modern Web Applications with ASP.NET Core and Microsoft Azure (2020) - Steve "ardalis" Smith (PDF) (:construction: in process)
- ASP.NET Core 2 Succinctly - Simone Chiaretta, Ugo Lattanzi
- ASP.NET MVC Music Store
- ASP.NET WebHooks Succinctly - Gaurav Arora
- ASP.NET with C# (2008) - Vijay Mukhi, Sonal Mukhi, Neha Kotecha
- Diving into ASP.NET WebAPI (2016) - Akhil Mittal (PDF)
- Intro to ASPNET MVC 4 with Visual Studio 2011 Beta (2012) - Rick Anderson and Scott Hanselman (PDF)
- Introducing ASP.NET Web Pages 2 (2012) - Mike Pope (PDF)
- The Little ASP.NET Core Book (2018) - Nate Barbettini (PDF)
Assembly Language
- ARM Assembly Language Programming - Peter Knaggs (PDF) (:construction: in process)
- Assemblers And Loaders (1993) - David Salomon (PDF)
- Assembly Language Succinctly (PDF)
- PC Assembly Language - P. A. Carter
- Professional Assembly Language (PDF)
- Programming from the Ground Up - Jonathan Bartlett (PDF)
- Ralf Brown's Interrupt List
- Software optimization resources - A. Fog
- The Art of Assembly Language (2003) - Randall Hyde (PDF)
- Wizard Code, A View on Low-Level Programming - Tuomo Tuomo Venäläinen (PDF)
- x86-64 Assembly Language Programming with Ubuntu - Ed Jorgensen (PDF)
- x86 Assembly - Wikibooks
- x86 Disassembly - Wikibooks
- Zen of Assembly Language: Volume I, Knowledge (1990) - Michael Abrash
Non-X86
- Easy 6502 - Nick Morgan
- Machine Code for Beginners [Z80 and 6502 CPUs] - Lisa Watts and Mike Wharton (PDF) (Scroll to bottom and click on book cover)
- Machine Language for Beginners - Richard Mansfield [6502 CPU]
- Programmed Introduction to MIPS Assembly Language
- The Second Book of Machine Language
AutoHotkey
Autotools
Awk
- An Awk Primer - Wikibooks
- Awk - Bruce Barnett
- Gawk: Effective AWK Programming - Arnold D. Robbins (HTML, PDF)
Bash
- Advanced Bash-Scripting Guide - M. Cooper (HTML)
- Bash Guide for Beginners (2008) - M. Garrels (HTML)
- Bash Notes for Professionals - Compiled from StackOverflow documentation (PDF)
- BASH Programming (2000) - Mike G. (HTML)
- Bash Reference Manual (HTML)
- Bash tutorial - Anthony Scemama (PDF)
- BashGuide - Maarten Billemont (HTML) (PDF)
- Conquering the Command Line - Mark Bates (HTML)
- Getting Started with BASH (HTML)
- Google Shell Style Guide - Paul Armstrong (HTML)
- Introduction to Bash Scripting - Bobby Iliev (Markdown, PDF)
- Introduction to the Command Line - Launch School (HTML)
- Linux Shell Scripting Tutorial - A Beginner's Handbook (2002) - Vivek G. Gite (HTML)
- Linux Shell Scripting Tutorial (LSST) v2.0 - Vivek Gite (HTML)
- Slackbook (2005) - Alan Hicks, Chris Lumens, David Cantrell and Logan Johnson (HTML, DocBook, Postscript, PDF)
- The Bash Academy - Maarten Billemont (HTML)
- The Linux Command Line - William E. Shotts, Jr. (PDF)
- Writing Shell Scripts - William E. Shotts, Jr. (HTML)
Basic
- 10 PRINT CHR$(205.5+RND(1)); : GOTO 10 - Nick Montfort, Patsy Baudoin, John Bell, Ian Bogost, Jeremy Douglass, Mark C. Marino, Michael Mateas, Casey Reas, Mark Sample, Noah Vawter
- A beginner's guide to Gambas - John W. Rittinghouse (PDF)
- Pick/Basic: A Programmer's Guide - Jonathan E. Sisk
- Visual Basic Essentials
BETA
- MIA 90-02: BETA Compiler - Reference Manual - Mjølner Informatics
- MIA 94-26: BETA Language Introduction - Tutorial - Mjølner Informatics
- MIA 99-41: BETA Language Modifications - Reference Manual - Mjølner Informatics
- MIA 99-42: The Fragment System: Further Specification - Mjølner Informatics
- Object-Oriented Programming in the BETA Programming Language - Ole Lehrmann Madsen, Birger Møller-Pedersen, Kristen Nygaard
Blazor
- Blazor: A Beginner's Guide - Ed Charbeneau (PDF) (email address requested, not required)
- Blazor for ASP.NET Web Forms Developers - Daniel Roth, Jeff Fritz, Taylor Southwick (PDF)
C
- 256-Color VGA Programming in C - David Brackeen
- A Tutorial on Pointers and Arrays in C - Ted Jensen (PDF)
- An Introduction to C & GUI Programming - Simon Long (PDF)
- Bare-metal programming for ARM - Daniels Umanovskis (PDF)
- Beej's Guide to C Programming - B. Hall (HTML, PDF)
- Beej's Guide to Network Programming - Using Internet Sockets - B. Hall
- Beej's Guide to the GNU Debugger (GDB) - B. Hall (HTML)
- Build Your Own Lisp - Daniel Holden
- C Elements of Style - Steve Oualline
- C for Python Programmers - Carl Burch
- C Notes for Professionals - Compiled from StackOverflow Documentation (PDF)
- C Programming - Wikibooks
- C Programming Boot Camp - Paul Gribble
- Deep C
- Essential C - Nick Parlante (PDF)
- Everything you need to know about pointers in C - Peter Hosey
- Functional C (1997) - Pieter H. Hartel, Henk Muller (PDF)
- Hashing - Prakash Hegade
- Learn to Code With C - The MagPi Essentials (PDF)
- Learning GNU C - Ciaran O’Riordan (PDF)
- Modeling with Data - Ben Klemens (PDF)
- Modern C - Jens Gustedt (PDF)
- Object-Oriented Programming With ANSI-C (PDF)
- Programming in C - Bharat Kinariwala & Tep Dobry
- Programming in C - Kishori Mundargi
- Structures and C - Prakash Hegade
- The C book - Mike Banahan, Declan Brady and Mark Doran (PDF, HTML)
- The Craft of Text Editing or A Cookbook for an Emacs - Craig A. Finseth
- The Current C Programming Language Standard – ISO/IEC 9899:2018 (C17/C18), Draft - Open Standards Org - www.open-std.org (PDF)
- The GNU C Programming Tutorial - Mark Burgess, Ron Hale-Evans (PDF)
- The GNU C Reference Manual - Trevis Rothwell, James Youngman (HTML) (PDF)
- The little book about OS development - Erik Helin, Adam Renberg
- The New C Standard - An Economic and Cultural commentary (2009) - Derek M. Jones (PDF)
- TONC GBA Programming - Game Boy Advance Development
C Sharp
- C# Essentials
- C# Notes for Professionals - Compiled from StackOverflow documentation (PDF)
- C# Programming - Wikibooks
- C# Programming Yellow Book - Rob Miles (PDF) (2019)
- C# Smorgasbord - Filip Ekberg (HTML) (PDF, EPUB, MOBI) (2018)
- C# Tips - Jason Roberts (Leanpub account or valid email requested)
- Creating Mobile Apps with Xamarin.Forms C#
- Daily Design Patterns - Matthew P Jones (PDF)
- Data Structures and Algorithms with Object-Oriented Design Patterns in C# - Bruno Preiss
- Dissecting a C# Application - Christian Holm, Bernhard Spuida, Mike Kruger
- Fundamentals of Computer Programming with C# - Svetlin Nakov, Veselin Kolev & Co (HTML, PDF)
- High level asynchronous programming with Reactive Extensions - Emil Petro
- Introduction to Rx
- Learn C# in Y Minutes
- Mastering Xamarin UI Development, Second Edition - Steven F. Daniel (Packt account required)
- Object Oriented Programming using C# - Simon Kendal, Bookboon. (email address requested, not required)
- Threading in C#
- Xamarin.Forms for macOS Succinctly - Alessandro Del Sole
- Xamarin.Forms Succinctly - Alessandro Del Sole
C++
- C++ Annotations - Frank B. Brokken (HTML, PDF)
- C++ Core Guidelines - Editors: Bjarne Stroustrup, Herb Sutter
- C++ GUI Programming With Qt 3 - Jasmin Blanchette, Mark Summerfield (PDF)
- C++ Language
- C++ Notes for Professionals - Compiled from StackOverflow Documentation (PDF)
- C++ Succinctly, Syncfusion (PDF, Kindle) (email address requested, not required)
- C++ Tricks
- CS106X Programming Abstractions in C++
- Elements of Programming - Alexander Stepanov and Paul McJones - (PDF)
- Financial Numerical Recipes in C++ - Bernt Arne Ødegaard
- Game Programming Patterns
- Google's C++ Style Guide
- Hands-On System Programming with C++ - Dr. Rian Quinn (Packt account required)
- How to make an Operating System - Samy Pesse
- How To Think Like a Computer Scientist: C++ Version - Allen B. Downey
- Introduction to Design Patterns in C++ with Qt 4 - Alan Ezust, Paul Ezust (PDF)
- Joint Strike Fighter, C++ Coding Standards, by Bjarne Stroustrup (PDF)
- LearnCpp.com (HTML)
- Matters Computational: Ideas, Algorithms, Source Code, by Jorg Arndt (PDF)
- Open Data Structures (In C++) - Pat Morin (PDF)
- Programming Fundamentals - A Modular Structured Approach using C++ - Kenneth Leroy Busbee (PDF)
- Software Design Using C++ - Br. David Carlson and Br. Isidore Minerd
- Software optimization resources by Agner Fog
- The Boost C++ libraries - Boris Schäling (HTML)
- The Rook's Guide to C++ - Jeremy Hansen (PDF)
- The Ultimate Question of Programming, Refactoring, and Everything
- Think C++: How To Think Like a Computer Scientist - Allen B. Downey (PDF)
- Thinking in C++, Second Edition, Vol. 1. - Bruce Eckel (Vol. 2)
Chapel
Cilk
Clojure
- A Brief Beginner’s Guide To Clojure
- Clojure - Functional Programming for the JVM - R. Mark Volkmann
- Clojure by Example - Hirokuni Kim
- Clojure community-driven documentation
- Clojure Cookbook
- Clojure Distilled Beginner Guide
- Clojure for the Brave and True
- Clojure in Small Pieces - Rich Hickey (PDF)
- Clojure Koans
- Clojure Programming - Wikibooks
- ClojureScript Koans
- ClojureScript Unraveled (HTML)
- Data Sorcery with Clojure
- Modern cljs
- SICP Distilled - An idiosyncratic tour of SICP in Clojure
- The Clojure Style Guide
COBOL
- COBOL Programming Fundamental (PDF)
- Enterprise COBOL for z/OS documentation library
- Introduction to the COBOL Language
- OpenCOBOL 1.1 - Programmer's Guide (PDF)
CoffeeScript
- CoffeeScript Cookbook
- CoffeeScript Ristretto - Reginald Braithwaite (Leanpub account or valid email requested)
- Smooth CoffeeScript
- The Little Book on CoffeeScript
ColdFusion
- CFML In 100 Minutes - J. Casimir
- Learn CF in a Week
Component Pascal
- Computing Fundamentals - Stan Warford (PDF)
Cool
Coq
Crystal
CUDA
- CUDA C Best Practices Guide (PDF)
- CUDA C Programming Guide (PDF)
- OpenCL Programming Guide for CUDA Architecture (PDF)
D
Dart
- Learning Dart (PDF)
DB2
- Getting started with DB2 Express-C (PDF)
- Getting started with IBM Data Studio for DB2 (PDF)
- Getting started with IBM DB2 development (PDF)
DBMS
Delphi / Pascal
- Essential Pascal Version 1 and 2 - M. Cantù
- Expert Delphi - Paweł Głowacki (Packt account required)
DTrace
Elasticsearch
Eiffel
- A Functional Pattern System for Object-Oriented Design - Thomas Kuhne (PDF)
Elixir
- 30 Days of Elixir - Tim Morgan (HTML)
- Elixir School (HTML)
- Elixir Succinctly, Syncfusion (PDF, Kindle) (email address requested, not required)
- Getting Started Guide (HTML) (PDF, MOBI, EPUB)
- Joy of Elixir - Ryan Bigg (HTML) - Source (:construction: in process)
- Learning Elixir - Joseph Kain Blog (HTML)
- The Ultimate Guide To Elixir For Object-Oriented Programmers - Bruce Park (HTML)
Ecto
- Ecto Getting Started Guide (HTML)
Phoenix
- Phoenix Framework Guide (HTML)
- Versioned APIs with Phoenix - Elvio Vicosa (PDF)
Emacs
- An Introduction to Programming in Emacs Lisp, 3rd Edition
- Emacs for the Modern World (HTML)
- GNU Emacs Lisp Reference Manual
- GNU Emacs Manual (PDF)
Embedded Systems
- Control and Embedded Systems (HTML)
- Discovering the STM32 Microcontroller (PDF)
- First Steps with Embedded Systems - Byte Craft Limited (PDF)
- Introduction to Embedded Systems, Second Edition - Edward Ashford Lee, Sanjit Arunkumar Seshia (PDF)
- Introduction to Microcontrollers (HTML)
Erlang
- BEAM Wisdoms (HTML)
- Concurrent Programming in ERLANG (PDF)
- Erlang Handbook (PDF)
- Erlang Programming - Wikibooks (HTML)
- Getting Started with Erlang User's Guide (HTML)
- Learn You Some Erlang For Great Good - Frederic Trottier-Hebert
- Making reliable distributed systems in the presence of software errors - Joe Armstrong (PDF)
- Stuff Goes Bad: Erlang in Anger - Fred Herbert (PDF)
- The BEAM Book (HTML)
ESP8266
- Kolban's book on the ESP32 & ESP8266 (Leanpub account or valid email requested)
F Sharp
- Analyzing and Visualizing Data with F# (PDF)
- F# for fun and profit (ePub)
- F# Programming - Wikibooks
- F# Succinctly, SyncFusion (PDF, Kindle) (email address requested, not required)
- Functional Programming Textbook - Yusuf M Motara (PDF)
- Programming Language Concepts for Software Developers
Firefox OS
Flutter
- Cookbook
- Flutter Succinctly, Syncfusion (PDF, Kindle) (email address requested, not required)
- Flutter Tutorial - Tutorials Point
- Flutter Tutorials Handbook
Force.com
- Apex Workbook (PDF)
- Developer Workbooks
- Force.com Fundamentals (PDF)
- Force.com Platform Fundamentals: An Introduction to Custom Application Development in the Cloud
- Force.com Workbook (PDF)
- Heroku Postgres (PDF)
- Heroku Workbook (PDF)
- Integration Workbook (PDF)
- Salesforce1 Mobile App Workbook (PDF)
- Visualforce Workbook (PDF)
Forth
- A Beginner's Guide to Forth - J.V. Noble
- And so Forth... (PDF)
- Programming Forth (PDF)
- Starting Forth
- Thinking Forth
- Thoughtful Programming and Forth
Fortran
- Introduction to fortran 95 and numerical computing: a jump-start for scientists and engineers (PDF)
- Professional Programmer’s Guide to Fortran77 (PDF)
- Self Study Guide: Programming in Fortran 95 (PDF)
FreeBSD
- Books and Articles from FreeBSD Site
- The Complete FreeBSD
- Using C on the UNIX System - David A. Curry
Git
- A Visual Git Reference - Mark Lodato
- Conversational Git
- git - the simple guide
- Git for Computer Scientists
- Git From The Bottom Up - J. Wiegley
- Git Immersion
- Git In The Trenches
- Git internals - Scott Chacon (PDF)
- Git Magic
- Git Notes for Professionals - Compiled from StackOverflow Documentation (PDF)
- Git Pocket Guide - Richard E. Silverman
- Git Reference
- Git Succinctly, Syncfusion (PDF, Kindle) (email address requested, not required)
- Git Workflows
- Happy Git and GitHub for the useR - Jenny Bryan
- How to Collaborate on Github - André J
- Intoduction to Git and Github - Launch School
- Intoduction to Git and Github - Tutorial - Dr. Chris Bourke (PDF)
- Learn Git - Learn Version Control with Git - Tobias Günther
- Pro Git - Scott Chacon
- Pro Git Reedited - Jon Forrest
- Ry's Git Tutorial - Ryan Hodson
- Think Like (a) Git: A Guide for the Perplexed
Go
- An Introduction to Programming in Go
- Build Web Application with Golang
- Building Web Apps with Go
- Effective Go
- Go 101 - @TapirLiu
- Go Bootcamp - Matt Aimonetti
- Go by Example
- Go for Javascript Developers
- How To Code in Go - Mark Bates, Cory Lanou, and Timothy J. Raymond (PDF, EPUB)
- Learn Go with Tests
- Learning Go
- Let's learn Go!
- Practical Cryptography With Go - Kyle Isom
- The Go Tutorial
- The Little Go Book
- Web apps in Go, the anti textbook
Groovy
Gradle
- Building Java Projects with Gradle
- Gradle Succinctly - José Roberto Olivas Mendoza
- Gradle User Guide - Hans Dockter, Adam Murdoch (PDF)
Grails
- Getting Started with Grails
- Grails Tutorial for Beginners
- The Grails Framework - Reference Documentation - Graeme Rocher, Peter Ledbrook, Marc Palmer, Jeff Brown, Luke Daley, Burt Beckwith, Lari Hotari (PDF)
Spock Framework
- Spock Framework Reference Documentation - Peter Niederwieser
Hack
Hadoop
- Big Data Analytics with Hadoop 3 - Sridhar Alla (Packt account required)
- Cloudera Impala - John Russel (PDF)
- Data-Intensive Text Processing with MapReduce (Jimmy Lin and Chris Dyer) (PDF)
- Hadoop for Windows Succinctly - Dave Vickers
- Hadoop Illuminated - Mark Kerzner & Sujee Maniyam
Haskell
- A Gentle Introduction to Haskell
- Anatomy of Programming Languages - William R. Cook
- Beautiful Code, Compelling Evidence - J.R. Heard (PDF)
- Exploring Generic Haskell - Andres Löh (PDF)
- Happy Learn Haskell Tutorial
- Haskell - Wikibooks
- Haskell and Yesod
- Haskell no panic
- Haskell Notes for Professionals - Compiled from StackOverflow documentation (PDF)
- Haskell web Programming (Yesod tutorial)
- Learn Haskell Fast and Hard
- Learn You a Haskell for Great Good - Miran Lipovaca
- Parallel and Concurrent Programming in Haskell - Simon Marlow
- Real World Haskell
- Speeding Through Haskell
- What I Wish I Knew When Learning Haskell - Stephen Diehl (PDF)
- Wise Man's Haskell - Andre Popovitch
- Yet Another Haskell Tutorial (PDF)
Haxe
- Flambe Handbook
- Haxe and JavaScript - Matthijs Kamstra (wikibook)
- Haxe Manual - Haxe Foundation (PDF, HTML)
- HaxeFlixel Handbook (HTML)
- Kha Handbook
HTML / CSS
- A beginner's guide to HTML&CSS
- A free guide to learn HTML and CSS
- Adaptive Web Design - Aaron Gustafson
- An advanced guide to HTML&CSS
- Atomic Design - Brad Frost
- Canvassing
- Code Guide: Standards for developing flexible, durable, and sustainable HTML and CSS - Mark Otto
- CSS Animation 101
- CSS Notes for Professionals - Compiled from StackOverflow Documentation (PDF)
- Dive Into HTML5 - Mark Pilgrim (PDF)
- DOM Enlightenment - Cody Lindley (HTML)
- GA Dash
- Google's HTML/CSS Style Guide
- How to Code in HTML5 and CSS3 - Damian Wielgosik (PDF)
- HTML Canvas Deep Dive - Josh Marinacci
- HTML Dog Tutorials
- HTML5 Canvas - Steve Fulton & Jeff Fulton
- HTML5 for Publishers - Sanders Kleinfeld
- HTML5 For Web Designers - Jeremy Keith
- HTML5 Notes for Professionals - Compiled from StackOverflow documentation (PDF)
- HTML5 Quick Learning Guide - HTML5Templates (PDF)
- HTML5 Shoot 'em Up in an Afternoon - Bryan Bibat (HTML)
- Interneting is Hard (But it Doesn't Have to Be) - Oliver James
- Learn CSS Layout
- Learn CSS Layout the pedantic way
- Learn to Code HTML & CSS - Shay Howe
- Magic of CSS - Adam Schwartz (HTML) (:construction: in process)
- MaintainableCSS
- Pocket Guide to Writing SVG - Joni Trythall
- Pro HTML5 Programming - Jen Simmons, Chris O'Connor, Dylan Wooters, Peter Lubbers
- Resilient Web Design - Jeremy Keith
- Scalable and Modular Architecture for CSS - Jonathan Snook
- Understanding Flexbox: Everything you need to know - Ohans Emmanuel
- W3.CSS Succinctly - Joseph D. Booth
- Web Audio API - Boris Smus
- Web Visual Effects with CSS3 - Thomas Mak
Bootstrap
- Twitter Bootstrap 3 Succinctly - Peter Shaw
- Twitter Bootstrap 4 Succinctly - Peter Shaw
- Twitter Bootstrap Succinctly - Peter Shaw
Idris
- Gentle Introduction to Dependent Types with Idris - Boro Sitnikovski (Leanpub account or valid email requested)
Icon
iOS
- Cocoa Dev Central
- iOS 8 App Development Essentials
- iOS Developer Notes for Professionals - Compiled from StackOverflow Documentation (PDF)
- iOS Succinctly, Syncfusion (PDF, Kindle) (email address requested, not required)
- NSHipster (Resource)
- Start Developing iOS Apps (Swift) (HTML)
- Start Developing iOS Apps Today (Objective-C) - Last updated 22.10.2013 (PDF)
IoT
- IoT in five days- V1.1 (PDF, EPUB)
- Mastering Internet of Things - Peter Waher (Packt account required)
Isabelle/HOL
- Concrete Semantics - A Proof Assistant Approach by Tobias Nipkow and Gerwin Klein (PDF)
- Isabelle/HOL - A Proof Assistant for Higher-Order Logic by Tobias Nipkow and Lawrence C. Paulson and Markus Wenzel (PDF)
J
- Arithmetic by Kenneth E Iverson (PDF)
- Brief Reference by Chris Burke and Clifford Reiter (PDF)
- Calculus by Kenneth E Iverson (PDF)
- Computers and Mathematical Notation by Kenneth E Iverson
- Concrete Math Companion by Kenneth E Iverson (PDF)
- Easy J by Linda Alvord, Norman Thomson (PDF) (Word DOC)
- Exploring Math by Kenneth E Iverson (PDF)
- J for C Programmers by Henry Rich
- J Primer
- Learning J by Roger Stokes- online
- Math for the Layman by Kenneth E Iverson (zipped html+images)
Java
- 3D Programming in Java - Daniel Selman (PDF)
- Apache Jakarta Commons: Reusable Java Components - Will Iverson (PDF)
- Artificial Intelligence - Foundations of Computational Agents, Second Edition - David L. Poole and Alan K. Mackworth
- Building Back-End Web Apps with Java, JPA and JSF - Mircea Diaconescu, Gerd Wagner (HTML,PDF)
- Category wise tutorials - J2EE - Yong Mook Kim
- Core Servlets and JavaServer Pages, 2nd Ed. (2003) - Marty Hall and Larry Brown
- Data Structures in Java for the Principled Programmer (2007) - Duane A. Bailey (PDF)
- Google's Java Style Guide
- Introduction to Computer Science "booksite" - by Robert Sedgewick and Kevin Wayne (HTML)
- Introduction to Computer science using Java - Bradley Kjell
- Introduction to Programming in Java - Robert Sedgewick and Kevin Wayne
- Introduction to Programming Using Java - David J. Eck
- Java Application Development on Linux (2005) - Carl Albing and Michael Schwarz (PDF)
- Java, Java, Java Object-Oriented Problem Solving - R. Morelli and R.Walde
- Java Language and Virtual Machine Specifications - James Gosling, et al
- Java Notes for Professionals - Compiled from StackOverflow documentation (PDF)
- Java Programming - Wikibooks
- Java Programming for Kids - Yakov Fain
- Java Projects, Second Edition - Peter Verhas (Packt account required)
- Microservices Best Practices for Java (PDF)
- Object-Oriented Programming in JavaTM Textbook - Rick Halterman (PDF per Chapter)
- Object Oriented Programming using Java - Simon Kendal (PDF) , Bookboon. (email address requested, not required)
- OOP - Learn Object Oriented Thinking & Programming - Rudolf Pecinovsky (PDF)
- Open Data Structures (in Java) - Pat Morin (PDF)
- Playing with Java Microservices on Kubernetes and OpenShift - Nebrass Lamouchi (Leanpub account or valid email requested)
- Processing XML with Java (A Guide to SAX, DOM, JDOM, JAXP, and TrAX) (2002) - Elliotte Rusty Harold
- The ABC of PDF with iText: PDF Syntax essentials - Bruno Lowagie (Leanpub account or valid email requested)
- The Java EE6 Tutorial (PDF)
- The Java EE7 Tutorial - Eric Jendrock, et al (PDF)
- The Java Tutorials
- The Java Web Scraping Handbook - Kevin Sahin (PDF, HTML)
- Think Data Structures: Algorithms and Information Retrieval in Java - Allen B. Downey (PDF, HTML)
-
Think Java: How to Think Like a Computer Scientist, 2nd Edition - Allen B. Downey and Chris Mayfield (HTML, PDF) (Interactive version by Trinket)
- Think Java: How to Think Like a Computer Scientist - Allen B. Downey and Chris Mayfield (HTML, PDF) (Interactive version by Trinket)
- Welcome to Java for Python Programmers - Brad Miller
- Welcome to the Java Workshop (2006) - Trevor Miller
- What’s New in Java 8 - Adam L. Davis
Codename One
- Codename One Developer Guide (PDF)
- Create an Uber Clone in 7 Days (first 2 chapters) - Shai Almog (PDF)
JasperReports
Spring
- Building Applications with Spring 5 and Vue.js 2 - James J. Ye (Packt account required)
- Software Architecture with Spring 5.0 - René Enríquez, Alberto Salazar (Packt account required)
- Spring Framework Cookbook: Hot Recipes for Spring Framework - JCGs (Java Code Geeks) (PDF)
- Spring Framework Notes for Professionals - Compiled from StackOverflow documentation (PDF)
- Spring Framework Reference Documentation - Rod Johnson et al.
Spring Boot
- Building modern Web Apps with Spring Boot and Vaadin (PDF)
- Spring Boot Reference Guide - Phillip Webb et al. (PDF)
Spring Data
- Spring Data Reference - Oliver Gierke, Thomas Darimont, Christoph Strobl, Mark Paluch, Jay Bryant
Spring Security
- Spring Security Reference - Ben Alex, Luke Taylor, Rob Winch
Wicket
JavaScript
- Basic JavaScript for the impatient programmer - Dr. Axel Rauschmayer (HTML)
- Book of Modern Frontend Tooling - Various (HTML)
- Building Front-End Web Apps with Plain JavaScript - Gerd Wagner (HTML,PDF)
- Clean Code JavaScript - Ryan McDermott (HTML)
- Crockford's JavaScript - Douglas Crockford (HTML)
- Deep JavaScript: Theory and techniques - Dr. Axel Rauschmayer (HTML)
- Designing Scalable JavaScript Applications - Emmit Scott (PDF+livebook)
- Dev Docs - Various (HTML)
- Eloquent JavaScript 3rd edition - Marijn Haverbeke (HTML, PDF, EPUB, MOBI)
- Exploring ES6 - Dr. Axel Rauschmayer (HTML)
- Google JavaScript Style Guide - Aaron Whyte, Bob Jervis, Dan Pupius, Erik Arvidsson, Fritz Schneider, & Robby Walker (HTML)
- Human JavaScript - Henrik Joreteg (HTML)
- JavaScript Allongé - Reginald Braithwaite (HTML)
- JavaScript Bible - Danny Goodman (PDF)
- JavaScript Challenges Book - Tomás Corral Casas (HTML)
- JavaScript Enlightenment - Cody Lindley (HTML)
- JavaScript ES6 and beyond - Alberto Montalesi (PDF, epub)
- JavaScript For Cats - Maxwell Ogden (HTML)
- JavaScript for Impatient Programmers (ES2020 edition) - Dr. Axel Rauschmayer (HTML)
- JavaScript Fundamentals, Plus a Dash Of JQuery - for dinner ladies - Nicholas Johnson (HTML)
- JavaScript Garden Maintained by Tim Ruffles (HTML)
- JavaScript Notes for Professionals - Compiled from StackOverflow documentation (PDF)
- JavaScript Patterns Collection - Shi Chuan (HTML)
- JavaScript Spessore - Reginald Braithwaite (HTML)
- JavaScript Succinctly - Cody Lindley (PDF, Kindle; email address requested, not required)
- JavaScript the Right Way - William Oliveira & Allan Esquina (HTML)
- jQuery Fundamentals - Bocoup (HTML)
- JS Robots - Mark Daggett (PDF)
- Leaflet Tips and Tricks: Interactive Maps Made Easy - Malcolm Maclean (HTML)
- Learning JavaScript Design Patterns - Addy Osmani (HTML)
- Let's Learn ES6 - Ryan Christiani (Superbook format)
- Managing Space and Time with JavaScript - Book 1: The Basics - Noel Rappin (dead link)
- Marionette Exposé: Learn to write modular Javascript applications using Backbone Marionette and RequireJS/AMD - Jack Killilea (HTML, PDF, EPUB, MOBI; Leanpub account or valid email requested)
- Mozilla Developer Network's JavaScript Guide - Mozilla Developer Network contributors (HTML)
- Neural Networks with JavaScript Succinctly - James McCaffrey (PDF, EPUB, MOBI)
- Oh My JS - Azat Mardanov (HTML)
- Patterns For Large-Scale JavaScript Application Architecture - Addy Osmani (HTML)
- Practical Modern JavaScript - Nicolas Bevacqua (HTML)
- Professor Frisby’s Mostly Adequate Guide to Functional Programming - Brian Lonsdorf (HTML)
- Robust Client-Side JavaScript - Matthias Schäfer (HTML, EPUB)
- Single page apps in depth - Mixu (HTML)
- Speaking JavaScript - Dr. Axel Rauschmayer
- Standard ECMA-262 ECMAScript 2016 Language Specification - Ecma International (HTML,PDF)
- The JavaScript Tutorial - Ilya Kantor (HTML)
- The JavaScript Way - Baptiste Pesquet
- The Problem with Native JavaScript APIs - Nicholas C. Zakas (PDF, email address requested)
- Thinking in JavaScript - Aravind Shenoy (Kindle)
- Understanding ECMAScript 6 - Nicholas C. Zakas (HTML)
- Understanding JavaScript OOP - Quil (HTML)
- You Don't Know JS - Kyle Simpson (HTML, PDF, EPUB, MOBI)
Angular.js
- Angular for the jQuery developer
- Angular.js Guide
- Angular.js Material Designing
- Angular.js Style Guide
- Angular.js Tutorial
- AngularJS - Step by Logical Step
- AngularJS Notes for Professionals - Compiled from StackOverflow Documentation (PDF)
- AngularJS Succinctly (PDF, Kindle) (email address requested, not required)
- AngularJs vs EmberJs
- Seven-Part Introduction to Angular
- Unit Testing Best Practices in AngularJS
Aurelia
- Beginning Aurelia - behzad (Leanpub account or valid email requested)
Backbone.js
- A pragmatic guide to Backbone.js apps
- Backbone Tutorials: Beginner, Intermediate and Advanced - Thomas Davis (Leanpub account or valid email requested)
- Backbonejs Tutorials
- Building Single Page Web Apps with Backbone.js (:construction: in process)
- Developing Backbone.js Applications
- Getting Started with Backbone.js
- How to share Backbone.js models with node.js
Booty5.js
D3.js
- D3 Tips and Tricks - Malcolm Maclean
- Dashing D3.js Tutorial
- Interactive Data Visualization with D3
Dojo
- Dojo: The Definitive Guide - Matthew A. Russell
Elm
- An Introduction to Elm (HTML)
- Beginning Elm - Pawan Poudel (HTML)
- Building a Live-Validating Signup Form in Elm
- Elm Accelerated - James Porter
- Elm Programming Language (HTML)
- Elm Tutorial
- Learn You an Elm (HTML)
- The Elm Architecture
Ember.js
- AngularJs vs EmberJs
- DockYard Ember.js Style Guide
- Ember App with RailsApi
- Ember.js - Getting started
- Vic Ramon's Ember Tutorial
Express.js
- Express.js Guide - Azat Mardanov
Ionic
- Ionic 4 Succinctly - Ed Freitas
jQuery
- JavaScript Fundamentals, Plus a Dash Of JQuery - for dinner ladies
- jQuery Notes for Professionals - Compiled from StackOverflow Documentation (PDF)
- jQuery Novice to Ninja (PDF)
- jQuery Succinctly, Syncfusion (PDF, Kindle) (email address requested, not required)
Meteor
Node.js
- An Introduction to libuv - Nikhil Marathe (PDF - ePub)
- Full Stack JavaScript: Learn Backbone.js, Node.js and MongoDB - Azat Mardan
- Mixu's Node Book
- Node Documentation
- Node: Up and Running - Tom Hughes-Croucher
- Node.js Notes for Professionals - Compiled from StackOverflow Documentation (PDF)
- Node.js Succinctly, Syncfusion (PDF, Kindle) (email address requested, not required)
- Practical Node.js: Building Real-World Scalable Web Apps - Azat Mardan
- The Node Beginner Book
Om
React
- Free React on Rails course
- Full-Stack React Projects - Shama Hoque (Packt account required)
- Hacking with React
- Intro to the React Framework
- Learning React.js: Getting Started and Concepts
- React-Bits
- React Book, your beginner guide to React - Chris Noring
- React Enlightenment
- React In-depth: An exploration of UI development
- React JS Notes for Professionals - Compiled from StackOverflow Documentation (PDF)
- React Primer Draft
- React Succinctly - Samer Buna
- React Tutorial
-
React Tutorial by Josh Finnie
- React with ASP.NET Core Tutorial
- React.js Tutorial: Now is Your Time to Try It, Right in Your Browser
- SurviveJS - Webpack and React
-
Guia do desenvolvedor React
Guia para se tornar um desenvolvedor React em 2019: Abaixo, você pode encontrar um diagrama mostrando os caminhos que podem levar, bem como as bibliotecas que você precisa aprender para se tornar um desenvolvedor React. Eu fiz esse esquema como uma dica para qualquer um que me perguntasse: "O que eu deveria aprender mais como desenvolvedor React?"
Aviso
O objetivo deste guia é dar uma ideia geral de como se tornar um desenvolvedor React. Este guia irá ajudá-lo se você estiver confuso sobre o que estudar, em vez de encorajá-lo a escolher algo elegante e popular. Você deve entender gradualmente por que uma ferramenta é mais adequada para determinadas situações do que outra, e não se esqueça de que uma ferramenta moderna e popular nem sempre significa que ela é mais adequada para o trabalho.
Roadmap
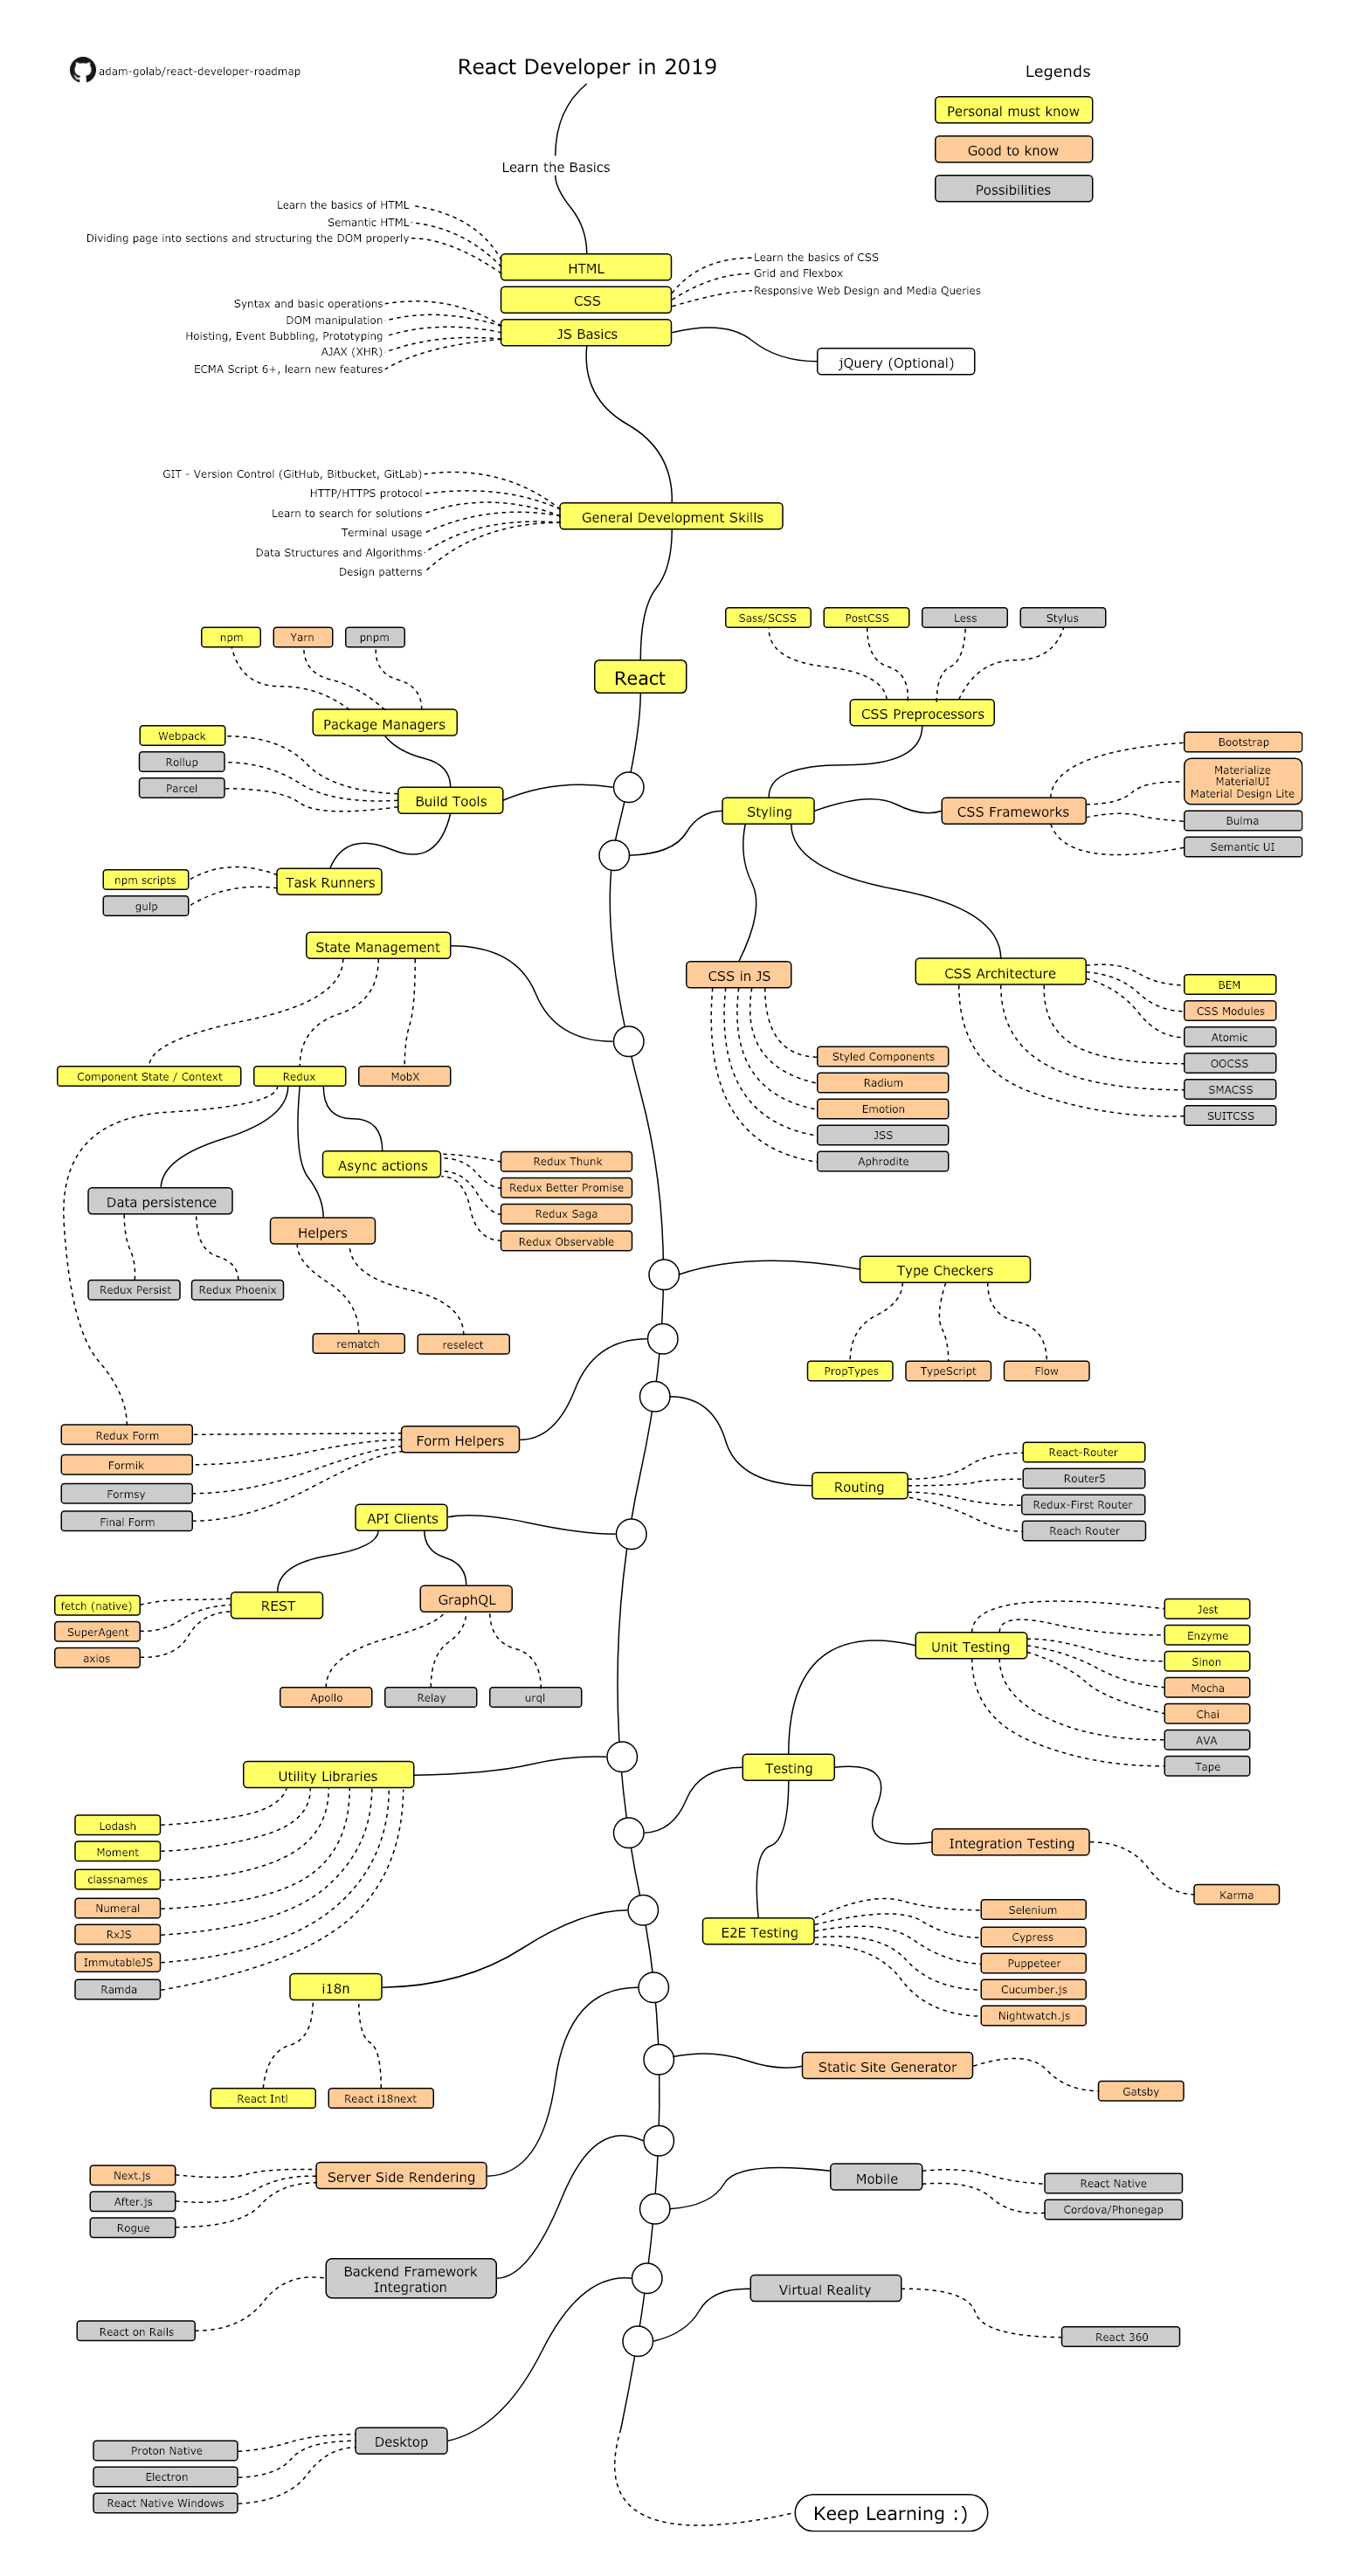
Recursos
-
Basico
- HTML
- Aprenda o básico do HTML
- Desenvolva algumas paginas como exercícios
- CSS
- Aprenda o básico de CSS
- Aplique estilos nas páginas desenvolvidas anteriormente
- Desenvolva uma página com CSS Grid e CSS Flexbox
- Javascript
- Se familiarize com a sintaxe
- Aprenda operações basicas com o DOM
- Aprenda mecanismos típicos para JS (Hoisting, Event Bubbling, Prototyping)
- Faça algumas requisições AJAX
- Aprenda as novas features do javascript (ECMA Script 6+)
- Opcional: Conheça a biblioteca JQuery
-
Conhecimentos de desenvolvimento em geral
- Aprenda GIT, crie repositórios no GitHub e compartilhe seu código com outras pessoas.
- Aprenda os protocolos HTTP(S) e metodos de request (GET, POST, PUT, PATCH, DELETE, OPTIONS)
- Não tenha medo de utilizar o google, veja o uso avançado do Google
- Familiarize-se com terminal e configure-o (bash, zsh, fish)
- Leia alguns livros sobre algoritmos e estrutura de dados
- Leia alguns livros sobre padrões de projeto (design patterns)
- Aprenda React no site oficial ou realize alguns cursos
-
Conheça as ferramentas que voce usará
-
Estilização
- Pré-processadores CSS
- Sass/CSS
- PostCSS
- Less
- Stylus
- Frameworks CSS
- Bootstrap
- Materialize, Material UI, Material Design Lite
- Bulma
- Semantic UI
- Arquitetura CSS
- BEM
- CSS Modules
- Atomic
- OOCSS
- SMACSS
- SUITCSS
- CSS in JS
- Styled Components
- Radium
- Emotion
- JSS
- Aphrodite
-
Gerenciamento de estado
- Component State/Context API
- Redux
-
Async actions (Side Effects)
-
Helpers
-
Persistencia de dados
- Redux Form
- MobX
-
Tipagem
-
Form Helpers
-
Rotas
-
Clientes API
-
Bibliotecas uteis
-
Testes
-
Internacionalização
-
Renderização no servidor
-
Gerador de site estático
-
Integração com estrturas de backend
-
Desenvolvimento de aplicativos móveis
-
Desenvolvimento de aplicativos desktop
-
Realidade virtual
React Developer Roadmap
Below you can find a chart demonstrating the paths that you can take and the libraries that you would want to learn to become a React developer. I made this chart as a tip for everyone who asks me, "What should I learn next as a React developer?"
Disclaimer
The purpose of this roadmap is to give you an idea about the landscape. The road map will guide you if you are confused about what to learn next, rather than encouraging you to pick what is hip and trendy. You should grow some understanding of why one tool would be better suited for some cases than the other and remember hip and trendy does not always mean best suited for the job
Roadmap
Resources
-
Basics
-
HTML
- Learn the basics of HTML
- Make a few pages as an exercise
-
CSS
- Learn the basics of CSS
- Style pages from previous step
- Build a page with grid and flexbox
-
JS Basics
- Get familiar with the syntax
- Learn basic operations on DOM
- Learn mechanisms typical for JS (Hoisting, Event Bubbling, Prototyping)
- Make some AJAX (XHR) calls
- Learn new features (ECMA Script 6+)
- Additionally, get familiar with the jQuery library
-
-
General Development Skills
- Learn GIT, create a few repositories on GitHub, share your code with other people
- Know HTTP(S) protocol, request methods (GET, POST, PUT, PATCH, DELETE, OPTIONS)
- Don't be afraid of using Google, Power Searching with Google
- Get familiar with terminal, configure your shell (bash, zsh, fish)
- Read a few books about algorithms and data structures
- Read a few books about design patterns
- Learn React on official website or complete some courses
-
Get familiar with tools that you will be using
-
Styling
-
CSS Preprocessor
-
CSS Frameworks
-
CSS Architecture
-
CSS in JS
-
-
State Management
- Component State/Context API
-
-
Async actions (Side Effects)
-
Helpers
-
Data persistence
- Redux Form
-
- MobX
-
Type Checkers
-
Form Helpers
-
Routing
-
API Clients
-
Utility Libraries
-
Testing
-
Internationalization
-
Server Side Rendering
-
Static Site Generator
-
Backend Framework Integration
-
Mobile
-
Desktop
-
Virtual Reality
React Native
- Programming React Native (Leanpub account or valid email requested)
- React Native Animation Book
- React Native Express
- React Native Notes for Professionals - Compiled from StackOverflow documentation (PDF)
- React Native Training
Redux
- Full-Stack Redux Tutorial
- SoundCloud Application in React + Redux
- The Complete Redux Book - Boris Dinkevich and Ilya Gelman (Leanpub account or valid email requested)
Vue.js
- 30 Days Of Vue - Hassan Djirdeh (HTML; email required for PDF)
- Learning Vue.js (PDF)
- The Vue.js Handbook - Flavio Copes (PDF)
Jenkins
Julia
- Introducing Julia - Wikibooks
- Julia by Example - Samuel Colvin (GitHub repo)
- Julia language: a concise tutorial - Antonello Lobianco (GitBook)
- Learn Julia in Y minutes - Leah Hanson
- Quantitative Economics with Julia - Jesse Perla, Thomas J. Sargent and John Stachurski (PDF)
- The Julia Express - Bogumił Kamiński (PDF)
- Think Julia - Ben Lauwens and Allen Downey (GitBook)
Kotlin
- Kotlin Notes for Professionals - Compiled from StackOverflow documentation (PDF)
- Kotlin Official Documentation
LaTeX / TeX
LaTeX
- Arbitrary LaTex Reference
- Begin Latex in minutes
- LaTeX - Wikibooks
- The Not So Short Introduction to LaTeX (PDF)
TeX
- Notes On Programming in TeX - Christian Feursänger (PDF)
- TeX by Topic, A TeXnician's Reference - Victor Eijkhout
- TeX for the Impatient - Paul Abrahams, Kathryn Hargreaves, and Karl Berry
Limbo
Linux
- Ad Hoc Data Analysis From The Unix Command Line - Wikibooks
- Advanced Linux Programming (PDF)
- Automated Linux From Scratch
- Getting Started with Ubuntu
- GNU Autoconf, Automake and Libtool
- GTK+/Gnome Application Development
- Hardened Linux From Scratch
- Kali Linux 2018: Assuring Security by Penetration Testing, Fourth Edition - Shiva V. N Parasram, Alex Samm, Damian Boodoo, Gerard Johansen, Lee Allen, Tedi Heriyanto, Shakeel Ali (Packt account required)
- Kali Linux: Professional Penetration-Testing Distribution
- Learning Debian GNU/Linux
- Linux 101 Hacks - Ramesh Natarajan (PDF)
- Linux Administrator's Security Guide
- Linux Advanced Routing & Traffic Control HOWTO
- Linux Appliance Design: A Hands-On Guide to Building Linux Appliances - Bob Smith, John Hardin, Graham Phillips, Bill Pierce (PDF, EPUB, MOBI)
- Linux commands Notes for Professionals - Compiled from StackOverflow documentation (PDF)
- Linux Device Drivers, Third Edition - Jonathan Corbet, Alessandro Rubini, and Greg Kroah-Hartman
- Linux from Scratch
- Linux Fundamentals - Paul Cobbaut (PDF)
- Linux Inside
- Linux Kernel in a Nutshell
- Linux Newbie Administrator Guide
- Linux Security for Beginners
- Linux Succinctly, Syncfusion (PDF, Kindle) (email address requested, not required)
- Red Hat Enterprise Linux 6 Essentials
- Secure Programming HOWTO - Creating Secure Software - D. A. Wheeler (HTML, PDF)
- Ten Steps to Linux Survival: Bash for Windows People - Jim Lehmer
- The Debian Administrator's Handbook
- The Linux Command Line (PDF)
- The Linux Development Platform (PDF)
- The Linux Kernel Module Programming Guide
- The Linux System Administrator's Guide
- Ubuntu Pocket Guide and Reference
- Ubuntu Server Guide (PDF)
- Understanding the Linux Virtual Memory Manager - Mel Gorman (HTML, PDF)
- UNIX Systems Programming for SVR4 - David A. Curry
- Upstart Intro, Cookbook and Best Practises
- What Every Programmer Should Know About Memory (PDF)
Lisp
- Basic Lisp Techniques - David J. Cooper, Jr. (PDF)
- Casting Spels in Lisp
- Common Lisp: A Gentle Introduction to Symbolic Computation - David S. Touretzky (PDF, PS)
- Common Lisp: An Interactive Approach - Stuart C. Shapiro
- Common Lisp Quick Reference
- Common Lisp the Language, 2nd Edition
- Google's Common Lisp Style Guide
- Interpreting LISP - Gary D. Knott (PDF)
- Learn Lisp The Hard Way - Colin J.E. Lupton
- Let Over Lambda - 50 Years of Lisp - D. Hoyte
- Lisp Hackers: Interviews with 100x More Productive Programmers - Vsevolod Dyomkin
- Lisp Koans
- Lisp Web Tales - Pavel Penev (Leanpub account or valid email requested)
- On Lisp - P. Graham
- Paradigms of Artificial Intelligence Programming: Case Studies in Common Lisp - Peter Norvig (PDF, epub, markdown)
- Practical Common Lisp - P. Seibel
- The Common Lisp Cookbook
- The Evolution of Lisp - Guy L. Steele Jr., Richard P. Gabriel (PDF)
Livecode
- LiveCode userguide (PDF)
Lua
Make
- Managing Projects with GNU Make - Robert Mecklenburg
Markdown
- Learn Markdown - Sammy P., Aaron O. (PDF) (EPUB) (MOBI)
Mathematica
- Mathematica® programming: an advanced introduction by Leonid Shifrin
- Power Programming with Mathematica - David B. Wagner
- Stephen Wolfram's The Mathematica Book
- Vector Math for 3d Computer Graphics
- Wolfram Mathematica Product Training: Wolfram U
MATLAB
- An Interactive Introduction to MATLAB (PDF)
- An Introduction to MATLAB (PDF)
- Applications of MATLAB in Science and Engineering
- Experiments with MATLAB
- Freshman Engineering Problem Solving with MATLAB (PDF)
- Interactive Tutorials for MATLAB, Simulink, Signal Processing, Controls, and Computational Mathematics
- Introduction to MATLAB for Engineering Students - David Houcque (PDF) (1.2, 2005)
- MATLAB - A Fundamental Tool for Scientific Computing and Engineering Applications - Volume 1
- MATLAB - A Ubiquitous Tool for the Practical Engineer
- MATLAB for Engineers: Applications in Control, Electrical Engineering, IT and Robotics
- MATLAB Notes for professionals - Compiled from StackOverflow documentation (PDF)
- MATLAB Programming - Wikibooks
- MATLAB Succinctly, Syncfusion (PDF, Kindle) (email address requested, not required)
- Numerical Computing with MATLAB
- Physical Modeling in MATLAB - Alan B. Downey
- Scientific Computing - Jeffrey R. Chasnov (PDF)
Maven
- Developing with Eclipse and Maven
- Maven by Example
- Maven: The Complete Reference
- Repository Management with Nexus
Mercurial
- HGInit - Mercurial Tutorial - Joel Spolsky
- Mercurial: The Definitive Guide
- Mercurial: The Definitive Guide 2nd edition
Mercury
- The Mercury Users' Guide (PDF)
Modelica
MySQL
- MySQL 8.0 Tutorial Excerpt (HTML) (PDF)
- MySQL Essentials
- MySQL Notes for Professionals - Compiled from StackOverflow Documentation (PDF)
Neo4J
- Fullstack GraphQL Applications with GRANDStack – Essential Excerpts - William Lyon (PDF) (email requested)
- Graph Algorithms: Practical Examples in Apache Spark and Neo4j - Mark Needham and Amy E. Hodler (PDF, EPUB, MOBI) (email requested)
- Graph Databases 2nd edition - Ian Robinson, Jim Webber and Emil Eifrém (PDF, EPUB, MOBI) (email requested)
- Graph Databases For Dummies - Dr. Jim Webber and Rik Van Bruggen (PDF) (email requested)
.NET Framework
- Akka.NET Succinctly - Zoran Maksimovic
- Application Security in .NET Succinctly - Stan Drapkin
- Clean Code .NET
- Cryptography in .NET Succinctly - Dirk Strauss
- Entity Framework
- Entity Framework Core Succinctly - Ricardo Peres
- Game Creation with XNA - Wikibooks
- Getting the Most from LINQPad Succinctly - José Roberto Olivas Mendoza
- MonoGame Succinctly - Jim Perry
- .NET for Visual FoxPro Developers
- .NET Framework Notes for Professionals - Compiled from StackOverflow Documentation (PDF)
- .NET Performance Testing and Optimization - The Complete Guide - Paul Glavich, Chris Farrell (PDF)
- NuGet In-House Succinctly - José Roberto Olivas Mendoza
- Rider Succinctly - Dmitri Nesteruk
- Under the Hood of .NET Memory Management - Chris Farrell, Nick Harrison (PDF)
- Using .NET Core, Docker, and Kubernetes Succinctly - Michele Aponte
- Visual Studio .NET Tips and Tricks (VS 2003-2005 only)
- Visual Studio 2019 Succinctly - Alessandro Del Sole
Nim
- Nim Basics - narimiran
- Nim by Example - Flaviu Tamas
- Nim Days - Ahmed Thabet
NoSQL
- CouchDB: The Definitive Guide
- Extracting Data from NoSQL Databases: A Step towards Interactive Visual Analysis of NoSQL Data - Petter Nasholm (PDF)
- Graph Databases
- Introduction to MongoDB - Tutorials Point
- MongoDB Koans
- MongoDB Succinctly, Syncfusion (PDF, Kindle) (email address requested, not required)
- NoSQL Databases - Christof Strauch (PDF)
- The Little MongoDB Book
- The Little Redis Book - K. Seguin (PDF, Epub)
Oberon
- Algorithms and Data-Structures - Niklaus Wirth (PDF)
- Object-Oriented Programming in Oberon-2 - Hanspeter Mössenböck (PDF)
- Programming in Oberon - Niklaus Wirth (PDF)
Objective-C
- Google's Objective-C Style Guide
- Object-Oriented Programming with Objective-C
- Objective-C Notes for Professionals - Compiled from StackOverflow Documentation (PDF)
- Objective-C Succinctly, Syncfusion (PDF, Kindle) (email address requested, not required)
- Programming With Objective-C
OCaml
- Developing Applications With Objective Caml
- Functional Programming in OCaml - Michael R. Clarkson
- OCaml Scientific Computing - Liang Wang, Jianxin Zhao (HTML) (:construction: in process)
- Real World OCaml
- Think OCaml - Allen B. Downey and Nicholas Monje
- Unix System Programming in OCaml Github Repo
- Using, Understanding, and Unraveling The OCaml Language: From Practice to Theory and vice versa - Didier Rémy
Octave
- Octave Programming - Wikibooks
OpenMP
- A Guide To OpenMP
- OpenMP Application Programming Interface Standard Version 4.0 (PDF)
- OpenMP Application Programming Interface Standard Version 5.0 (PDF)
OpenResty
OpenSCAD
- OpenSCAD User Manual - Wikibooks
TrueOS
Perl
- Beginning Perl
- Data Munging with Perl (PDF)
- Embedding Perl in HTML with Mason - D. Rolsky, K. Williams
- Essential Perl (PDF)
- Exploring Programming Language Architecture in Perl
- Extreme Perl - R. Nagier (HTML, PDF)
- Higher-Order Perl - M. J. Dominus (PDF)
- Impatient Perl
- Learning Perl The Hard Way
- Modern Perl 5
- Perl & LWP
- Perl 5 Internals
- Perl for the Web - C. Radcliff
- Perl Notes for Professionals - Compiled from StackOverflow Documentation (PDF)
- Perl Training Australia - Course Notes
- Plack Handbook
- SDL::Manual Writing Games in Perl
- Template Toolkit Documentation
- The DBIx-Class Book
- The PDL Book (PDF)
- Web Client Programming with Perl
PHP
- Clean Code PHP
- PHP 5 Power Programming (PDF)
- PHP Best Practices
- PHP Internals Book
- PHP Notes for Professionals - Compiled from StackOverflow Documentation (PDF)
- PHP Pandas - Dayle Rees
- PHP Programming - Wikibooks
- PHP Reference: Beginner to Intermediate PHP5 - Mario Lurig (PDF)
- PHP Security Guide
- PHP: The Right Way
- PHPUnit Manual - Sebastian Bergmann (PDF)
- Practical PHP Programming
- Practical PHP Testing
- Survive The Deep End: PHP Security
- Using Libsodium in PHP Projects
CakePHP
- CakePHP Cookbook 2.x (PDF)
CodeIgniter
Drupal
- The Tiny Book of Rules (PDF)
Laravel
- 100 (and counting) Laravel Quick Tips - Povilas Korop / LaravelDaily Team (PDF)
- Laravel 5.x Official Documentation. Synced Daily (Leanpub account or valid email requested)
- Laravel Best Practices
- Laravel: Code Bright - Dayle Rees
- Laravel: Code Happy - Dayle Rees
- Laravel: Code Smart - Dayle Rees
- Laravel Collections Unraveled - Jeffrey Madsen (Leanpub account or valid email requested)
Symfony
- Symfony 5: The Fast Track
- The Symfony Best practices 4.1.x (PDF)
- The Symfony Book 2.8.x
- The Symfony Book 3.4.x
- The Symfony Book 4.4.x
Zend
PicoLisp
PostgreSQL
- Postgres Official Documentation
- Postgres Succinctly (PDF, Kindle) (email address requested, not required)
- PostgreSQL Tutorial - Tutorials Point
- Practical PostgreSQL
- The Internals of PostgreSQL for database administrators and system developers
PowerShell
- A Unix Person's Guide to PowerShell - The DevOps Collective, Inc. (PDF, ePub, MOBI, HTML) (Leanpub account or valid email requested)
- Creating HTML Reports in PowerShell - The DevOps Collective, Inc. (PDF, ePub, MOBI, HTML) (Leanpub account or valid email requested)
- DevOps: The Ops Perspective - The DevOps Collective, Inc. (PDF, ePub, MOBI, HTML) (Leanpub account or valid email requested)
- Ditch Excel: Making Historical & Trend Reports in PowerShell - The DevOps Collective, Inc. (PDF, ePub, MOBI, HTML) (Leanpub account or valid email requested)
- Layman’s Guide to PowerShell 2.0 remoting (PDF)
- Learn PowerShell Core 6.0 - David das Neves, Jan-Hendrik Peters (Packt account required)
- Learn PowerShell in Y Minutes
- Mastering PowerShell v2
- PowerShell 101: The No-Nonsense Beginner’s Guide to PowerShell - Mike F. Robbins (Leanpub account or valid email requested)
- PowerShell 2.0 – One CMDLET At A Time (PDF)
- PowerShell Notes for Professionals - Compiled from StackOverflow documentation (PDF)
- PowerShell Succinctly, Syncfusion (PDF, Kindle) (email address requested, not required)
- PowerShell Tips to Write By - Adam Bertram (Leanpub account or valid email requested) (:construction: in process)
- Secrets of PowerShell Remoting - The DevOps Collective, Inc. (PDF, ePub, MOBI, HTML) (Leanpub account or valid email requested)
- The Big Book of PowerShell Error Handling - The DevOps Collective, Inc. (PDF, ePub, MOBI, HTML) (Leanpub account or valid email requested)
- The Big Book of PowerShell Gotchas - The DevOps Collective, Inc. (PDF, ePub, MOBI, HTML) (Leanpub account or valid email requested)
- The Monad Manifesto - Annotated - The DevOps Collective, Inc. (PDF, ePub, MOBI, HTML) (Leanpub account or valid email requested)
- The PowerShell + DevOps Global Summit Manual for Summiteers - The DevOps Collective, Inc. (PDF, ePub, MOBI, HTML) (Leanpub account or valid email requested)
- Why PowerShell? - The DevOps Collective, Inc. (PDF, ePub, MOBI, HTML) (Leanpub account or valid email requested)
- Windows PowerShell Networking Guide - The DevOps Collective, Inc. (PDF, ePub, MOBI, HTML) (Leanpub account or valid email requested)
Processing
Prolog
- Adventure in Prolog
- Applications of Prolog - Attila Csenki, Bookboon. (email address requested, not required)
- Coding Guidelines for Prolog - Michael A. Covington, Roberto Bagnara, Richard A. O'Keefe, Jan Wielemaker, Simon Price
- Concise Intro to Prolog
- Expert Systems in Prolog
- GNU Prolog Manual (PDF)
- Introduction to Prolog for Mathematicians - J. Ireson-Ireson-Paine
- Learn Prolog Now!
- Logic, Programming and Prolog (2ed)
- Natural Language Processing Techniques in Prolog - P. Blackburn, K. Striegnitz
- Prolog and Natural - Language Analysis - Fernando C. N. Pereira, Stuart M. Shieber
- Prolog for Programmers
- Prolog Problems - Werner Hett
- Prolog Techniques - Attila Csenki, Bookboon. (email address requested, not required)
- Prolog Tutorial
- The Art of Prolog, Second Edition - Leon S. Sterling, Ehud Y. Shapiro (Open Access)
- The First 10 Prolog Programming Contests - Bart Demoen, Phuong-Lan Nguyen, Tom Schrijvers, Remko Tronçon
- Warren's Abstract Machine: A Tutorial Reconstruction - Hassan A¨it-Kaci
Constraint Logic Programming (extended Prolog)
PureScript
- PureScript By Example - Phil Freeman
Python
- 20 Python Libraries You Aren't Using (But Should) - Caleb Hattingh
- A Beginner's Python Tutorial - Wikibooks
- A Byte of Python (3.x) (HTML, PDF, EPUB, Mobi)
- A Guide to Python's Magic Methods - Rafe Kettler
- A Whirlwind Tour of Python - Jake VanderPlas (PDF) (EPUB, MOBI)
- Architecture Patterns with Python - Harry J.W. Percival & Bob Gregory (HTML)
-
Automate the Boring Stuff with Python, 2nd Edition: Practical Programming for Total Beginners - Al Sweigart (3.8)
- Automate the Boring Stuff with Python: Practical Programming for Total Beginners - Al Sweigart (3.4)
- Beej's Guide to Python Programming - For Beginners - B. Hall (HTML,PDF)
- Biopython (PDF)
- Build applications in Python the antitextbook (3.x) (HTML, PDF, EPUB, Mobi)
-
Building Skills in Object-Oriented Design, V4 - Steven F. Lott (3.7)
- Building Skills in Object-Oriented Design, Release 2.2.1 - Steven F. Lott (PDF) (2.2.1)
- Building Skills in Object-Oriented Design, Release 3.1 - Steven F. Lott (PDF) (3.1)
- Building Skills in Python - Steven F. Lott (PDF) (2.6)
- Code Like a Pythonista: Idiomatic Python - David Goodger
- CodeCademy Python
- Composing Programs (3.x)
- Cracking Codes with Python - Al Sweigart
- Data Structures and Algorithms in Python - B. R. Preiss (PDF)
-
Dive into Python 3 - Mark Pilgrim (3.0)
- Dive into Python - Mark Pilgrim (2.3)
- From Python to NumPy
- Full Stack Python
- Functional Programming in Python - David Mertz
- Fundamentals of Python Programming - Richard L. Halterman (PDF) (:construction: in process)
- Google's Python Class (2.4 - 2.x)
- Google's Python Style Guide
- Hadoop with Python - Zachary Radtka, Donald Miner
- Hands-On Natural Language Processing with Python - Rajesh Arumugam, Rajalingappaa Shanmugamani (Packt account required)
- Hitchhiker's Guide to Python! (2.6)
- How to Code in Python 3 - Lisa Tagliaferri (PDF)
- How to Make Mistakes in Python - Mike Pirnat (PDF) (1st edition)
-
How to Think Like a Computer Scientist: Learning with Python, Interactive Edition - Brad Miller, David Ranum, Jeffrey Elkner, Peter Wentworth, Allen B. Downey, Chris Meyers, and Dario Mitchell (3.2)
- How to Think Like a Computer Scientist: Learning with Python 1st Edition - Allen B. Downey, Jeff Elkner and Chris Meyers (2.4) (HTML, PDF)
- How to Think Like a Computer Scientist: Learning with Python 2nd Edition - Jeffrey Elkner, Allen B. Downey, and Chris Meyers (Using Python 2.x)
- How to Think Like a Computer Scientist: Learning with Python 3 (RLE) - Peter Wentworth, Jeffrey Elkner, Allen B. Downey, and Chris Meyers (PDF)
- Intermediate Python - Muhammad Yasoob Ullah Khalid (1st edition)
-
Introduction to Programming with Python (3.3)
- Introduction to Programming Using Python - Cody Jackson (1st edition) (2.3)
- Introduction to Python - Kracekumar (2.7.3)
- Invent Your Own Computer Games With Python - Al Sweigart (3.1)
- Learn Python, Break Python
- Learn Python Programming, Second Edition - Fabrizio Romano (Packt account required)
- Learn to Program Using Python - Cody Jackson (PDF)
- Learning to Program
- Lectures on scientific computing with python - J.R. Johansson (2.7)
- Making Games with Python & Pygame - Al Sweigart (2.7)
- Math for programmers (using python)
- Modeling and Simulation in Python - Allen B. Downey (PDF)
- Modeling Creativity: Case Studies in Python - Tom D. De Smedt (PDF)
- Natural Language Processing (NLP) with Python — Tutorial (PDF)
- Natural Language Processing with Python (3.x)
-
Non-Programmer's Tutorial for Python 3 - Wikibooks (3.3)
- Non-Programmer's Tutorial for Python 2.6 - Wikibooks (2.6)
- Picking a Python Version: A Manifesto - David Mertz
- Porting to Python 3: An In-Depth Guide (2.6 - 2.x & 3.1 - 3.x)
- Practical Programming in Python - Jeffrey Elkner (PDF)
- Problem Solving with Algorithms and Data Structures using Python - Bradley N. Miller and David L. Ranum (3.x)
- Program Arcade Games With Python And Pygame (3.3)
- Programming Computer Vision with Python (PDF)
- Programming for Non-Programmers, Release 2.6.2 - Steven F. Lott (PDF) (2.6)
- Python 101 - Michael Driscoll (HTML, TEXT)
- Python 2 Official Documentation (PDF, HTML, TEXT) (2.x)
- Python 2.7 quick reference - John W. Shipman (PDF) (2.7)
- Python 3 Official Documentation (PDF, EPUB, HTML, TEXT) (3.x)
- Python 3 Tutorial
- Python Data Science Handbook - Jake VanderPlas (HTML, Jupyter Notebooks)
- Python for Everybody - Charles Russell Severance (PDF, EPUB, HTML) (3.x)
- Python for Informatics: Exploring Information - Charles Russell Severance (2.7.5)
- Python for you and me (2.7.3)
- Python for you and me (3.x)
- Python Idioms (PDF)
- Python in Education - Nicholas Tollervey
- Python in Hydrology - Sat Kumar Tomer
- Python Koans (2.7 or 3.x)
- Python Machine Learning By Example - Yuxi (Hayden) Liu (Packt account required)
- Python Notes for Professionals - Compiled from StackOverflow documentation (PDF)
- Python Practice Book (2.7.1)
- Python Practice Projects
- Python Programming - Wikibooks (2.7)
- Python Programming - Wikibooks (PDF) (2.6)
- Python Tutorial - Tutorials Point
- Scipy Lecture Notes
- SICP in Python (3.2)
- Slither into Python: An introduction to Python for beginners (3.7)
- Suporting Python 3: An In-Depth Guide (2.6 - 2.x & 3.1 - 3.x)
- Test-Driven Web Development with Python - Harry Percival (3.3 - 3.x)
- Text Processing in Python - David Mertz (2.3 - 2.x)
- The Coder's Apprentice: Learning Programming with Python 3 - Pieter Spronck (PDF) (3.x)
- The Definitive Guide to Jython, Python for the Java Platform - Josh Juneau, Jim Baker, Victor Ng, Leo Soto, Frank Wierzbicki (2.5)
- The Little Book of Python Anti-Patterns (Source)
- The Programming Historian - William J. Turkel, Adam Crymble and Alan MacEachern
- The Python GTK+ 3 Tutorial
- The Standard Python Library - Fredrik Lundh
- Think Complexity - Allen B. Downey (2nd Edition) (PDF, HTML)
- Think DSP - Digital Signal Processing in Python - Allen B. Downey (PDF, HTML)
-
Think Python 2nd Edition - Allen B. Downey (3.x) (HTML, PDF)
- Think Python First Edition - Allen B. Downey (2.x) (HTML, PDF)
- Tiny Python 3.6 Notebook - Matt Harrison (3.6)
- Web2py: Complete Reference Manual, 6th Edition (pre-release) (2.5 - 2.x)
Django
- Django Girls Tutorial (1.11)
- Django Official Documentation (PDF) (1.5)
- Django Official Documentation (PDF) (1.7)
- Django Official Documentation (PDF) (1.9)
- Django Official Documentation (PDF) (1.10)
- Django Official Documentation (PDF) (2.2)
- Django Official Documentation (PDF) (3.1)
- Django RESTful Web Services - Gaston C. Hillar (Packt account required)
- Django Web Framework (Python) - MDN contributors
- Djen of Django
- Effective Django (1.5)
- How to Tango With Django (1.7)
Flask
- Explore Flask - Robert Picard
- Flask Documentation - Pallets
- The Flask Mega-Tutorial - Miguel Grinberg (0.9)
Kivy
Pandas
- Learn Pandas - Hernan Rojas (0.18.1)
- pandas: powerful Python data analysis toolkit - Wes McKinney and the Pandas Development Team (:construction: in process) (PDF)
Pyramid
Tornado
QML
- Qt5 Cadaques - Juergen Bocklage-Ryannel and Johan Thelin (HTML, PDF, ePub) (:construction: in process)
R
- Advanced R Programming - Hadley Wickham
- An Introduction to Statistical Learning with Applications in R - Gareth James, Daniela Witten, Trevor Hastie and Robert Tibshirani (PDF)
- Cookbook for R - Winston Chang
- Data Analysis and Prediction Algorithms with R - Rafael A. Irizarry
- Data Analysis for the Life Sciences - Rafael A Irizarry, Michael I Love (Leanpub account or valid email requested)
- Efficient R programming - Colin Gillespie, Robin Lovelace
- Exploratory Data Analysis with R - Roger D. Peng (Leanpub account or valid email requested)
- Introduction to Probability and Statistics Using R - G. Jay Kerns (PDF)
- Learning Statistics with R - Danielle Navarro
- ModernDive - Chester Ismay and Albert Y. Kim
- Practical Regression and Anova using R - Julian J. Faraway (PDF)
- R for Data Science - Garrett Grolemund and Hadley Wickham
- R for Spatial Analysis (PDF)
- R Language for Programmers - John D. Cook
- R Notes for Professionals - Compiled from StackOverflow Documentation (PDF)
- R Packages - Hadley Wickham
- R Practicals (PDF)
- R Programming - Wikibooks
- R Programming for Data Science - Roger D. Peng (Leanpub account or valid email requested)
- R Succinctly, Syncfusion (PDF, Kindle) (email address requested, not required)
- Summary and Analysis of Extension Program Evaluation in R - Salvatore S. Mangiafico
- The caret Package - Max Kuhn
- The R Inferno - Patrick Burns (PDF)
- The R Language
- The R Manuals
- Tidy Text Mining with R - Julia Silge and David Robinson
Racket
- How to Design Programs - Matthias Felleisen, Robert Bruce Findler, Matthew Flatt, Shriram Krishnamurthi
- Programming Languages: Application and Interpretation
- The Racket Guide
Raku
- Metagenomics - Ken Youens-Clark
- Perl 6 at a Glance - Andrew Shitov (PDF)
- Raku Guide (HTML) (PDF)
- Raku One-Liners - Andrew Shitov (PDF)
- Raku Programming - Wikibooks (HTML)
- Think Raku - Laurent Rosenfeld, with Allen B. Downey (PDF)
- Using Perl 6 (:construction: project is dead)
- X=Raku - Learn X in Y minutes (HTML)
Raspberry Pi
- Raspberry Pi: Measure, Record, Explore - Malcolm Maclean (HTML)
- Raspberry Pi Users Guide - (2012) - Eben Upton (PDF)
- The Official Raspberry Pi Project Book (PDF)
REBOL
- Learn REBOL - Nick Antonaccio
Ruby
- A community-driven Ruby style guide
- CodeCademy Ruby
- Developing Games With Ruby - Tomas Varaneckas
- I Love Ruby
- Introduction to Programming with Ruby - Launch School
- Just Enough Ruby to Get By
- Learn Ruby First - Frederick John
- Learn to Program - Chris Pine
- Mr. Neighborly's Humble Little Ruby Book
- Object Oriented Programming with Ruby - Launch School
- Practicing Ruby
- Programming Ruby
- Ruby Best Practices - Gregory Brown (PDF)
- Ruby Essentials
- Ruby Hacking Guide
- Ruby in Twenty Minutes
- Ruby Koans
- Ruby Learning
- Ruby Notes for Professionals - Compiled from StackOverflow Documentation (PDF)
- Ruby Programming
- Ruby User's Guide
- Ruby Web Dev: The Other Way - Yevhen Kuzminov
- Rubyfu
- The Bastards Book of Ruby
- The Book Of Ruby - Huw Collingbourne
- The Definitive Ruby Tutorial For Complete Beginners - Jesus Castello
- The Little Book Of Ruby - Huw Collingbourne
- The Ruby Reference - Victor Shepelev
- The Unofficial Ruby Usage Guide (at Google) - Ian Macdonald
- Using Blocks in Ruby - Jay McGavren (PDF)
- Why's (Poignant) Guide to Ruby
RSpec
Ruby on Rails
- A community-driven Rails style guide
- Api on Rails 6 - Alexandre Rousseau
- Building REST APIs with Rails
- Kestrels, Quirky Birds, and Hopeless Egocentricity - Reg Braithwaite
- Learn Ruby on Rails as You Modify a Craigslist Clone
- Learn Ruby on Rails: Book One - Daniel Kehoe (PDF, EPUB) (Leanpub account or valid email requested)
- Objects on Rails - Avdi Grimm
- Rails Girls Guides
- Ruby Notes for Professionals - Compiled from StackOverflow Documentation (PDF)
- Ruby on Rails 3.2 - Step by Step
- Ruby on Rails 4.0 Guide
- Ruby on Rails Guides
- Ruby on Rails Notes for Professionals - Compiled from StackOverflow Documentation (PDF)
- Ruby on Rails Tutorial (Rails 5): Learn Web Development with Rails - Michael Hartl
- Upgrading to Rails 4
Sinatra
Rust
- Rust by Example
- Rust for Rubyists - Steve Klabnik
- The Rust Programming Language
- The Rustonomicon
- Why Rust? (PDF)
Sage
- Sage for Power Users - William Stein (PDF)
- The Sage Manuals
Scala
- A Scala Tutorial for Java programmers (PDF)
- Advanced Scala with Cats - Noel Welsh and Dave Gurnell (PDF, HTML, EPUB) (email address requested, not required)
- Another tour of Scala - David Copeland
- Creative Scala - Noel Welsh and Dave Gurnell (PDF, HTML, EPUB) (email address requested, not required)
- EAI Patterns with Actor Model - Vaughn Vernon
- Effective Scala
- Essential Scala - Noel Welsh and Dave Gurnell (PDF, HTML, EPUB) (email address requested, not required)
- Functional Programming for Mortals - Sam Halliday
- Functional Programming, Simplified (Scala edition) - Alvin Alexander (free preview (400 pages from 595), PDF)
- Hello, Scala - Alvin Alexander (free preview (120 pages from 257), PDF)
- Learning Scala in small bites
- Learning Scalaz
- Pro Scala: Monadic Design Patterns for the Web
- Programming in Scala, First Edition - by M. Odersky, L. Spoon, B. Venners
- Pure functional HTTP APIs in Scala - Jens Grassel
- PythonToScala - Rob Story
- S-99: Ninety-Nine Scala Problems - Phil! Gold
- Scala & Design Patterns: Exploring Language Expressivity - Fredrik Skeel Løkke (PDF)
- Scala By Example - M. Odersky (PDF)
- Scala Cookbook: Bonus Chapters - Alvin Alexander (PDF)
- Scala for Perl 5 Programmers - Breno G. de Oliveira
- Scala School by Twitter
- Scala Succinctly - Chris Rose
- Scala Tutorial - Tutorials Point
- tetrix in Scala
- The Neophyte's Guide to Scala - Daniel Westheide
- The Type Astronaut's Guide to Shapeless - Dave Gurnell (PDF, HTML, EPUB) (email address requested, not required)
- Xtrace
Lift
- Exploring Lift (published earlier as "The Definitive Guide to Lift", PDF)
- Lift
- Lift Cookbook - Richard Dallaway
- Simply Lift - David Pollak (PDF)
Play Scala
- Essential Play - Dave Gurnell (PDF, HTML, EPUB) (email address requested, not required)
- Play Framework Recipes - Alvin Alexander
Scheme
- A Pamphlet Against R. Computational Intelligence in Guile Scheme
- An Introduction to Scheme and its Implementation
- Concrete Abstractions: An Introduction to Computer Science Using Scheme - M. Hailperin, B. Kaiser, K. Knight
- Scheme Tutorial
- Simply Scheme: Introducing Computer Science - B. Harvey, M. Wright
- Teach Yourself Scheme in Fixnum Days
- The Scheme Programming Language: Edition 3 - The Scheme Programming Language: Edition 4
- Write Yourself a Scheme in 48 Hours - Wikibooks
Scilab
Scratch
- An Introductory Computing Curriculum Using Scratch
- Computer Science Concepts in Scratch
- Learn to Code with Scratch - The MagPi magazine (PDF)
- Scratch Programming Playground - Al Sweigart
Sed
Self
Smalltalk
- Deep into Pharo - Alexandre Bergel, Damien Cassou, Stéphane Ducasse, Jannik Laval
- Dynamic Web Development with Seaside - S. Ducasse, L. Renggli, C. D. Shaffer, R. Zaccone
- Enterprise Pharo: a Web Perspective
- Numerical Methods with Pharo - Didier Besset, Stéphane Ducasse, Serge Stinckwich
- Pharo by Example - Andrew P. Black et al. (Smalltalk Implementation and IDE)
- Stef's Free Online Smalltalk Books (meta-list)
Snap
- Snap! Reference Manual - B. Harvey, J. Mönig (PDF)
Spark
Splunk
- Splunk 7.x Quick Start Guide - James H. Baxter (Packt account required)
SQL (implementation agnostic)
- Developing Time-Oriented Database Applications in SQL - Richard T. Snodgrass (PDF)
- SQL For Web Nerds
- SQL Notes for Professionals - Compiled from StackOverflow Documentation (PDF)
- SQL Queries Succinctly - Nick Harrison
- Use The Index, Luke!: A Guide To SQL Database Performance
SQL Server
- Best of SQLServerCentral.com Vol 7 *(RedGate, By SQLServerCentral Authors)
- Brad's Sure Guide to SQL Server Maintenance Plans - Brad McGehee (PDF) (email address requested)
- Defensive Database Programming - Alex Kuznetsov (PDF)
- Fundamentals Of SQL Server 2012 Replication - Sebastian Meine (PDF) (email address requested)
- How to Become an Exceptional DBA, Second edition - Brad McGehee (PDF)
- Inside the SQL Server Query Optimizer - Benjamin Nevarez (PDF) (email address requested)
- Introducing Microsoft SQL Server 2008 R2
- Introducing Microsoft SQL Server 2012
- Introducing Microsoft SQL Server 2014
- Mastering SQL Server Profiler - Brad McGehee (PDF)
- Microsoft SQL Server Notes for Professionals - Compiled from StackOverflow Documentation (PDF)
- Performance Tuning with SQL Server Dynamic Management Views - Tim Ford, Louis Davidson (PDF)
- Protecting SQL Server Data - John Magnabosco (PDF)
- SQL Server 2012 Tutorials: Reporting Services
- SQL Server 2017 Administrator's Guide - Marek Chmel, Vladimír Mužný (Packt account required)
- SQL Server Backup and Restore - Shawn McGehee (PDF) (email address requested)
- SQL Server Execution Plans, Third Edition - Grant Fritchey (PDF)
- SQL Server for C# Developers Succinctly - Sander Rossel
- SQL Server Hardware - Glenn Berry (PDF)
- SQL Server Internals: In-Memory OLTP - Kalen Delaney (PDF)
- SQL Server Metadata Succinctly - Joseph D. Booth
- SQL Server Source Control Basics - Rob Sheldon, Rob Richardson, Tony Davis (PDF)
- SQL Server Statistics - Holger Schmeling (PDF)
- SQL Server Stumpers Vol.5 (PDF)
- SQL Server Tacklebox - Rodney Landrum (PDF)
- SQL Server Transaction Log Management - Tony Davis, Gail Shaw (PDF)
- The Art of SQL Server FILESTREAM - Jacob Sebastian, Sven Aelterman (PDF)
- The Art of XSD - Jacob Sebastian (PDF)
- The Best of SQLServerCentral.com Vol 7 (PDF)
- The Redgate Guide to SQL Server Team-based Development - Phil Factor, Grant Fritchey, Alex Kuznetsov, Mladen Prajdić (PDF)
- Troubleshooting SQL Server: A Guide for the Accidental DBA - Jonathan Kehayias, Ted Krueger (PDF)
Standard ML
- Introduction to Standard ML - Atsushi Ohori (PDF)
- ML for the Working Programmer, 2nd Edition - Lawrence C. Paulson
- Programming in Standard ML '97 - Stephen Gilmore, University of Edinburgh
- Programming in Standard ML, DRAFT - Robert Harper (PDF)
- SML# Document - Atsushi Ohori, Katsuhiro Ueno
- The Definition of Standard ML (Revised) - SMLFamily GitHub project (PDF)
Subversion
Swift
- Essential Swift - Krzysztof Kowalczyk (Compiled from StackOverflow Documentation)
- Hacking with Swift
- Swift Notes for Professionals - Compiled from StackOverflow Documentation (PDF)
- The Swift Programming Language (HTML) (iBook)
- Using Swift with Cocoa and Objective-C (HTML) (iBook)
Vapor
- Vapor 3 Tutorial For Beginners - Tibor Bödecs
- Vapor Official Docs
Tcl
- Tcl Programming - Richard.Suchenwirth, et. al.
TEI
- What is the Text Encoding Initiative? - Lou Bernard
Teradata
Tizen
- Guide to Developing Tizen Native Application - Jung, Dong-Geun (Denis.Jung) (PDF)
TLA
- Specifying Systems: The TLA+ Language and Tools for Hardware and Software Engineers - Leslie Lamport (Postscript or PDF)
TypeScript
- Learn TypeScript in Y Minutes
- TypeScript Accelerated - James Porter
- TypeScript Deep Dive
- TypeScript for C# Programmers
- TypeScript Succinctly, Syncfusion (PDF, Kindle) (email address requested, not required)
Angular
- Angular 2+ Notes for Professionals - Compiled from StackOverflow documentation (PDF)
- Angular Docs
- Build a Full-Stack Web Application Using Angular & Firebase - Ankit Sharma
Deno
- Deno Manual
- FlavioCopes Deno Handbook - free PDF with registration
Unix
- An Introduction to Unix
- Beej's Guide to Unix Interprocess Communication - B. Hall (HTML,PDF)
- Commentary on the Sixth Edition UNIX Operating System - J. Lions
- INTRODUCTION TO UNIX - Mark A. Thomas
- Unix as IDE - Tom Ryder (epub, mobi)
- UNIX Commands and Concepts - Robert I. Pitts
- Unix for Poets - Kenneth Ward Church (PDF)
- Unix Toolbox - Colin Barschel
- UNIX Tutorial for Beginners
Verilog
- Verilog, Formal Verification and Verilator Beginner's Tutorial - Daniel E. Gisselquist, Ph.D.
- Verilog Quick Reference Guide - Sutherland HDL (PDF)
- Verilog Tutorial
VHDL
- Free Range VHDL - Bryan Mealy, Fabrizio Tappero (TeX and PDF)
- VHDL Tutorial
- VHDL Tutorial: Learn By Example
Vim
- A Byte of Vim
- Learn Vim (the Smart Way) (HTML) (:construction: in process)
- Learn Vim Progressively
- Learn Vimscript the Hard Way
- Use Vim Like A Pro - Tim Ottinger (Leanpub account or valid email requested)
- Vi Improved -- Vim - Steve Oualline (PDF)
- VIM-GALORE - All things Vim! (HTML)
- Vim Recipes (PDF)
- Vim Regular Expressions 101
Visual Basic
- Visual Basic .NET Notes for Professionals - Compiled from StackOverflow Documentation (PDF)
- Visual Basic Essentials
- Visual Basic Official Docs
Visual Prolog
Web Services
- RESTful Web Services (PDF)
Windows 8
- Programming Windows Store Apps with HTML, CSS, and JavaScript, Second Edition - Kraig Brockschmidt (PDF)
Windows Phone
- Developing An Advanced Windows Phone 7.5 App That Connects To The Cloud
- Windows Phone 8 Development Succinctly - Matteo Pagani (PDF)
- Windows Phone 8.1 Development for Absolute Beginners
- Windows Phone Programming Blue Book
Workflow
xBase (dBase / Clipper / Harbour)
- Application Development with Harbour - Wikibooks
- CA-Clipper 5.2 Norton Guide
- Clipper Tutorial: a Guide to Open Source Clipper(s) - Wikibooks
-
🔝 Back to the top
 Git Tutorial With Command Line
This is a tutorial on git using the command line. My goal is to make this tutorial as deep as it gets within time, so this tutorial will evolve gradually within time. However, first things first, because that I believe that an ordinary developer should learn basic git concepts and what it does, when to use what, I'll focus on that at first. Later then, I want to extend this tutorial about advanced features of git.
TOC
- 0 Introduction
- 1 Branches
- 2 Branches Demo
- 4 Working With Remote
- 5 More On Branching
- 6 Merge Basics
- 7 Git Log Basics
- 8 Fixing Merge Conflicts
- 9 Revert Basics
- 10 Rebase Basics
- 11 Cherry Picking
0 Introduction
Let's first think about the concept. Git is a versioning tool, and what's a versioning tool. Think about this, you with your team is working in a daily magazine. There are writers and also multiple reviewers and editors. Sometimes, even, a simple article, possibly written by more than one writer. After the article is finished with a draft, reviewers may put some note, editors change the article. So this means that, before a final version of an article, several people are working with the initial article. How they are going to be aware of the changes at the same time and work wisely? That's the case example of a version control.
Assuming you are the writer. You make an initial draft, version 1, make multiple copies for the same draft, let's say, there are 2 editors whose names are Mark and David, working with you, then making 2 draft copies of version one. Then, Mark makes a change in paragraph 2, and make the version draft 1.1. However, editor 2 makes a change also on paragraph 2, but also on paragraph 4. Assuming David is a senior editor, he will be the one who decides for all the changes. It's very easy to apply on draft version 1.2 for parapraph 4 because, there are no changes, however, on paragraph 2, Mark made some changes so David has 3 options;
- Apply only Mark's changes (ignoring his own changes)
- Apply only his own changes (ignoring Mark's changes)
- Make a mix of Mark's changes and his.
After then, draft version 1.3 which is a merge of 1.1 and 1.2, will be released and can be sent to the reviewers.
In this example, I just wanted to mention 2 things. First of all, Git is a version tool, and secondly, it's not dependent on programming languages or working domain. It's domain-agnostic, it only focuses on versions based on files.
1 Branches
First of all, I'll call any project as "repository". This can be a repository of a Magazine - March, or a repository of a framework written in Java, or it could containt just a README.md file. That's not important. Just to set the terminology right.
In the introduction part, I've written about how people can work with different versions at the same time. So, if there is an initial version of a file, let's say, version 1.0, then if two people are going to work with that, then it can be cloned (copied) so that different workers can work with their own version. This is called as "branch" in git. A branch is a version of the "repository" inherited from it's parent version.
Let's give a real world example. You are to write a framework. It has database part, and business-logic part, which are located in different packages. Architect makes a boiler-plate code, and initialized git with it, because it's the first branch initialized, it's called as "master" branch, every other branch inherited either from this branch, or inherited from any branch inherited from it. Then, the developers who is going to work with the database part, will have his/her own branch inherited from the master branch. Let's call it "repo-db-feature", and the developer who is going to work with the business-logic will have his/her own branch too, "repo-business-feature".
2 Branches Demo
In this demo, we will see how a simple branch is created.
- Make a folder, called as "repo1"
-
Make a file called as "content.txt". The content of the file should be as follows;
This is an initial sentence of the file from master. - Apply the following commands;
git init
git status
git add content.txt
git status
git commit -m "initial commit"
git status
The output in my windows command line is as follows;
D:\repo1>git init
Initialized empty Git repository in D:/repo1/.git/

D:\repo1>git status
On branch master

No commits yet

Untracked files:
  (use "git add <file>..." to include in what will be committed)

        content.txt

nothing added to commit but untracked files present (use "git add" to track)

D:\repo1>git add content.txt

D:\repo1>git status
On branch master

No commits yet

Changes to be committed:
  (use "git rm --cached <file>..." to unstage)

        new file:   content.txt


D:\repo1>git commit -m "initial commit"
[master (root-commit) c351f84] initial commit
 1 file changed, 1 insertion(+)
 create mode 100644 content.txt

D:\repo1>git status
On branch master
nothing to commit, working tree clean
Let's explain what do these commands.
3 Basic Git Commands
In the previous section, we have used the following commands.
- git init
- git status
- git add content.txt
- git commit -m "initial commit"
-
🔝 Back to the top
3-a git init
This is the command that initializes the repository. When you have a repository, in the master folder, you run command and git makes a secret folder called as ".git", stores git-related files so that git can track everything that changes under this command.
3-b git status
This is the command when we want to see a summary of the changed/tracked/untracked files.
The following command says that we have a file which is not tracked by git. Because we created this file after we git-init, the git system doesn't track the file but status reports that to us.
D:\repo1>git status
On branch master

No commits yet

Untracked files:
  (use "git add <file>..." to include in what will be committed)

        content.txt

nothing added to commit but untracked files present (use "git add" to track)
3-c git add
After we create a file in a git repository, we run the git status (we don't have to but just to be sure if we need to), and see that there are untracked files. With git-add command, we add them and make git-aware of that;
D:\repo1>git add content.txt

D:\repo1>git status
On branch master

No commits yet

Changes to be committed:
  (use "git rm --cached <file>..." to unstage)

        new file:   content.txt
As you can see, after we add the file, git tells us that there is a new file (or a changed file), to be committed.
3-d git commit
When we commit our changes, they become persistent to the git system. So any changes, you need to add them, and then commit them so that it will be written into your branch.
The command pattern is as follows;
git commit -m "<yourcommitcomment_here>"
Let's take a look at to this;
D:\repo1>git commit -m "initial commit"
[master (root-commit) c351f84] initial commit
 1 file changed, 1 insertion(+)
 create mode 100644 content.txt

D:\repo1>git status
On branch master
nothing to commit, working tree clean
As you can see, after we commit, git status gives us no any information, it seems, it's only interested in new files and changed files. So how are we supposed to be sure that our commit is persisted.
3-e git log
With "git log" command (which is actually a bit complex then it seems with multiple parameters), we can see the list of all the commits like a LIFO stack. So we see on the top of the list, the latest commit.
D:\repo1>git log
commit c351f84ded3f797302e127026fd161f69c2b7f70 (HEAD -> master)
Author: bzdgn <levent.divilioglu@divilioglu.com>
Date:   Sun Oct 18 23:58:42 2020 +0200

    initial commit
Generally, you have lot's of commits but you only need to see the last n commits. Then you should use;
git log -n <numberofcommitsyouwanttosee>
ex: git log -n 2
4 Working With Remote
It's nice to work git in local, and also useful for you to control your own projects' versioning. But when you work with multiple people or in teams, you need to have your repository at remote. To make an example of that, we will use github, so I assume you have already a github account.
A new repository is created on the git-server, in this demo, our git-server will be github but it can also only be bitbucket or any other git-based server.
Here is what we are going to do;
- create a repository named "example" on github
- clone the repository to your local environment (your computer)
- add a simple file named with "content.txt" (with any arbitrary content)
- commit the file to local default branch (in this case, the master branch or microsoft github terminology: main branch)
- push it to the git server (github)
In your github UI, you can create a repository by pressing the + button on top right. When you create it, it will be similar to the following;

You can see that initially you can add a README.md file, and also a .gitignore file (will be discussed later) but you don't have to do that, you can also add them after you create your project.
After you create the project in the server (github), in order to work with that repository, you have to clone it on your local branch. There is a section with https/ssh, as you can see in the following capture;
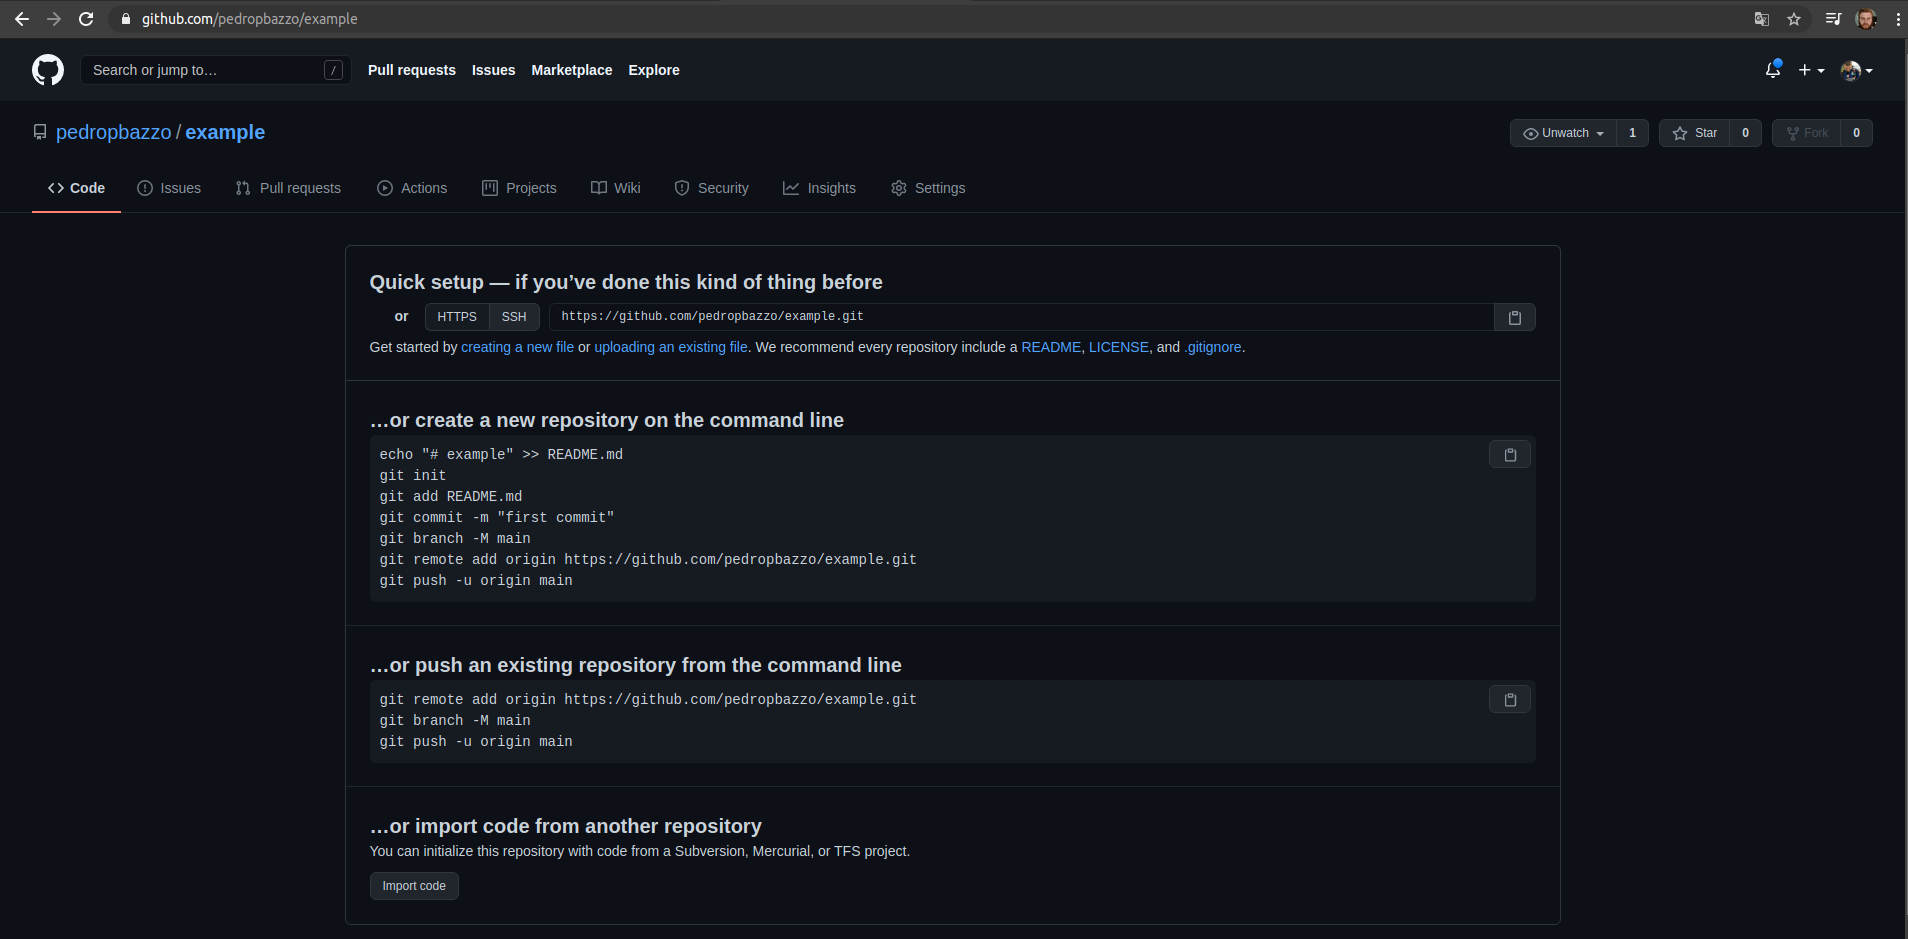
You can use that link, via an ssh or an https protocol (I use ssh always if possible), and clone it to your local environment. Cloning means, you copy everything that the repo in the server has;
For this example, I've used this command to clone my github repo from the server: git clone git@github.com:bzdgn/example.git
But in general, it will be like;
git clone git@github.com:<your_username>/<yourreponame>.git
Get into the main directory of your cloned repository on your local environment, and make a file with any content, named as "content.txt". Then commit and push the file;
git add content.txt
git commit -m "initial commit for content.txt"
git push
git push command (actually you can explicitly the branch name if you are working with multiple branch, but this will push to the only branch which is main), will push the committed changes to the server. Then you can check via github to see the changes. You will see the content.txt file now;

5 More on Branching
Before we go further, there are several basic commands about branching. These are trivial commands for creating and removing branches;
If there are multiple branches, you can checkout on one particular branch with;
git checkout <branch_name>
To create a new branch inherited from existing branch, the following command can be used;
git checkout -b <branch_name>
For example, when you create a new branch with git checkout -b <branch_name> while you are in master, the new branch will be inherited from master. But if you are on a feature branch, then it will be inherited from the feature_branch and create a new branch with the designated branch name.
To rename an existing branch, you can use this command;
git branch -m <old_branch_name> <new_branch_name>
To delete an existing branch, you can use the following;
git branch -d <branch_name>
But beware that if there are unmerged commits, you will get errors
However, you can also force deleting by the capital "D", as written below;
git branch -D <branch_name>
To list all the existing local branches;
git branch
6 Merge Basics
Let's start what is a merge by giving an example. Let's say, in a master/main branch, the November edition of a magazine we have. Every author has their own branches, development/draft brances for their articles for the upcoming November edition. As writer (or developer), you have to write your own article and make a draft branch. This branch of yours contains only changes due to your article, the page you are responsible for. When you are done, that draft must be merged with the master/main branch.
The simples case of a merge is, while you are working on your own branch, no change on master branch is done. This is a specific type of a merge under-the-hood, called as fast-forward. Let's see that within an example.
- Make a folder, called as "repo2", cd to this folder and initialize with git:
git init - create a file with the name "contents2.txt" with the followings;
This is the master version
Entry 1 is about cars
Entry 2 is about roads
Entry 3 is about houses
- Apply
git add contents2.txt - Apply
git commit -m "initial commit from master branch" - Create a new branch, called as feature1:
git checkout -b feature1 - Open "contents2.txt" and update the line starting with "Entry 2" as follows;
This is the master version
Entry 1 is about cars
Entry 2 is about bikes
Entry 3 is about houses
git statusto see the changes- Apply
git add contents2.txt - Apply
git commit -m "feature commit from feature branch"
If everything goes well, your output in your command line should similar to this (depending on the os)
D:\>mkdir repo2

D:\>cd repo2

D:\repo2>git init
Initialized empty Git repository in D:/repo2/.git/

D:\repo2>git add contents2.txt

D:\repo2>git commit -m "initial commit from master branch"
[master (root-commit) bd6ce60] initial commit from master branch
 1 file changed, 4 insertions(+)
 create mode 100644 contents2.txt

D:\repo2>git checkout -b feature1
Switched to a new branch 'feature1'

D:\repo2>git status
On branch feature1
Changes not staged for commit:
  (use "git add <file>..." to update what will be committed)
  (use "git checkout -- <file>..." to discard changes in working directory)

        modified:   contents2.txt

no changes added to commit (use "git add" and/or "git commit -a")

D:\repo2>git add contents2.txt

D:\repo2>git commit -m "feature commit from feature branch"
[feature1 bc569e1] feature commit from feature branch
 1 file changed, 1 insertion(+), 1 deletion(-)
Type git branch to see all the branches;
D:\repo2>git branch
* feature1
  master
To see the changes, let's first checkout the master and apply git-log;
- git checkout master
- git log
As you can see below, there is only 1 commit in master branch;
D:\repo2>git checkout master
Switched to branch 'master'

D:\repo2>git log
commit bd6ce60ea770f37509bc20c79dd13f5ddd23f6ba (HEAD -> master)
Author: bzdgn <levent.divilioglu@divilioglu.com>
Date:   Mon Oct 19 02:15:36 2020 +0200

    initial commit from master branch
Let's do the same for feature1 branch;
- git checkout feature1
- git log
D:\repo2>git checkout feature1
Switched to branch 'feature1'

D:\repo2>git log
commit bc569e1a905b71c6e4315f245b9a1da3803ccb2f (HEAD -> feature1)
Author: bzdgn <levent.divilioglu@divilioglu.com>
Date:   Mon Oct 19 02:16:20 2020 +0200

    feature commit from feature branch

commit bd6ce60ea770f37509bc20c79dd13f5ddd23f6ba (master)
Author: bzdgn <levent.divilioglu@divilioglu.com>
Date:   Mon Oct 19 02:15:36 2020 +0200

    initial commit from master branch
As you can see, there are 2 commits on feature1 branch. So, assuming we are done, we have to apply a merge on master. When we say "merge on master", it means, specifically, merging our existing branch on to master. To do that, normally we checkout on the branch we want to use as a target, and merge the feature branch on to it. But before going further, I want to introduce you the git diff command;
Using git dif we can compare one branch with another (and vice versa), let's apply it so;
git diff feature1 master
The output is as follows;
D:\repo2>git diff feature1 master
diff --git a/contents2.txt b/contents2.txt
index d0a9b56..115ec54 100644
--- a/contents2.txt
+++ b/contents2.txt
@@ -1,4 +1,4 @@
 This is the master version
 Entry 1 is about cars
-Entry 2 is about bikes
+Entry 2 is about roads
 Entry 3 is about houses
\ No newline at end of file
This means, feature1 branch deletes the line starting within the contents2.txt, and adding the line starting with +.
If you apply the other way around, git diff master feature1, you will see that the - and the + lines are interchanged;
D:\repo2>git diff master feature1
diff --git a/contents2.txt b/contents2.txt
index 115ec54..d0a9b56 100644
--- a/contents2.txt
+++ b/contents2.txt
@@ -1,4 +1,4 @@
 This is the master version
 Entry 1 is about cars
-Entry 2 is about roads
+Entry 2 is about bikes
 Entry 3 is about houses
\ No newline at end of file
This makes sense so. Anyways, with the git diff feature1 master command, we see that "roads" word is deleted and "bikes" word is added on the line starting with "Entry 2". Before merging, let's see the last view of the contents2.txt file in master branch;
- git checkout master
- cat contents2.txt (for windows: type contents2.txt)
D:\repo2>git checkout master
Switched to branch 'master'

D:\repo2>type contents2.txt
This is the master version
Entry 1 is about cars
Entry 2 is about roads
Entry 3 is about houses
Let's merge it with master;
git checkout master
git merge feature1
Here is the output of the command line;
D:\repo2>git checkout master
Already on 'master'

D:\repo2>git merge feature1
Updating bd6ce60..bc569e1
Fast-forward
 contents2.txt | 2 +-
 1 file changed, 1 insertion(+), 1 deletion(-)
Let's see the latest merged contents2.txt file content;
This is the master version
Entry 1 is about cars
Entry 2 is about bikes
Entry 3 is about houses
As you can see, it's equalized with the branch version. Let's check that also with the "git log" command, both branches now, after the merge, should have the same commits;
git log
And the output is;
D:\repo2>git log
commit bc569e1a905b71c6e4315f245b9a1da3803ccb2f (HEAD -> master, feature1)
Author: bzdgn <levent.divilioglu@divilioglu.com>
Date:   Mon Oct 19 02:16:20 2020 +0200

    feature commit from feature branch

commit bd6ce60ea770f37509bc20c79dd13f5ddd23f6ba
Author: bzdgn <levent.divilioglu@divilioglu.com>
Date:   Mon Oct 19 02:15:36 2020 +0200

    initial commit from master branch
Before moving any further, I want to tell what a fast-forward merge means. If no changes are made on master branch, while you are working with a feature branch (or a sub-branch), and then you merge it on master, then it just fast forwards all the commits into master. That simple! Think about this, you start watching Video streaming on a train on your phone app, while going back from work to home. You watched the first 30 minutes of the movie. Then you come at home, eat something and then, you open your pc, using the same subscription, to the same Video Streaming company, you start the movie, and it just continues from the same point where you have paused. It actually checks if other clients to the same subscription (phone, pad, computer...) watched that movie, if so, it fast-forwards, assuming you have already watched that, which is true.
But merge is not always bed of roses, so there are cases where you have more work to do. But before jumping into that section, I just want to talk a bit about git log and also git diff command.
7 Git Log Basics
Git log is a very powerful command line tool that you can use to see the commits, and also to filter them based on several parameters. You can play with git log so that it makes it easier for you to see the commits, the hash, author, date and other parameters so. Let's give some examples about git log.
To see the commits, you can just use git log as below;
D:\git-tutorial>git log
commit 03b5d54030825a7386d34dfaad40527300ec8772 (HEAD -> main, origin/main, origin/HEAD)
Author: Levent Divilioglu <bzdgn@users.noreply.github.com>
Date:   Mon Oct 19 02:41:39 2020 +0200

    WIP for Section 7

commit 143d649ed8ae7567b56663100b2f62ad64b141c3
Author: Levent Divilioglu <bzdgn@users.noreply.github.com>
Date:   Mon Oct 19 02:34:52 2020 +0200

    Update README.md

commit f74c49a54c1adf8c42475940db578302421535a6
Author: Levent Divilioglu <bzdgn@users.noreply.github.com>
Date:   Mon Oct 19 02:33:09 2020 +0200

    Update README.md

commit 7b04a36f590d5676c11cf5d8995438d02323feee
Author: Levent Divilioglu <bzdgn@users.noreply.github.com>
Date:   Mon Oct 19 01:53:17 2020 +0200

    Update README.md

commit 08c2c65ec4c20832857ecbc89931544f4f90ed06
Author: Levent Divilioglu <bzdgn@users.noreply.github.com>
Date:   Mon Oct 19 01:37:21 2020 +0200

    Update README.md
:
As you can see, you can see the commit stack, the first shown commit is the last one, and if it exceeds the maximum line of the command line, you will see a colon (:). If you press space, you will see the older commits in the next page. If you press just space, you will go down. If you press q, then you will quit to terminal.
Let's see, the commits as one line: git log --oneline
You will only see the hash and the git commit message as below. The last commit, again is the first one, and called as HEAD.
D:\git-tutorial>git log --oneline
03b5d54 (HEAD -> main, origin/main, origin/HEAD) WIP for Section 7
143d649 Update README.md
f74c49a Update README.md
7b04a36 Update README.md
08c2c65 Update README.md
fe8ff56 re-rename
80f8d29 rename
7397024 Update README.md
4728263 trim png file
f64e866 Update README.md
75ef53f Update README.md
e68b146 Update README.md
29c94e8 Update README.md
0b87e08 Update README.md
7e04f9a Update README.md
f0e233d Merge branch 'main' of github.com:bzdgn/git-tutorial into main
1880c1f misc files
008a458 wip
c507fd2 pushing to remote - wip
1b82ea0 Second commit for basic git commands
d7765d4 Initial commit for README
35bba2f Initial commit
Please note that HEAD actually is a pointer to the lastest log as you can see here;

Let's see only the last 3 commits, then you can use: git log -n <number_of_commits
Here is an example;
D:\git-tutorial>git log -n 3
commit 03b5d54030825a7386d34dfaad40527300ec8772 (HEAD -> main, origin/main, origin/HEAD)
Author: Levent Divilioglu <bzdgn@users.noreply.github.com>
Date:   Mon Oct 19 02:41:39 2020 +0200

    WIP for Section 7

commit 143d649ed8ae7567b56663100b2f62ad64b141c3
Author: Levent Divilioglu <bzdgn@users.noreply.github.com>
Date:   Mon Oct 19 02:34:52 2020 +0200

    Update README.md

commit f74c49a54c1adf8c42475940db578302421535a6
Author: Levent Divilioglu <bzdgn@users.noreply.github.com>
Date:   Mon Oct 19 02:33:09 2020 +0200

    Update README.md
You can also mix the options like, see the last 3 commits and in the --oneline format;
D:\git-tutorial>git log -n 3 --oneline
03b5d54 (HEAD -> main, origin/main, origin/HEAD) WIP for Section 7
143d649 Update README.md
f74c49a Update README.md
You can also use the filter, and see the last 3 commits of the same author;
D:\git-tutorial>git log -n 3 --oneline --author="Levent Divilioglu"
03b5d54 (HEAD -> main, origin/main, origin/HEAD) WIP for Section 7
143d649 Update README.md
f74c49a Update README.md
8 Fixing Merge Conflicts
When merging one branch (usually a feature branch) with another (mostly master/main branch), a merge conflict is likely to be happen, especially if you are working with a team. For unexperienced users, merge conflicts seems a bit scary but it's not a scary case. Let's first start explaining what is a merge conflict.
You remember the simplest merge case we have spoken above: fast-forward. It's the case, when you are working in a branch, nothing happens on the master, so, when you merge onto master, git just makes a copy of the commits you have done on your branch, and puts on to the top of HEAD of the master branch. So it's actually nothing more than a fast-forward. On that case, no conflicts are expected. But what happens, while you are merging on your feature branch, a team member of yours also working on another branch, and what happens, at the same time, you two, are working on the same file? Then, if your friend merges it before you, you will have a merge conflict, because the file you are working with, has already changed so you have to decide to take his changes, or ignore it and use your changes.
Let's summarize what happens in this example. Assume that you have an existing two commits on master, which is X1 and X2. HEAD points to the latest commit, which is X2;
X1 -> X2(HEAD)
Then Mark and David, makes their own branchs, respectively, branch_mark, and branch_david. branch_mark has only one commit, which is M1. branch_mark seems like this;
X1 -> X2 -> M1
And branch_david seems like this, with one commit;
X1 -> X2 -> D1
Assume that Mark, merges his branch to master, and it's a fast-forward so for Mark (who is lucky), doesn't have any merge conflicts. And then the master will be as below;
X1 -> X2 -> M1 (HEAD)
Then David, checksout on master, and apply the git merge branch_david, so he tries to merge his branch on master and then, because the commit M1 and D1 has changes on the same file, he will get merge conflicts. This is what you need to know theory-wise.
Now it's time to make a practice.
- Create a folder called as repo3 and apply:
git init - Create a file contents.txt with the following content;
Once upon a time, there was a very beautiful girl.
She liked to go to the forest with her dog every day.
One day, she was lost in the road.
    <fill here with something>
Then she married with him have have 3 children.
- Apply:
git add contents - Apply:
git commit -m "master main commit"
Now, we have a master branch with 1 commit. We need to create 2 more branches. branch_a and branch_b. These branches will have different changes for the 4th line.
For branch_a, here is what you need to do;
- Apply:
git checkout -b branch_a -
Edit the contents file as below;
Once upon a time, there was a very beautiful girl. She liked to go to the forest with her dog every day. One day, she was lost in the road. And she met with a very ugly, smelly giant wolf!!!1 Then she married with him have have 3 children. - Apply:
git add contents.txt - Apply:
git commit -m "branch_a commit"
For branch_b, here is what you need to do;
- Apply:
git checkout master(So we need to branched from master like we did n branch_a) - Apply:
git checkout -b branch_b -
Edit the contents file as below;
Once upon a time, there was a very beautiful girl. She liked to go to the forest with her dog every day. One day, she was lost in the road. And she met with a very handsome prince. Then she married with him have have 3 children. - Apply:
git add contents.txt - Apply:
git commit -m "branch_b commit"
So, here how contents.txt file is seen on master/main branch. You can checkout on master and open the contents.txt to see it;
Once upon a time, there was a very beautiful girl.
She liked to go to the forest with her dog every day.
One day, she was lost in the road.
    <fill here with something>
Then she married with him have have 3 children.
Here how the same file looks on branch_a master. You can checkout on master and open the contents.txt to see it;
Once upon a time, there was a very beautiful girl.
She liked to go to the forest with her dog every day.
One day, she was lost in the road.
And she met with a very ugly, smelly giant wolf!!!1
Then she married with him have have 3 children.
And lastly, here how the same file looks on branch_b master. You can checkout on master and open the contents.txt to see it;
Once upon a time, there was a very beautiful girl.
She liked to go to the forest with her dog every day.
One day, she was lost in the road.
And she met with a very handsome prince.
Then she married with him have have 3 children.
Let's merge branch_a first, to master branch;
- Apply:
git checkout master - Apply:
git merge branch_a
You will see something similar to this;
D:\repo3>git checkout master
Switched to branch 'master'

D:\repo3>git merge branch_a
Updating 9d872b9..3a46183
Fast-forward
 contents.txt | 2 +-
 1 file changed, 1 insertion(+), 1 deletion(-)
And the content of the contents.txt file is changed to the following;
Once upon a time, there was a very beautiful girl.
She liked to go to the forest with her dog every day.
One day, she was lost in the road.
And she met with a very ugly, smelly giant wolf!!!1
Then she married with him have have 3 children.
Himm... looks doesn't right. Children should not read a story that a beautiful girl marries with a smelly giant ugly wolf and have 3 children! We have to fix it, aren't we?
But before doing so, let's see the commits on git log;
D:\repo3>git log --oneline
3a46183 (HEAD -> master, branch_a) branch_a commit
9d872b9 master main commit
As you can see, the only commit of branch_a branch is copied on the top of master. Now, let's merge the branch_b to master;
- Apply:
git checkout master - Apply:
git merge branch_b
The output will be as follows as expected;
D:\repo3>git checkout master
Already on 'master'

D:\repo3>git merge branch_b
Auto-merging contents.txt
CONFLICT (content): Merge conflict in contents.txt
Automatic merge failed; fix conflicts and then commit the result.
Ohh, merge conflict, what are we going to do?!! May be we have to turn the computer off, wait a few seconds and turn it on again. Of course I'm joking, what we are going to do is fixing the merge conflict. That's what we have expected right, even if we are working alone, with our own branches, we can have merge conflicts as you can see.
Let's check the file contents.txt;
Once upon a time, there was a very beautiful girl.
She liked to go to the forest with her dog every day.
One day, she was lost in the road.
<<<<<<< HEAD
And she met with a very ugly, smelly giant wolf!!!1
=======
And she met with a very handsome prince.
>>>>>>> branch_b
Then she married with him have have 3 children.
You have to learn how to read this, if you are using eclipse, or a simple notepad, it's not important. Take a look at to this;
...
<<<<<<< HEAD
    Here will be the content of the HEAD conflicting with current branch.
=======
    Here will be the content of the merging branch, conflicting with HEAD.
>>>>>>> branch_name
...
What I want to mention is, starting with the line <<<<<<< HEAD to the =======, you have the conflicting part of the current(in this case, master) branch. And beginning from the =======, to the >>>>>>> branch_name, that content is the conflicting part of the merging branch. These two are conflicting, and you can choose from the current branch (ours), or you can choose from the merging branch (theirs), or you just mix it, or remove it, at least, it's just a simple text right. As soon as you fix it, it's not important.
Let's take the part coming from the branch_b, I've edited the contents.txt as below;
Once upon a time, there was a very beautiful girl.
She liked to go to the forest with her dog every day.
One day, she was lost in the road.
And she met with a very handsome prince.
Then she married with him have have 3 children.
To merge it;
- Apply:
git add contents.txt - Apply:
git commit -m "solving merge conflicts" - Apply:
git log --oneline
Here is what you get;
D:\repo3>git status
On branch master
You have unmerged paths.
  (fix conflicts and run "git commit")
  (use "git merge --abort" to abort the merge)

Unmerged paths:
  (use "git add <file>..." to mark resolution)

        both modified:   contents.txt

no changes added to commit (use "git add" and/or "git commit -a")

D:\repo3>git add contents.txt

D:\repo3>git commit -m "solving merge conflicts"
[master 5a73c0c] solving merge conflicts

D:\repo3>git log --oneline
5a73c0c (HEAD -> master) solving merge conflicts
eafc758 (branch_b) branch_b commit
3a46183 (branch_a) branch_a commit
9d872b9 master main commit
So the merge conflict is solved. git merge has much more many options, but to solve conflict, we only need to fix the conflicting files.
9 Revert Basics
It sometimes happens that you commit something and it doesn't work, either because that's dependent on configuration, or because you were just careless, or you just fix something while you break something else. The reason is not important, git revert is used for that, for reverting one or several commits. The most simple definition for git revert is, it's just an undo for git.
I believe, understanding the use case of revert is very important, and as you know it, you will be more careful when you are applying your commits. Why? Because you will know and consider if something goes wrong, you have to revert it, and that's why, a simple commit must be tidy. We will see that, especially when we talk about rebase in the next section.
Let's learn it by practice;
- Create a folder: repo4 and change to the directory.
- Apply:
git init -
Create "contents.txt" with the contents below;
My first sentence. - Apply:
git add contents.txtandgit commit -m "first commit" -
Edit "contents.txt" with the contents below;
My second sentence. - Apply:
git add contents.txtandgit commit -m "second commit"
When you apply git log --oneline, you will see the following two commits;
D:\repo4>git log --oneline
ba97727 (HEAD -> master) second commit
7d7ba6b first commit
And the latest status of the file of "contents.txt" is as below;
My first sentence.
My second sentence.
Let's remove our last commit. So, let's see the last commit: git log -n 1
D:\repo4>git log -n 1
commit ba97727c7e79967493eb19e11432d804545bb3f6 (HEAD -> master)
Author: bzdgn <levent.divilioglu@divilioglu.com>
Date:   Tue Oct 20 09:15:49 2020 +0200

    second commit
We have to remember this hash to make a revert: ba97727c7e79967493eb19e11432d804545bb3f6
Now, there are two ways to apply a git revert;
First way is;
- Apply:
git revert ba97727c7e79967493eb19e11432d804545bb3f6 - The upper command will automatically open the default text editor, in my system it's vi, and the default is vi or vim in linux. It just simply ask the user to update the revert commit message. Do as you wish, and if you are using vi/vim too, when you are done, just press escape and write "wq!", which stands for write&quit, as shown below;
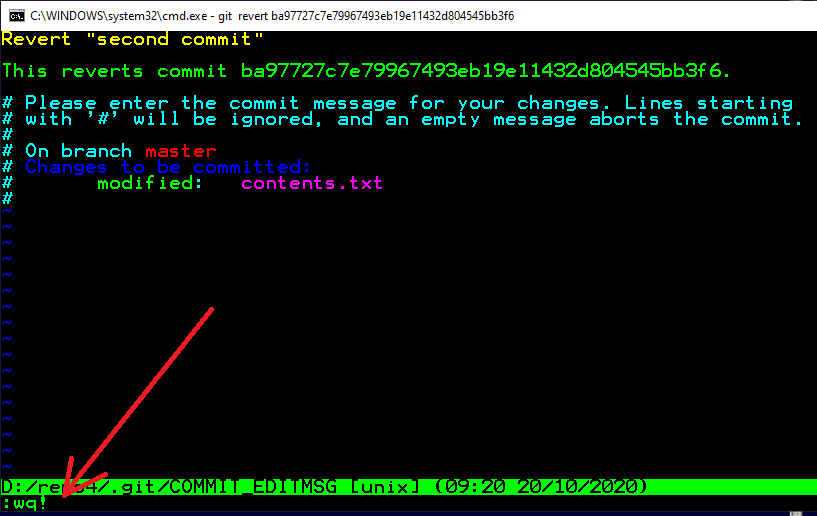
As you are done with revert message editing, it's done. Apply as simple git log --oneline to see the revert message;
D:\repo4>git revert ba97727c7e79967493eb19e11432d804545bb3f6
[master 103d8ab] Revert "second commit"
 1 file changed, 1 insertion(+), 2 deletions(-)

D:\repo4>git log --oneline
103d8ab (HEAD -> master) Revert "second commit"
ba97727 second commit
7d7ba6b first commit
As you can see, the second commit is reverted, to be sure, you can check the "contents.txt" file to see that the second line is gone.
The second way to revert is this, using reference with HEAD
Instead of reverting via hash, if you apply this command;
git revert HEAD~1..HEAD
and edit the revert-message through the default text editor, it will revert the last commit as well. The generic version of this command should be like;
git revert HEAD~<number_of_commits>..HEAD
If you run git revert HEAD~5..HEAD, it means "revert the last 5 commits".
Let's make an example for this;
- Create a directory "repo5", change to this directory and apply:
git init -
I believe now you can easily do this sequentially. Create a file named as "contents.txt" and add every line and commit it distinctively.
This is my first line
This is my second line
This is my third line
This is my fourth line
This is my fifth line
So there will be 5 commits.
When you are done, it should look like this when you apply git log --oneline;
D:\repo5>git log --oneline
ea7166b (HEAD -> master) fifth commit
e370bf7 fourth commit
e39e38e third commit
1d64d23 second commit
ebb38da first commit
So, I want to revert the last 3 commits, which means, the last 3 lines will be removed. There are again, two ways to do that. You will see why it is so and you will regret the first way we are going to take.
Just apply: git revert HEAD~3..HEAD, after this command, for 3 times, you are going to edit revert message for each commit. Then you will get to the terminal automatically;
D:\repo5>git revert HEAD~3..HEAD
[master e8ee88b] Revert "fifth commit"
1 file changed, 1 insertion(+), 2 deletions(-)
[master 07b06f9] Revert "fourth commit"
1 file changed, 1 insertion(+), 2 deletions(-)
[master c0793bf] Revert "third commit"
 1 file changed, 1 insertion(+), 2 deletions(-)
Apply the git log and see, there are 3 distinct revert commits;
D:\repo5>git log --oneline
c0793bf (HEAD -> master) Revert "third commit"
07b06f9 Revert "fourth commit"
e8ee88b Revert "fifth commit"
ea7166b fifth commit
e370bf7 fourth commit
e39e38e third commit
1d64d23 second commit
ebb38da first commit
Check the file "contents.txt" so see the last 3 lines related to the last 3 commits are deleted;
This is my first line
This is my second line
So it's very annoying to commit for every revert right? There's a better way, let's see that. Again, we have to set our repo up;
- Delete and create the directory "repo5", change to this directory and apply:
git init -
I believe now you can easily do this sequentially. Create a file named as "contents.txt" and add every line and commit it distinctively.
This is my first line
This is my second line
This is my third line
This is my fourth line
This is my fifth line
So there will be 5 commits.
To revert the last 3 commits;
- Apply:
git revert HEAD~3..HEAD --no-commit - Apply:
git commit -m "reverting last 3 commits"
Now you can check git log;
D:\repo5>git log --oneline
cbc87d4 (HEAD -> master) reverting last 3 commits
ea7166b fifth commit
e370bf7 fourth commit
e39e38e third commit
1d64d23 second commit
ebb38da first commit
You see, so in our command git revert HEAD~3..HEAD --no-commit, the --no-commit option just reverts the commits, and then we manually enter a commit message regarding to our reverts. Simpler and better!
Just to ensure, check your file and see the last three lines regarding to the three commits are removed;
This is my first line
This is my second line
Well done!
10 Rebase Basics
When we work on drafts, it's quite messy. Before we release something, we need to clean our workbench. The same applies to working with git environment. You work on your branch, make a dozen of commits and then if you push it to the remote, it will be annoying! Just for a simple functionality, if you make multiple commits to fix typos, renames, it's hard for readibility in git log, and also it's hard for manageability. Besides, when you do so, if you make a mistake, you are going to revert all those messy commits! So here another question comes: "What is a commit", in my huble opinion, a unit of work as small as possible that cannot be separable, should be wrapped in one commit!
My rule of thumb again;
"A unit of work as small as possible that cannot be separable, should be wrapped in one commit!"
This can change from team to team, you can discuss, but at least that's how I do in git.
So what's a rebase then? In this section, I'll not go into the depth of rebase, it's an advanced tool comes with git. But I want to introduce "squashing" which git rebase makes it available to us. When you want to unify multiple commits related to a unit of work, you use rebase to squash those commits into one. Git is a very smart tool, will collect those multiple commits, makes one new commit from the start of the rebase point. So simply: We will use git rebase to squash multiple commits into one.
What's good in this? Let's say, you make a commit for a fix, then several commits for renaming typos, because you were clumpsy. So finally, for one unit of code, you have 2 commits let's say. Then later on, you push it to the master, and it's seen that your fix has errors, breaks the integration tests somehow (I have written integration tests because if you push something while unit tests are failing, dude, you are doing it all wrong!), so you need to revert it. But because you have not wrapped your commits into one commit, you have to revert 2. If you have 5 commits on one fix, you have to revert 5 commits. And then, it looks really bad on git log. That's why, always squash a unit of work to one commit!
Again: "A unit of work as small as possible that cannot be separable, should be wrapped in one commit!"
So let's go for an example, learn it by heart as we always do;
Here is our setup;
- Create the directory "repo6", change to this directory and apply:
git init -
I believe now you can easily do this sequentially. Create a file named as "contents.txt" and add every line and commit it distinctively.
Go to the station Eindhoven
Find the yellow machine to load your OV chipkaart
Put your kaart in the machine
Load money on the machine
Use your bank card to and enter your pin to finish
So there will be 5 commits again.
As you can see, this time, our content is givin sequential orders to someone. But the last three lines are tabbed because they are transactional, needs to be done at one time. So I want to unify these three commits into one. Let's do so.
If you apply git log --oneline it should be as below;
D:\repo6>git log --oneline
855b968 (HEAD -> master) fifth commit
d3be3fb fourth commit
7403a76 third commit
c0707fa second commit
59f5769 first commit
So let's squash the last three commit (those are seen on the top of commit stack, the top three!), into one.
Now we have to be careful, we are going to use a new command;
git rebase -i <commit #>
We need to squash the last 3, but the rebase commit will be the one before them, it's the one that we would like to left behind. So;
Apply: git rebase -i c0707fa
This will take you to the rebase screen within the default system text editor. Take a look at to the top 3 commands, yes, they are commands this time. You should also read the whole thing for once to understand what we do there;
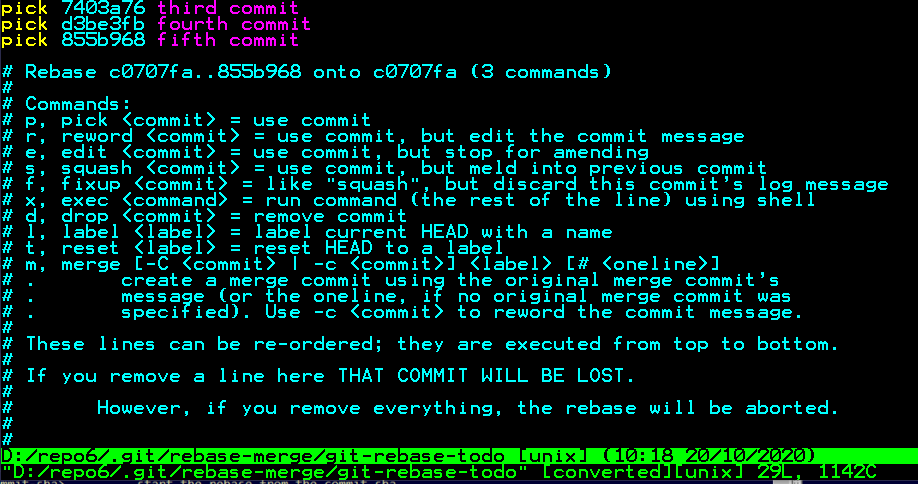
Let's focus on those 3 top lines;
pick 7403a76
pick d3be3fb
pick 855b968
We want to pick the third commit, and mix/merge the fourth and fifth commits. The hash of third commit is : 7403a76, so to mix the others, we are going to use squash instead of pick, like below;
pick 7403a76
squash d3be3fb
squash 855b968
When you apply, it should be seen like below, and then save and quit it;
Then a second screen comes, this one is our commit message, well, it's self explanatory, so I'll just save and quit;

If everything goes well (should be, if not, try again), then the console will look like this;
D:\repo6>git log --oneline
855b968 (HEAD -> master) fifth commit
d3be3fb fourth commit
7403a76 third commit
c0707fa second commit
59f5769 first commit                                                                                                                                                                                                                            D:\repo6>git rebase -i c0707fa
[detached HEAD 044ec11] third commit
 Date: Tue Oct 20 10:14:56 2020 +0200
 1 file changed, 4 insertions(+), 1 deletion(-)
Successfully rebased and updated refs/heads/master.
Let's git-log and see what has been committed;
D:\repo6>git log --oneline
044ec11 (HEAD -> master) third commit
c0707fa second commit
59f5769 first commit
Hey, it seems that our commits are lost!, But no, we have unified it in the third commit, you can check it with git show HEAD command, which shows the last commit;
D:\repo6>git show HEAD
commit 044ec11045aa4acfd5acd362b523636334339138 (HEAD -> master)
Author: bzdgn <levent.divilioglu@divilioglu.com>
Date:   Tue Oct 20 10:14:56 2020 +0200

    third commit

    fourth commit

    fifth commit

diff --git a/contents.txt b/contents.txt
index a3672e6..d7e3835 100644
--- a/contents.txt
+++ b/contents.txt
@@ -1,2 +1,5 @@
 Go to the station Eindhoven
-Find the yellow machine to load your OV chipkaart
\ No newline at end of file
+Find the yellow machine to load your OV chipkaart
+    Put your kaart in the machine
+    Load money on the machine
+    Use your bank card to and enter your pin to finish
\ No newline at end of file
Congratulations, you've just squashed your last 3 commits which makes life easier!
11 Cherry Picking
Assuming you are working on a branch, and you are messy. But one of the commits need to be injected on master, from a working messy branch. This can be done with "cherry pick" functionality of git which, in my opinion, saves hours and lives very oftenly. Learn "cherry picking" it's your friend and guardian angel!
Here is our use case, we have a master branch, and a feature branch
Master Branch: A (HEAD)
Feature Branch: B -> C -> D (HEAD)
A, B, C and D are the commits. What I want to do is, just only take the commit C and apply it, put it on the top of the stack of the master branch. So at the end, this is what I want on master branch;
Master Branch: A -> C(HEAD)
Let's learn it by making practice again;
-- WORK-IN-PROGRESS-
Requirements Engineering
Requirements are the basis for every project, defining what the stakeholders of a new system need and also what the system must do to satisfy their needs. The requirements guide the project's activities and are usually expressed in natural language so that everyone can gain an understanding.
In addition to the requirements defining the problems and solutions, we must also define the risks and provide satisfactory solutions in case these risks fail. Thus, the requirements define the basis for:
Project Planning
Risk management
Acceptance Tests
Change Control
The requirements are so important that they usually have a major impact on the failures of software projects. Below we highlight the three main problems for failures in software projects:
Requirements: poorly organized requirements, very poorly expressed, probably reported to stakeholders, very rapid or unnecessary changes, unrealistic expectations. Resource Problem Management: inability to have enough money and lack of support or failure to enforce discipline and planning. Many of them arise from the lack of requirements control. Policies: Contributes to the first and second problems. The most interesting thing is that all these problems can be solved with little money.
Thus, we can say that requirements engineering is a process that encompasses all activities that contribute to the production of a requirements document and its maintenance over time.
Throughout the article we will see more what is requirements engineering, how does the requirements engineering process take place and what are its main activities.
1. Requirements Engineering Process
Therefore, requirements engineering is the process by which the requirements of a software product are collected, analyzed, documented and managed throughout the software life cycle.
Once we understand what requirements engineering is, we can start to know how the requirements engineering process works. Paralleling the software development process, there is a software process that involves several activities that can be classified into: Development Activities where we have activities that contribute to the development of the software product such as survey and requirements analysis, design and implementation; Management activities that involve planning and managerial monitoring of the project; and Quality Control Activities that are related to the evaluation of product quality.
In general, requirements play a fundamental role in software development. Software requirements are one of the main measures of software success, given that if they meet the objectives and requirements for which the software was built and are fully in line with customer needs. Requirements are the basis for estimates, modeling, design, implementation, testing and even maintenance. Thus, the requirements are present throughout the entire software life cycle.
At the beginning of a project, we have to raise the requirements, understand them and document them. As the requirements are extremely important for the success of a project, we must also carry out quality control activities to verify, validate and guarantee the quality of the requirements. Another key measure is to manage the evolution of requirements, since business is dynamic and we cannot guarantee that these requirements will not change. Thus, we must maintain traceability between the requirements and the other artifacts produced in the project.
Therefore, we can see that the requirements involve development activities through the Survey and Analysis and Documentation of Requirements, management through the Requirements Management and finally the quality control through the Verification, Validation and Quality Assurance of Requirements. All of these activities that are related to requirements is the Requirements Engineering Process.
In the rest of the article we will see a little more what each of these activities that are part of the requirements engineering process are.
2. Survey of Requirements
This is the initial phase of the requirements engineering process. This activity takes into account the needs of users and customers, domain information, existing systems in the organization, current regulations, laws, etc.
The objective in this phase is to understand the organization as a whole, its processes, needs, possibilities for improvement and existing restrictions. Thus, we are concerned with discovering the requirements.
This phase is quite complex and also requires us to obtain information from interested parties, consult documents, obtain knowledge of the domain and study the business of the organization.
In the requirements survey, we must pay attention to four understandings that we must have: Understanding the Application Domain, in which it is understood, in a general way, the area in which the system will be applied; Understanding the Problem where we understand the details of the specific problem to be solved with the help of the system to be developed; Understanding of the Business where we understand how the system will affect the organization and how it will contribute to the achievement of the business objectives and the general objectives of the organization; and finally, the Understanding of Stakeholder Needs and Restrictions, where the demands for support for the work of each of the stakeholders in the system are understood, the work processes to be supported by the system and the role of any existing systems in the execution and conduction of work processes.
For the requirements survey we have several useful techniques that can be used to help the survey of these requirements, they are: interviews, questionnaires, observation of the environment and individuals in their daily tasks in the organization, analysis of existing documents in the organization, interaction scenario between the end user and the system where the user can simulate his interaction with the system explaining to the analyst what he is doing and what information he needs to perform the task, prototyping where a preliminary version of the system, often not operational and disposable, it is presented to the user to capture specific information about their information requirements, observation reactions, group dynamics, and several other techniques that can also be employed.
3. Requirements Analysis
After the Requirements Gathering activity, the Requirements Analysis activity begins, which is where the requirements raised are used as the basis for modeling the system.
The requirements are typically written in natural language, however, it is useful to express more detailed system requirements in a more technical way through different types of models that can be used. These models are graphical representations that describe business processes, the problem to be solved and the system to be developed. Graphical representations are much more understandable than detailed descriptions in natural language and are therefore used.
Thus, analysis is a modeling activity. It is worth mentioning that this modeling is conceptual, as we are concerned with mastering the problem and not with technical solutions. Therefore, the analysis models are developed in order to obtain a greater understanding of the system to be developed and to specify it.
In the requirements analysis, two main perspectives are sought, the first of which is the structural one, in which one seeks to model the concepts, properties and relations of the domain that are considered relevant to the system under development. The second perspective is the behavioral one, in which one seeks to model the general behavior of the system, of one of its functionalities or of an entity.
The UML diagrams provide support for all the diagrams needed in this analysis phase.
4. Requirements Documentation
The requirements and models captured in the Requirements Gathering and Requirements Analysis steps must be described and presented in documents. Documentation is an activity of recording and officializing the results of requirements engineering. As a result, one or more documents must be produced.
This written documentation in a good way has several benefits such as ease in communicating requirements, reduction in development effort, provides a realistic basis for estimates, a good basis for verification and validation, among other benefits.
The documentation produced also has several stakeholders who use the documentation for different purposes. Customers, Users and Domain Specialists work in specifying, evaluating and changing requirements. Customer managers use the documentation to plan a proposal for the system and to plan and monitor the development process. Developers use the documentation to understand the system and the relationship between its parts. Testers use the documentation to design test cases.
The Requirements Document must contain a description of the purpose of the system, a brief description of the problem domain and lists of functional, non-functional requirements and business rules, all described in natural language. Developers, customers, users and managers use this document. Another document that can be produced is the Requirements Specification Document, which must contain the requirements written from the developer's perspective, including a direct correspondence with the requirements in the Requirements Document. The models produced in the previous phase must be within this requirements specification document.
5. Verification, Validation and Quality Assurance of Requirements
This phase should be started as soon as possible in the software development process. Requirements are the basis for development, so it is essential that they are carefully evaluated. Therefore, documents produced during the previous phase must be subjected to requirements verification and validation.
The difference between verification and validation is that verification ensures that the software is being built correctly. In turn, validation ensures that the software being developed is the correct software. Therefore, verification ensures that the artifacts produced meet the requirements and validation ensures that the requirements and the software that was derived from those requirements meet the proposed use.
6. Requirements Management
Changes in requirements occur throughout the software process, from requirements gathering to system operation during production. This is due to the discovery of errors, omissions, conflicts, inconsistency in requirements, better understanding of users about their needs, technical problems, changes in customer priorities, changes in business, competitors, economic changes, changes in the software environment, changes organizational, etc.
To minimize the problems caused by these changes, it is necessary to manage requirements. The Requirements Management Process involves activities that help the team to identify, control and track requirements and manage changes in requirements at any time throughout the software lifecycle.
Therefore, the objectives of the process are to manage changes to the agreed requirements, manage relationships between requirements, manage dependencies between requirements and other documents produced during the software process. Thus, requirements management has the following activities: change control, version control, monitoring the status of requirements and tracking requirements.
Defining an appropriate process for an organization is very important and has several benefits, as a good description of a process provides guidance and reduces the likelihood of errors or oversights. The most important thing is to know that there is no ideal process, so adapting a process to internal needs is always the best choice instead of imposing a process on the organization.
Validation involves the participation of the user and the customer, as only they are able to confirm that the requirements meet the purposes of the system.
In this phase, the requirements documents are examined to ensure that all requirements have been unambiguously declared, that inconsistencies, conflicts, omissions and errors have been detected and corrected, that the documents are in accordance with established standards, that the requirements really satisfy the needs of customers and users.
Therefore, the requirements must be complete, correct, consistent, realistic, necessary, capable of being prioritized, verifiable and traceable.
Bibliography - PRESSMAN, Roger, Software Engineering, McGraw-Hill, 6th edition, 2006.
Service-oriented architecture (SOA)
There are divergences in communication between business and IT sectors. What is requested is not always consistent with what users actually imagined. For corporations seeking leadership in the competitive market, there are ways to be traced. To be competitive, it is not enough to have cutting-edge technology, it is necessary to improve business processes, have union between sectors and understanding of all processes involved in business activity.
SOA (Service Oriented Architecture) helps companies to be prepared to evolve in technology and profitability, reducing technology restrictions for business leaders, it also makes it possible to ensure a flexible and reusable structure.
In a simple way, SOA is a business approach to create IT (Information Technology) systems that allow leveraging existing resources, creating new resources and, above all, being prepared for inevitable changes required by the market, obtaining more productivity and profit for the company.
To enjoy the benefits of this architecture, investment of time and learning is required. Through the use of SOA, understanding between business leaders and the IT area is facilitated. The main item of SOA are the services that serve to describe the relationship between a provider and a consumer, which have the objective of solving a certain activity in common.
Each service can be defined as a specific activity, due to the identification of the services found in the corporation. The same can be compared with the famous toy "Lego", where you can use the same pieces for countless occasions. An example is "a service for consulting products ...", which is created only once and can be used in any system.
SOA helps to answer and improve issues reflected in scenarios, such as, Is the business large and complex? Does the niche change quickly? Is our legacy the center of our business? Are our systems flexible? Can they have changes attributed? Are the business rules organized? Is there quality in our data?
SOA Governance
Every company needs governance to raise, plan, execute, control and improve processes and, consequently, generate better results.
Governance means ensuring that people do what is right, in addition to “controlling the development and operation of software”.
Some crucial points associated with SOA governance are:
Policies: define what is right; Processes: reinforce policies; Metrics: provide visibility and possible policy reinforcements; Organization: establishes a culture that supports the governance process. Processes have to be flexible enough to be able to support frequent updates, they must be as explicit as possible, so that the team can monitor their execution.
The technical aspects of a process can be classified as, documentation, service management, monitoring and change management.
As shown in Figure 1, there are two ways to implement SOA governance.

The Top-down form is where requests come from the company's presidents, managers and executives, whereas Bottom-up refers to where requests come from users, analysts, programmers and technicians.
SOA Maturity Figure 2 shows an SOA maturity model developed by Sonic Software (a software development company).

As can be seen, level one represents the initial learning and implementation phase of the project. At level two, services are provided that use defined standards, such as technical governance of SOA implementation.
Level three provides services within the partnership between technology and business organizations, seeking to ensure that the use of SOA suppliers clarifies business responsibilities.
Then, at level four, the focus is on the implementation of internal and external business processes. At level five, business processes are optimized, so that the information system using SOA becomes the main system of the organization.
In addition to this maturity model, there is also the option developed by IBM and known as ServiceMaturity ModelIntegration (SIMM). This model consists of seven levels, which are (in increasing order of maturity):
Silo: data integration; Integrated: application integration; Modular: functional integration; Simple services: integration process; Composite services: supply chain integration; Virtualized services: virtual infrastructure; Dynamically configurable: automatic scalability. The levels of SOA maturity indicate how well the company is already able to survey, plan, implement and control processes and allows identifying the quality and success that will be achieved in initiatives for SOA implementation.
Services Although the difficulty in finding an exact definition for "service", its main objective is associated with representing a natural step in business functionality.
In business, the steps of a corporation's activity can be classified as services. With all the steps being performed in sync, a process is created generating results for other processes.
Service can also be defined as one or more steps that use messages to exchange data between a supplier and a consumer. Technically, a service is a description of one or more operations that use (multiple) messages to exchange data between a supplier and a consumer, with the common effect that the consumer obtains some information, modifies the state of the system or modifies the process component.
Through services, business processes can be encapsulated, where each process or part of a process can be implemented through services.
As shown in Figure 3, it is possible to work with complex structures without many management obstacles.

Figure 3 shows levels that a service can encapsulate, where the primary lines of code are in a given language, which represent the step-by-step of a given procedure. The procedural module refers to the set of primary lines of code, becoming a function or procedure that receives values and returns results.
The Class / Object structure is the union of several procedures and attributes responsible for the functionalities. Components are the union of several structures, forming micro processes and services are the union of several processes, creating a macro process.
Complex structures can be represented by small steps, which can be reused in another structure that needs the function that this service provides, highlighting that it is necessary for a service to be independent and self-sufficient in its objectives.
SOA brings as a main resource the reuse of code, routines and database, because a service can be used several times, at various times during work processes, avoiding redundancies and rework.
Classification of services
Services can be categorized into three groups, shown in Figure 4.

Basic services, also known as corporate services, are those that provide a basic business function.
Basic services can be subdivided into “data services”, such as, create customer, change customer address, create account, return customer list and “logic services”, such as, return if a year is leap, define valid dates for the system. After establishing basic services, the “Fundamental SOA” is obtained.
Intermediate services, also known as composite services, are those that do an “orchestration of services” work. As in a musical orchestra in which the conductor has several instruments (services) to orchestrate, the composite services use the basic services to obtain results. After establishing composite services, the “Federative SOA” is obtained.
The "Process Services" process is the union of composite services, defining a particular process that has been in place. Thus, unlike basic and compound services, process services keep states during their execution, being able to work with the flow. An example can be mentioned an e-commerce system shopping cart, where during the purchase process several additions, changes and deletions are made to it, with the possibility of making the purchase at the end or not.
Process services established, the “Process-Enabled SOA” is obtained.
Figure 5 shows the three stages of service expansion in more detail.

The existence of backends (systems normally run on the server side), which make up the main layer of the architecture, where there may be application servers, databases, ERPs (Enterprise Resource Planning) etc. In this layer, all care and security of information is necessary.
The basic services (Data and Logics) make contact with the backends. There are also ESBs (enterprise service bus) - corporate service bus, that is, an interface responsible for providing connectivity, transforming data, routing data, security, monitoring, among other definitions.
Data transformation is inherently part of the bus in an ESB distribution, with transformation services, specialized for the needs of individual applications connected to the bus, located anywhere and accessible from anywhere on the bus. An ESB can be defined as a resolution of independence between applications, due to the fact that the given transformation is an integral part. The ESB is responsible for the interoperability of the services, regardless of the source or destination of the data, and its main function is to make it possible for consumers and suppliers to interact.
Figure 5 also presents the “orchestration layer” (Federative Stage) and the “process layer” (Process-Enabled Stage), where the ESB is like a tunnel for the consumption of services and the front-end.
Service modeling considerations
The levels of granularity define how specific the service is. The processes that are defined can be broken into several sub-processes by performing a certain system action.
There are two types of granularity, being "fine" and "coarse". Modeling based on coarse granularity serves to implement few services for various processes. Fine granularity, on the other hand, refers to the implementation of several services for few processes. It should be noted that the larger the subdivision, the more specific the services are and the more specific they are, the better the maintenance, scalability and reuse of them.
If the component services come together and separate easily, they are loosely coupled, that is, not interconnected like traditional applications and because they are codependent, they can be mixed and combined with other component services.
The weaker the coupling, the more useful and flexible it will be, since it can be combined for different processes. For example, a service that returns a customer list can be used in a sales module, in a reporting module, or in a supplier module.
Components can be joined dynamically in real time, behaving as a single application, tightly coupled.
Loose coupling is a concept that aims to deal with scalability, flexibility and fault tolerance, allowing its use to eliminate dependencies, so that maintenance does not impact the existing functionalities.
Conclusion
Throughout this article, a series of benefits made possible by the use of SOA were presented, highlighting the better interaction between the IT area and the organization's business area.
The implementation of SOA proved to be challenging, not being possible to implement it completely immediately, but gradually, through models of maturity.
The use of SOA can expand further in the development and maintenance of corporate software, because working with the concept of well-defined and loosely coupled services allows adjustments to be made more easily to the software developed, allowing the organization to adapt quickly to changes expected by the market.
References
AECE, Israel. WCF - Architecture, Development and Standards ARSANJANI, Ali. IBM - SOA Maturity Model BACHMAN, Jon. Sonic Software. SOA Maturity Model CHAPPEL, David A. Enterprise Service Bus. Sevastopol, CA: O'Reilly Media, 2004. CONDÉ, L; GODINHO, R. “Service Oriented Architecture” WCF Good practices (survey, construction and accommodation) ECKSTEIN, Jutta. Agile Software Development in the Large. New York: Dorset House, 2004. ERL, Thomas. Service Oriented Architecture. Concepts, Technologies and Development. Upper Sadlle River, NJ: Prentice Hall, 2005. HURWITZ, BLOOR, KAUFMAN and HALPER, Judith, Robin, Marcia and Fern. Service Oriented Architecture - SOA. Series for Dummies. Rio de Janeiro, Alta Books, 2009. JOSUTTIS, Nicolai M. SOA in Practice. The Art of Distributed Systems Modeling. Rio de Janeiro, AltaBooks, 2008. KRAFZIG AND SLAMA, Dirk, Karl. Enterprise SOA: Service-Oriented Architecture Best Practices, Upper Saddle River, NJ: Prentice Hall, 2004. LOWY, Juval. Programming Services - WCF. Rio de Janeiro: Alta Books, 2007. MANES, Anne Thomas. Web Services. A Management Guide. Boston, MA: Addison-Wesley, 2003. MARZULLO, Fábio Perez. SOA in Practice. Innovating your business through service-oriented solutions. São Paulo: Editora Novatec, 2009. SAMPAIO, Cleuton. SOA and Web Services in Java. Rio de Janeiro: Brasport, 2006.
Domain Driven Design (DDD)
This article deals with the use of Domain-Driven Design (DDD) in a practical way, through the creation of a software project from start to finish. In order to demonstrate the patterns proposed by the methodology.
What is it for:
Developing a software project, following this methodology, puts the team of designers and developers on the path of object orientation, towards a rich domain model. It allows the technical team to take greater advantage of the benefits offered by the paradigm. In addition to facilitating communication with domain experts, due to the focus on the domain, supported by DDD.
In what situation the useful topic:
DDD is useful for any project team that aims to model the customer's business domain, effectively and efficiently. It also facilitates good communication between those involved in the project, as it allows the creation of a design that reflects the domain, in addition to providing extensibility and reusability, based on the correct use of the object-oriented paradigm.
Java and Domain-Driven Design in practice:
Modeling systems efficiently is a challenge for any development team. In this context, DDD appears as a support for this objective.
This article presents the implementation, from beginning to end, of a system in Java, using the frameworks JSF 2.0 and EJB 3.0, based on the Domain-Driven Design (DDD) methodology. In this way, it is possible to create a system with all the benefits offered by object orientation, which reflects the business domain and with reduced complexity, due to the patterns proposed by the methodology.
Frameworks play an important role in facilitating the work of the development team, in the most technical aspects of the software creation process.
The Domain-Driven Design (DDD) methodology, presented by Eric Evans in the book “Domain-Driven Design: Tackling Complexity in the Heart of Software”, offers tools for building systems with a focus on the customer's business domain.
In addition, the entire creation process is supported by the language of those who will use the application (Ubiquitous Language), in this way, the communication between the technical team and domain experts, it becomes clearer.
"A domain expert is a member of the design team whose field of expertise is the application domain rather than software development. He is a profound connoisseur of the business. Ubiquitous language is a language structured around the model and should be used by all members of the project to connect all activities."
In summary, DDD introduces to the software development process:
- A layered architecture for division of responsibilities (see the box “DDD's layered architecture”);
- The ubiquitous language, which facilitates communication between the technical team and domain experts, in addition to generating documentation at the code level;
- Patterns that simplify and consolidate the design.
The objective of this article is to demonstrate the practical use of DDD, through the implementation of a project in Java, with the frameworks JSF 2.0 and EJB 3.0, making use of the JPA persistence API, inside a Java EE container (GlassFish).
The article does not intend to go much deeper into DDD concepts, the main idea is to show it in a practical way, associated with the development of an application.
Before we start to work on the presented objective, we need details about the system that will be developed.
DDD's layered architecture DDD proposes a layered architecture (see Figure Q1) for the division of responsibilities of an application. Each of them must specialize in a particular aspect of the system. This specialization allows the creation of a cohesive design that is easy to interpret. The basic principle is that each element of a layer, depends only on other elements of that same layer or lower layers.
The architecture proposed by the DDD is formed by:
- Presentation Layer (User Interface): Responsible for interpreting the user's commands;
- Application Layer (Application): It does not contain business rules or code referring to the domain, it only coordinates tasks and delegates work;
- Model Layer (Domain): It is the heart of the system. Responsible for representing the domain and its business rules;
-
Infrastructure layer: Provides technical resources for the system, such as data persistence.

Figure Q1. DDD architecture.
Online sales system
An event organization company will launch the 2011 edition of its most famous event, Java in Rio. This event consists of a week of different attractions for IT professionals, which include lectures, workshops, short courses, among others.
Each day of the event will feature activities led by big names in the area. Those interested in participating must purchase tickets for the days of their choice.
The organization has already defined the dates for Java in Rio, but has not yet confirmed all the professionals who will be part of the cycle of attractions offered. As the event is very popular, he decided to put up passes for sale, which will entitle buyers to exchange for tickets of the day they choose, when the attractions are defined.
Based on this scenario, the organizers ordered an online pass sale system, which allows the sale of up to five passes (entitled to a half-price), identified through a unique code, for each customer, at the price of R $ 190.00 a unit.
Modeling the application
In view of the scenario presented above, we can start modeling the sales system.
In order to build an effective ubiquitous language, it is important to use words that are part of the current language of domain experts when modeling the application. In this universe, project members must discuss the system to make communication clearer.
The design of the application must be aligned with the current language of the business. It is important that class names, attributes, variables and method signatures are part of the ubiquitous language. Thus, the team of designers and programmers, can show how elements of the client's business will relate within the system, using a vocabulary familiar to domain experts. In addition, a domain expert who has some technical knowledge about the technology employed, can talk at a lower level of abstraction with the development team, more easily.
The patterns offered by DDD will allow the technical team to introduce their own terms to the ubiquitous language, thus, more technical aspects of the development process can be discussed with the domain experts, in a simplified way. Instead of designers and developers talking about DAOs, queries, JDBC, Java Beans and other things that are not part of the daily life of a domain expert, they will be able to express themselves with a higher level of abstraction, using more common terms such as: entities, services, specifications and repositories, for example.
After conversations between the technical team and domain experts, it was decided that the system should allow the user to choose the number of passes he wants to purchase, enter his personal data and delivery address, and then pay the order with a credit card.

The initial model, illustrated in Figure 1, emerged based on the scenario presented and is composed of three ENTITIES (Client, Order and Pass) and two VALUE OBJECTS (Address and CartaoDeCredito).
ENTITIES are objects defined essentially by an identity. They must be distinguished from each other not by their attributes, but by the identity they carry. In practice, this is possible by assigning the object a unique identifier.
Thus, we can differentiate each object of an ENTITY, unequivocally, in order to avoid problems with data corruption. For example, in our case, we do not want orders associated with the wrong people or duplicate passes delivered to customers. ENTITIES must have their life cycles efficiently tracked in the model, that is, operations on them, must be based on their identities.
VALUE OBJECTS, on the other hand, are objects that describe something and are not based on an identity. For the system it does not matter if the order was paid with the customer's, father's or friend's credit card. It also doesn't matter if the delivery address has been used more than once, as each order must be delivered, regardless of whether another order has already been placed to the same address. In short, there is no need to track the life cycle of these objects.
A good analogy for VALUABLE OBJECTS is that of a child drawing with a green crayon. If the tip of the chalk breaks, she can just throw it away, take another green chalk from her case and continue drawing. The result will be the same.
This division between ENTITIES and VALUE OBJECTS reduces complexity, as it helps us to stay focused on what really matters. DDD proposes another pattern, called AGGREGATE, which can also be used to assist in this task.
AGGREGATES allow the creation of "borders", so that objects of classes that reside inside a border, are only accessed through the root class (ROOT ENTITY), which acts as a kind of "gateway". This approach helps to limit the number of dependencies on the model. In practice, objects external to AGGREGATE can only carry references to the ROOT ENTITY. Thus, the root class is responsible for controlling all operations on AGGREGATE objects. For example, it is the responsibility of the Order class to create instances of objects of the Pass class. In addition, deleting a root object must result in the removal of all objects within the boundary.
This division between ENTITIES and VALUE OBJECTS reduces complexity, as it helps us to stay focused on what really matters. DDD proposes another pattern, called AGGREGATE, which can also be used to assist in this task.
In the proposed model there are two AGGREGATES, with roots in Customer and Order, which can be identified in Figure 1, by the represented borders.
Now that we have a domain model in hand, it's time to start coding.
"Domain model or model is a set of abstractions that describe certain aspects of a domain and can be used to solve problems related to it. For example, the astrolabe, used to determine positions of stars, is a mechanical implementation of a model of the sky."
Working on the model
Before we actually start writing the code, it is worth mentioning that the model presented in the previous section is not necessarily the definitive and perfect one. Great ideas can emerge (and do!) During the implementation of a system and, as this occurs, we must change the model to reflect the improvements made in the design.
Even over coffee, great ideas can also come up. Therefore, we should not be afraid to make the necessary modifications to the model and refactor our code. It is important to always look for the ideal domain model, and refactoring is the key word for that.
The first thing we will do is create a project and set up the environment. In this article, the following tools were used: the Eclipse Helios IDE (with the GlassFish plugin installed), the Java EE GlassFish Server 3.0.1 container and the PostgreSQL database.
With the project created, we will configure the necessary XML files to work in an environment with JSF and EJB, as shown in Listings 1 and 2. In addition to these configurations, it is necessary to download and add the Hibernate libraries to the classpath, as we need an implementation for JPA.
"Installing and configuring Eclipse, GlassFish and PostgreSQL is not part of the scope of this article. It is important to note, when creating the project in Eclipse, the selection of the ‘Dynamic Web Project’, ‘JavaServer Faces’ and ‘JPA’ facets, in addition to associating the project with the GlassFish container. In this way, all JSF and EJB libraries will be present in the project."
With the environment ready and configured, we can dive into the domain model to implement its classes and business rules. We will start our journey by writing the ENTITIES and VALUE OBJECTS that appear in the model represented by Figure 1. Listings 3, 4 and 5, represent the ENTITIES of the system, while Listings 6 and 7, the VALUE OBJECTS.
As you may have noticed, annotations from the persistence API (JPA) were used for the O / R mapping of classes. Thus, there is no need to use Hibernate XML files.
Listing 1. web.xml: Deployment Descriptor of the application.
<?xml version="1.0" encoding="UTF-8"?>
<web-app version="2.5" xmlns="http://java.sun.com/xml/ns/javaee" xmlns:xsi="http://www.w3.org/2001/XMLSchema-instance" xsi:schemaLocation="http://java.sun.com/xml/ns/javaee http://java.sun.com/xml/ns/javaee/web-app_2_5.xsd">
  <context-param>
    <param-name>javax.faces.PROJECT_STAGE</param-name>
    <param-value>Development</param-value>
  </context-param>
  <servlet>
    <servlet-name>Faces Servlet</servlet-name>
    <servlet-class>javax.faces.webapp.FacesServlet</servlet-class>
    <load-on-startup>1</load-on-startup>
  </servlet>
  <servlet-mapping>
    <servlet-name>Faces Servlet</servlet-name>
    <url-pattern>*.jsf</url-pattern>
  </servlet-mapping>
  <session-config>
    <session-timeout>30</session-timeout>
  </session-config>
  <welcome-file-list>
    <welcome-file>jsp/index.jsf</welcome-file>
  </welcome-file-list>
</web-app>
Listing 2. persistence.xml: Configuration file for the persistence framework used, in this case, Hibernate.
<?xml version="1.0" encoding="UTF-8"?>
<persistence version="2.0" xmlns="http://java.sun.com/xml/ns/persistence" xmlns:xsi="http://www.w3.org/2001/XMLSchema-instance" xsi:schemaLocation="http://java.sun.com/xml/ns/persistence http://java.sun.com/xml/ns/persistence/persistence_2_0.xsd">
  <persistence-unit name="JavaInRio" transaction-type="JTA">
    <provider>org.hibernate.ejb.HibernatePersistence</provider>
    <jta-data-source>jdbc/java_in_rio</jta-data-source>
    <class>br.com.devmedia.javamagazine.prevenda.model.CartaoDeCredito</class>
    <class>br.com.devmedia.javamagazine.prevenda.model.Cliente</class>
    <class>br.com.devmedia.javamagazine.prevenda.model.Endereco</class>
    <class>br.com.devmedia.javamagazine.prevenda.model.Passe</class>
    <class>br.com.devmedia.javamagazine.prevenda.model.Pedido</class>
  </persistence-unit>
</persistence>
Listing 3. Order.java: Class that represents the Order entity in the model.
@Entity
@Table (name = "order")
@SequenceGenerator (name = "order_seq", sequenceName = "order_id_seq")
public class Order {

  @Id
  @GeneratedValue (strategy = GenerationType.SEQUENCE, generator = "seq_pedido")
  @Column (name = "id")
  private long id;

  // @ManyToOne, represents the ‘many to one’ relationship between Order and Customer.
  // The cascade attribute, tells Hibernate, what type of operation should
  // be propagated to the relationship.
  @ManyToOne (cascade = CascadeType.PERSIST)
  @JoinColumn (name = "customer_id")
  private Client client;

  @OneToMany (cascade = CascadeType.ALL)
  @JoinColumn (name = "order_id", nullable = false)
  private List <Passe> passes;

  private transient double precoTotal;
  @Column (name = "shipping")
  private double freight;
  @Embedded
  private CartaoDeCredito cartaoUused;

  public Order () {
    this.passes = new ArrayList <Passe> ();
    this.cartaoUusedado = new CartaoDeCredito ();
    this.cliente = new Client ();
  }

  public Order (Customer Customer) {
    this.cliente = customer;
    this.passes = new ArrayList <Passe> ();
    this.cartaoUusedado = new CartaoDeCredito ();
  }

  // generates passes based on the quantities passed as parameters
  public void generationPasses (int qtdInteiras, int qtdMeias) {
    this.passes = new ArrayList <Passe> ();
    this.addPassesInteiros (qtdInteiras);
    this.add PassesDeMeiaEntrada (qtdMeias);
  }

  // internal method for adding entire passes to the collection
  private void adds IntegerPasses (int quantity) {

    for (int i = 0; i <quantity; i ++) {
      Pass passe = new Passe ();

      // generate pass code
      UUID guid = UUID.randomUUID ();
      String code = guid.toString ();

      passe.setCode (code);

      this.passes.add (pass);
    }
  }

  // internal method for adding half-price passes to the collection
  private void adds PassesDeMeiaEntrada (int quantity) {

    for (int i = 0; i <quantity; i ++) {
      Pass passe = new Passe ();

      // generate pass code
      UUID guid = UUID.randomUUID ();
      String code = guid.toString ();

      passe.setCode (code);
      passe.setMeiaEntrada (true);

      this.passes.add (pass);
    }
  }

  // method responsible for calculating the total order price
  public double calculaTotal (double shipping) {

    double total = 0;

    for (Pass p: this.passes) {
      if (! p.isMeiaEntrada ()) {
        total + = PASS.PRECO;
      } else {
        total + = PASS.PRECO / 2;
      }
    }

    // add shipping
    this.frete = shipping;
    total + = this.frete;

    this.precoTotal = total;

    total return;
  }

  // returns the number of passes for the entire collection
  public int getQuantityDeInteiras () {

    int qty = 0;

    for (Pass p: this.passes) {
      if (! p.isMeiaEntrada ()) {
        qty ++;
      }
    }
    return qty;
  }

  // returns the number of half-entry passes in the collection
  public int getQuantityStockings () {

    int qty = 0;

    for (Pass p: this.passes) {
      if (p.isMeiaEntrada ()) {
        qty ++;
      }
    }
    return qty;
  }

  // getters & setters
}
Listing 4. Passe.java: Class that represents the Passe entity in the model.
@Entity
@Table(name="passe")
@SequenceGenerator(name="seq_passe", sequenceName="passe_id_seq")
public class Passe {

  @Id
  @GeneratedValue(strategy=GenerationType.SEQUENCE, generator="seq_passe")
  @Column(name="id")
  private long id;
  @Column(name="codigo")
  private String codigo;
  @Column(name="ativo")
  private boolean ativo;
  @Column(name="meia_entrada")
  private boolean meiaEntrada;
  public static final double PRECO = 190;

  public Passe(){
    this.ativo = true;
  }

  // getters & setters
}
Listing 5. Client.java: Class that represents the Client entity in the model.
@Entity
@Table(name="cliente")
@SequenceGenerator(name="seq_cliente", sequenceName="cliente_id_seq", initialValue=1, allocationSize=1)
public class Cliente {

  @Id
  @GeneratedValue(strategy=GenerationType.SEQUENCE, generator="seq_cliente")
  @Column(name="id")
  private long id;
  @Column(name="nome")
  private String nome;
  @Column(name="cpf")
  private String cpf;
  @Column(name="email")
  private String email;
  @Column(name="telefone")
  private String telefone;
  @Embedded
  private Endereco endereco;

  public Cliente() {
    this.endereco = new Endereco();
  }

  // getters & setters
}
Listing 6. Address.java: Class that represents the value object Address in the model.
@Embeddable
public class Address {

   @Column (name = "street")
   private String street;
   @Column (name = "number")
   private int number;
   @Column (name = "add-on")
   private String complement;
   @Column (name = "state")
   private String state;
   @Column (name = "city")
   private String city;
   @Column (name = "neighborhood")
   private String neighborhood;
   @Column (name = "zip")
   private String cep;

   public Address () {
   }

   // getters & setters
}
Listing 7. CartaoDeCredito.java: Class that represents the CartaoDeCredito value object in the model.

@Embeddable
public class CartaoDeCredito {

   @Column (name = "card_number")
   private String number;
   @Column (name = "mes_cartao")
   private int mes;
   @Column (name = "ano_cartao")
   private int ano;
   @Column (name = "bandeira_cartao")
   private String flag;

   // getters & setters
}
Some ENTITIES keep business rules in their behavior. This is the case of Order (see Listing 3), which is responsible for calculating the total price using the calculaTotal method (double shipping) and generating the customer's passes through the generPasses method (int qtdInteiras, int qtdMeias). Passes are generated in this way, as we are respecting the AGGREGATE Order frontier (see Figure 1). Such rules can be refined, using unit tests, using the TDD (Test-Driven Development) technique. For this, the TestPedido class was created (see Listing 8) and the JUnit library was used.
"The TestPedido class was created as a JUnit Test Case. Thus, we can use JUnit's annotations to run the class as a test case. TDD is a very important tool for developing ‘inside-out’ software, as we work directly on the model layer, creating and refining business rules."
Listing 8. TestPedido.java: JUnit Test Case that groups unit tests related to the Order entity.
public class TestePedido {

   @Test
   public void can I add passwords to order () {

     Order order = new Order ();

     // arrow order passes
     request.geraPasses (3, 1);

     Assert.assertEquals (4, request.getPasses (). Size ());

     for (Pass to: request.getPasses ()) {
       System.out.println (p.getCodigo ());
     }
   }

   @Test
   public void canCheckRequestValid () {

     Order order = new Order ();
     request.geraPasses (3, 2);

     Assert.assertTrue (new ValidSpecification (). AnsweredBy (request));
   }

   @Test
   public void canCalculateTotal () {

     double freight = ServicoDeCalculoDoFrete.calculaFrete ("12345-007");

     Order order = new Order ();

     // arrow order passes
     request.geraPasses (3, 1);

     double totalCalculado = order.Total calculation (freight);
     double totalExpected = 677.07;

     // total expected R $ 677.07
     Assert.assertEquals (totalExpected, totalCalculated, 0);
     System.out.println (request.getPrecoTotal ());
   }
}
There are also business rules that do not fit naturally into the behavior of an ENTITY or a VALUE OBJECT. They can distort the basic meaning of an object in the domain, when the responsibility for treating them is delegated to them. For example, debiting the value of a purchase, on a credit card.
Moving them out of the model layer can be even worse, since the code for the domain is now expressed outside the model. In this case, as a way to model these rules, one can make use of a SPECIFICATION or a SERVICE (SERVICE).
In all types of applications, simple rules are handled with Boolean testing methods. In our example, we can verify this behavior in methods of the type somePass.isHalfEntry () or somePass.isActive (). However, these rules are not always so simple. While they belong to the model layer, they do not fit the behavior of the object being tested. To meet these cases, we can use the SPECIFICATION pattern.
A SPECIFICATION has the function of testing objects to verify that they meet a certain criterion. The basic and simplest format for a specification is:
public interface Specification <T> {

   public boolean servicedBy (T obj);

}
When implementing this interface, a specification can answer whether an object meets the requirements defined by domain experts. Our ValidValidationSpecification (see Listing 9) was created with the aim of verifying whether an order has a maximum of five passes and a maximum of one half-price. In practice, it receives an object of the Order type through the method served by (Order Order), which checks whether the number of associated passes meets the quantity requirements, defined through constants in the class.
The customer, when placing an order, must inform their zip code to calculate shipping and credit card details, to pay for the purchase. These operations depend on resources external to the model. Creating a direct interface between objects in the domain and these resources is inadequate. Therefore, we can use the SERVICE pattern, to encapsulate these operations.
Our system has two services, which are: ServicoDePagamento (see Listing 10) and ServicoDeCalculoDoFrete (see Listing 11). They act as FACADES for services outside the application. Their methods provide an interface with postal systems and credit card operators
"The classes of service in this example have been simplified, as it is not part of the purpose of this article to show how communication is done with postal systems and credit card operators. They were created with the intention of showing how to fit such operations into the model."
Listing 9. SpecificacaoDePedidoValido.java: Specification that tests if an object of type Order is valid.
public class ValidOrder Specification implements <Order> Specification {

   // maximum number of passes per order
   private static final int QTDMAX = 5;
   // maximum number of socks per order
   private static final int MAXMEIAS = 1;

   public ValidOrder Specification () {

   }

   public boolean servicedBy (Request Request) {

     if (request.getPasses (). size ()> QTDMAX) {
       return false;
     } else {
       int totalDeSocksOrdder = 0;
       for (Pass to: request.getPasses ()) {
         if (p.isMeiaEntrada ()) {
           totalOrderSocks ++;
         }
       }
       if (orderOverview> MAXMEIAS) {
         return false;
       }
     }
     return true;
   }
}
Listing 10. ServicoDePagamento.java: Service that encapsulates communication with credit card operator systems.
public class ServicoDePagamento {

  private ServicoDePagamento(){
  }

  public static boolean realizaDebito(String numeroCartao, double valor){
    return true;
  }

}
Listing 11. ServicoDeCalculoDoFrete.java: Service that encapsulates communication with postal systems.
public class ServicoDeCalculoDoFrete {

  public enum CampoEndereco{RUA, ESTADO, CIDADE, BAIRRO}

  private ServicoDeCalculoDoFrete(){
  }

  public static double calculaFrete(String cep){
    return 12.07;
  }

  public static Map<CampoEndereco, String> recuperaEndereco(String cep){

    Map<CampoEndereco, String> endereco = new HashMap<CampoEndereco, String>();
    endereco.put(CampoEndereco.RUA, "Rua de Lugar Nenhum");
    endereco.put(CampoEndereco.ESTADO, "RJ");
    endereco.put(CampoEndereco.CIDADE, "Rio de Janeiro");
    endereco.put(CampoEndereco.BAIRRO, "Bairro Qualquer");

    return endereco;
  }
}
We saw, earlier, how to represent ENTITIES and AGGREGATES. With these elements defined in the domain model, we need a mechanism that provides us with references and persistence services for them.
The REPOSITORY pattern (see the box “Repository and the life cycle of an object”) offers a simple model for this purpose. Its interface provides methods that encapsulate the storage, retrieval of objects and collections.
Therefore, our application has a REPOSITORY of objects of the Order type (according to Listing 12), responsible for storing the orders placed by customers, in the database.
Note that the RepositorioDePedidos class is annotated with @Stateless. This annotation, which is part of the EJB specification, transforms our class into a Session Bean and allows us to use dependency injection (@PersistenceContext) in order to delegate transaction control to the container. This makes the job of making operations and queries on the database, through the EntityManager interface, less verbose, simpler and more efficient (review Listing 12).
"REPOSITORIES and SPECIFICATIONS mix seamlessly. We could use this combination to validate that a customer has already requested the number of passes allowed on previous purchases. To reduce the amount of code in the example, we ignore the Customer lifecycle, so that, whenever an order is placed, a new Customer object is persisted. It is interesting that you explore this scenario on your own. "
After using the techniques and patterns presented, we finally have a model expressed in a cohesive manner, with its rules implemented and supported by the TDD (see Listings 3 to 12 and Listing 14). We can then move on to the outermost layers of the application. This does not mean that the work on the model is ready. As previously mentioned, new ideas that improve the design can emerge and bring us closer and closer to an ideal model. Despite this, we are sure that we will work around a domain model that meets the needs raised so far, and most importantly, with its rules tested.
Repository and the life cycle of an object
To manage the life cycle of an object, we need a reference to it. We can get it by simply creating a new object with a new operator, for example. From there, we can define its state. Often, it is interesting to persist this state for future operations. Therefore, another way to obtain references to an object is to recover its persisted state.
The REPOSITORY pattern offers a model for encapsulating persistence and object recovery operations. It represents all objects of a given type as a conceptual (emulated) set. That is, the repository creates the illusion that you are working with a collection of objects of a type, in memory. The customer has the impression that he is adding, removing or retrieving objects, directly from this collection.
In practice, its interface offers CRUD operations (Create, Retrieve, Update and Delete). It makes details about the persistence mechanism transparent, such as the creation of SQL queries, for those who use it.
Using the technologies mentioned in this article, we can create the following basic interface for a repository:
@Local
public interface MeuRepositorioLocal<T> {

  public void adicionar(T obj);
  public void remover(T obj);
  public void alterar(T obj);
  public T buscarPorId(int id);
  public List<T> buscarTodos();

}
And implement it as follows:
@Stateless
public class MeuRepositorio implements MeuRepositorioLocal <MeuObjeto> {

   @PersistenceContext
   private EntityManager in;

   public void add (MyObject obj) {
      em.persist (obj);
   }

   public void remover (MyObject obj) {
     em.remove (em.merge (obj));

   }

   public void change (MyObject obj) {
     em.merge (obj);
   }

   public MyObject BuscarPorId (int id) {
     MeuObjeto obj = em.find (MeuObjeto.class, id);
     return obj;
   }

   public List <MyObject> fetchAll () {
     Query query = em.createQuery ("SELECT o FROM MyObject o");
     return query.getResultList ();
   }
}
Working outside the model
With the domain model in place, it's time to move on to the application and presentation layer, which are the outermost layers of the system. They are represented by the JavaServer Faces (JSF) framework in our project.
The first thing we are going to do is create the controller class RequestController (as per Listing 13). Controller classes are responsible for directing the actions performed by the user in the view layer, into the model layer. Because they do not represent the domain, they must not contain business rules.
The OrderController class was annotated with @ManagedBean. In this way, its life cycle is managed by the container and we can use dependency injection to inject a RepositorioDePedidosLocal Session Bean, through the RepositorioDePedidosLocal interface (see Listing 14), with the annotation @EJB. The @SessionScope annotation is used to define the scope of the life cycle of the object of the controlling class, which in this case is session.
The methods of the controller class, which are part of the application layer, will be called directly from the presentation layer and will pave the way into the model layer, through its interface.
The advantage of using annotations (@ManagedBean and @SessionScope) in control classes is that there is no need to use the faces-config.xml file to define settings.
Listing 12. RepositorioDePedidos.java: Repository that provides and stores objects of type Order.
@Stateless
public class RepositorioDePedidos implements RepositorioDePedidosLocal {

   @PersistenceContext
   private EntityManager in;

   // allows adding a request to the repository
   public void add (Request order) {
     em.persist (order);
   }
}
Listing 13. OrdersController.java: Controller class responsible for opening the way for the model layer, from the presentation.
@ManagedBean
@SessionScoped
public class RequestController {

  @EJB
  private RepositorioDePedidosLocal repositorio;

  private Client client;
  private Request order;
  private int qtdInteiras;
  private int qtdMeias;
  private String msg;

  // prepare the environment with an order instance
  public String preparPedido () {

    this.cliente = new Client ();
    this.pedido = new Order (this.cliente);
    this.msg = null;

    return "order";
  }

  // calculates the total order after the user enters quantities and zip code
  public String calculaTotal () {

    request.geraPasses (this.qtdInteiras, this.qtdMeias);

    System.out.println (this.qtdInteiras);
    System.out.println (this.qtdSocks);

    // validates requested quantities
    if (! new ValidOrder Specification (). servicedBy (request)) {
      this.msg = "<h3 style = 'color: red;'> Sorry! You can order a maximum of 5 passes (half a ticket). </h3> <hr>";
      return "order";
    }

    // retrieves address by zip code informed
    Map <CampoEndereco, String> address = ServicoDeCalculoDoFrete.recuperaEndereco (this.cliente.getCep ());
    cliente.setStreet (address.get (CampoEndereco.RUA));
    cliente.setEstado (address.get (CampoEndereco.ESTADO));
    cliente.setCidade (address.get (CampoEndereco.CIDADE));
    cliente.setBairros (address.get (CampoEndereco.BAIRRO));

    // calculates total order
    double freight = ServicoDeCalculoDoFrete.calculaFrete (this.cliente.getCep ());
    order.Total calculation (freight);

    return "PersonalData";
  }

  // redirects to payment screen
  public String effectPayment () {
    return "payment";
  }

  // finishes the purchase process. Debit the card and save the order.
  public String finalizaCompra () {

    // debits the purchase on the informed card
    ServicoDePagamento.realizaDebito (this.pedido.getNumeroCartao (), this.pedido.getPrecoTotal ());

    // data persists
    this.repositorio.adar (this.pedido);

    return "sucess";
  }

  // getters & setters
}
Listing 14. RepositorioDePedidosLocal.java: Interface used to inject a local Session Bean.
@Local
public interface RepositorioDePedidosLocal {

   public void add (Requested request);
}
330 / 5000 Resultados de tradução The user interface is made up of JSP files. The main JavaServer Pages that form the presentation layer of the project, are shown in Listings 15, 16, 17 and 18.
This layer makes use of the JavaServer Faces taglibs and EL to communicate with the application layer, which contains the controller classes.
The JSPs were presented in the listings in order of execution. For reasons of code simplification, form validations have been omitted at the application layer.
Listing 15. index.jsp: System home page.
<%@ page language="java" contentType="text/html; charset=ISO-8859-1"
    pageEncoding="ISO-8859-1"%>
<%@taglib uri="http://java.sun.com/jsf/core" prefix="f" %>
<%@taglib uri="http://java.sun.com/jsf/html" prefix="h" %>
<!DOCTYPE html PUBLIC "-//W3C//DTD HTML 4.01 Transitional//EN" "http://www.w3.org/TR/html4/loose.dtd">
<html>
  <head>
    <meta http-equiv="Content-Type" content="text/html; charset=ISO-8859-1">
    <title>Java in Rio</title>
  </head>
  <body>
    <h1 align="center">Bem vindo ao Java in Rio!</h1>
    <hr>
    <f:view>
      <h:form>
        <div align="center"><h:commandButton value="Pré-Venda!" action="#{pedidoController.preparaPedido}"></h:commandButton></div>
      </h:form>
    </f:view>
  </body>
</html>
Listing 16. Ordem.jsp: Page that allows you to choose the number of passes you want.
<%@ page language="java" contentType="text/html; charset=ISO-8859-1"
    pageEncoding="ISO-8859-1"%>
<%@taglib uri="http://java.sun.com/jsf/core" prefix="f" %>
<%@taglib uri="http://java.sun.com/jsf/html" prefix="h" %>
<!DOCTYPE html PUBLIC "-//W3C//DTD HTML 4.01 Transitional//EN" "http://www.w3.org/TR/html4/loose.dtd">
<html>
  <head>
    <meta http-equiv="Content-Type" content="text/html; charset=ISO-8859-1">
    <title>Java in Rio</title>
  </head>
  <body>
    <h1>Pré-Venda!</h1>
    <hr>
    <f:view>
      <h:outputText value="#{pedidoController.msg}" escape="false" rendered="#{not empty pedidoController.msg}"></h:outputText>
      <h:form>
        <h3>Selecione a quantidade de passes desejada:</h3>
        <table width="300">
          <tr>
            <td><h:outputText value="Inteira: "></h:outputText></td>
            <td align="right">
              <h:selectOneMenu value="#{pedidoController.qtdInteiras}">
                <f:selectItem itemLabel="0" itemValue="0" />
                <f:selectItem itemLabel="1" itemValue="1" />
                <f:selectItem itemLabel="2" itemValue="2" />
                <f:selectItem itemLabel="3" itemValue="3" />
                <f:selectItem itemLabel="4" itemValue="4" />
                <f:selectItem itemLabel="5" itemValue="5" />
              </h:selectOneMenu>
            </td>
          </tr>
          <tr>
            <td><h:outputText value="Meia Entrada: "></h:outputText></td>
            <td align="right">
              <h:selectOneMenu value="#{pedidoController.qtdMeias}">
                <f:selectItem itemLabel="0" itemValue="0" />
                <f:selectItem itemLabel="1" itemValue="1" />
              </h:selectOneMenu>
            </td>
          </tr>
        </table>
        <hr>
        <h3>Informe o cep:</h3>
        <h:inputText value="#{pedidoController.cliente.cep}"></h:inputText><h:commandButton value="Calcular Preço" action="#{pedidoController.calculaTotal}"></h:commandButton>
      </h:form>
    </f:view>
  </body>
</html>
Listing 17. data_pessoais.jsp: Page where the user can enter his personal data and delivery address.
<% @ page language = "java" contentType = "text / html; charset = ISO-8859-1"
    pageEncoding = "ISO-8859-1"%>
<% @ taglib uri = "http://java.sun.com/jsf/core" prefix = "f"%>
<% @ taglib uri = "http://java.sun.com/jsf/html" prefix = "h"%>
<! DOCTYPE html PUBLIC "- // W3C // DTD HTML 4.01 Transitional // EN" "http://www.w3.org/TR/html4/loose.dtd">
<html>
  <head>
    <meta http-equiv = "Content-Type" content = "text / html; charset = ISO-8859-1">
    <title> Personal Data </title>
  </head>
  <body>
    <f: view>
      <h1> Pre-order! </h1>
      <hr>
      <h3> Order Summary: </h3>
      <table width = "300">
        <tr>
          <td> Integers: </td>
          <td> <h: outputText value = "# {orderController.order.Quantity Of Integers}"> </ h: outputText> </td>
        </tr>
        <tr>
          <td> Socks: </td>
          <td> <h: outputText value = "# {requestController.order.sock Quantity}"> </ h: outputText> </td>
        </tr>
      </table>
      <hr>
      <div> FREIGHT: <h: outputText value = "# {requestController.pedido.frete}"> </ h: outputText> </div>
      <div> TOTAL: <h: outputText value = "# {requestController.pedido.precoTotal}"> </ h: outputText> </div>
      <hr>
      <h: form>
        <h3> Enter your details: </h3>
        <table>
          <tr>
            <td> Full Name: </td>
            <td> <h: inputText value = "# {requestController.cliente.name}"> </ h: inputText> </td>
          </tr>
          <tr>
            <td> CPF: </td>
            <td> <h: inputText value = "# {requestController.cliente.cpf}"> </ h: inputText> </td>
          </tr>
          <tr>
            <td> Email: </td>
            <td> <h: inputText value = "# {requestController.cliente.email}"> </ h: inputText> </td>
          </tr>
          <tr>
            <td> Telephone: </td>
            <td> <h: inputText value = "# {requestController.client.telephone}"> </ h: inputText> </td>
          </tr>
          <tr>
            <td> Street: </td>
            <td> <h: outputText value = "# {requestController.cliente.rua}" /> </td>
          </tr>
          <tr>
            <td> Number: </td>
            <td> <h: inputText value = "# {requestController.cliente.numero}"> </ h: inputText> </td>
          </tr>
          <tr>
            <td> Complement: </td>
            <td> <h: inputText value = "# {requestController.cliente.complemento}"> </ h: inputText> </td>
          </tr>
          <tr>
            <td> State: </td>
            <td> <h: outputText value = "# {requestController.cliente.state}" /> </td>
          </tr>
          <tr>
            <td> City: </td>
            <td> <h: outputText value = "# {requestController.cliente.city}" /> </td>
          </tr>
          <tr>
            <td> Neighborhood: </td>
            <td> <h: outputText value = "# {requestController.cliente.b Bairro}" /> </td>
          </tr>
          <tr>
            <td> CEP: </td>
            <td> <h: outputText value = "# {requestController.cliente.cep}" /> </td>
          </tr>
        </table>
        <hr>
        <h: commandButton value = "Proceed to payment" action = "# {orderController.effectPayment}"> </ h: commandButton>
      </ h: form>
    </ f: view>
  </body>
</html>
Listing 18. payment.jsp: Page where the user informs the data of a credit card and completes the purchase.
<%@ page language="java" contentType="text/html; charset=ISO-8859-1"
    pageEncoding="ISO-8859-1"%>
<%@taglib uri="http://java.sun.com/jsf/core" prefix="f" %>
<%@taglib uri="http://java.sun.com/jsf/html" prefix="h" %>
<!DOCTYPE html PUBLIC "-//W3C//DTD HTML 4.01 Transitional//EN" "http://www.w3.org/TR/html4/loose.dtd">
<html>
  <head>
    <meta http-equiv="Content-Type" content="text/html; charset=ISO-8859-1">
    <title>Pagamento</title>
  </head>
  <body>
    <h1>Pré-Venda!</h1>
    <hr>
    <f:view>
      <h:form>
        <h3>Informe os dados do cartão de crédito:</h3>
        <table width="300">
          <tr>
            <td>Numero do Cartão: </td>
            <td align="right"><h:inputText value="#{pedidoController.pedido.numeroCartao}"></h:inputText> </td>
          </tr>
          <tr>
            <td>Validade (mês/ano): </td>
            <td align="right"><h:inputText value="#{pedidoController.pedido.mesCartao}" style="width: 30px;" maxlength="2"></h:inputText> / <h:inputText value="#{pedidoController.pedido.anoCartao}" style="width: 30px;" maxlength="2"></h:inputText> </td>
          </tr>
          <tr>
            <td>Bandeira</td>
            <td align="right">
              <h:selectOneMenu value="#{pedidoController.pedido.bandeiraCartao}">
                <f:selectItem itemLabel="AMEX" itemValue="AMEX" />
                <f:selectItem itemLabel="MASTERCARD" itemValue="MASTERCARD" />
                <f:selectItem itemLabel="VISA" itemValue="VISA" />
              </h:selectOneMenu>
            </td>
          </tr>
        </table>
        <hr>
        <h3>Resumo do Pedido:</h3>
        <table width="300">
          <tr>
            <td>Inteiras: </td>
            <td><h:outputText value="#{pedidoController.pedido.quantidadeDeInteiras}"></h:outputText> </td>
          </tr>
          <tr>
            <td>Meias: </td>
            <td><h:outputText value="#{pedidoController.pedido.quantidadeDeMeias}"></h:outputText></td>
          </tr>
        </table>
        <hr>
        <div>FRETE: <h:outputText value="#{pedidoController.pedido.frete}"></h:outputText> </div>
        <div>TOTAL: <h:outputText value="#{pedidoController.pedido.precoTotal}"></h:outputText> </div>
        <hr>
        <h3>Dados Pessoais:</h3>
        <table>
          <tr>
            <td>Nome Completo: </td>
            <td><h:outputText value="#{pedidoController.cliente.nome}"/> </td>
          </tr>
          <tr>
            <td>CPF: </td>
            <td><h:outputText value="#{pedidoController.cliente.cpf}"/> </td>
          </tr>
          <tr>
            <td>Email: </td>
            <td><h:outputText value="#{pedidoController.cliente.email}"/> </td>
          </tr>
          <tr>
            <td>Telefone: </td>
            <td><h:outputText value="#{pedidoController.cliente.email}"/> </td>
          </tr>
          <tr>
            <td>Rua: </td>
            <td><h:outputText value="#{pedidoController.cliente.rua}"/> </td>
          </tr>
          <tr>
            <td>Número: </td>
            <td><h:outputText value="#{pedidoController.cliente.numero}"/> </td>
          </tr>
          <tr>
            <td>Complemento: </td>
            <td><h:outputText value="#{pedidoController.cliente.complemento}"/> </td>
          </tr>
          <tr>
            <td>Estado: </td>
            <td><h:outputText value="#{pedidoController.cliente.estado}"/> </td>
          </tr>
          <tr>
            <td>Cidade: </td>
            <td><h:outputText value="#{pedidoController.cliente.cidade}"/> </td>
          </tr>
          <tr>
            <td>Bairro: </td>
            <td><h:outputText value="#{pedidoController.cliente.bairro}"/> </td>
          </tr>
          <tr>
            <td>CEP: </td>
            <td><h:outputText value="#{pedidoController.cliente.cep}"/> </td>
          </tr>
        </table>
        <hr>
        <h:commandButton value="Finalizar Compra" action="#{pedidoController.finalizaCompra}"></h:commandButton>
      </h:form>
    </f:view>
  </body>
</html>
Conclusions
This article sought to show the use of the technique presented by Eric Evans, in a practical way, focusing more on the design of the application than on the explanation of concepts, supporting technologies and frameworks.
The simple fact of using an object-oriented language, such as Java, in a software project, does not guarantee that the project team is aligned with the paradigm. Object orientation is much more linked to design decisions than the language used.
The great benefits of object orientation appear in the medium and long term, mainly during the maintenance phase of a system, where most of the design time is spent.
DDD helps the development team to follow, in fact, the object-oriented paradigm, in addition to allowing the creation of a rich domain model. In this way, the maintenance of the final product, as well as the addition of improvements and new features, will be facilitated. Thanks to the clarity between business and implementation, based on the effective and efficient use of object orientation.
References
http://domaindrivendesign.org/ DDD community.
http://www.infoq.com/minibooks/domain-driven-design-quickly InfoQ DDD book.
https://www.devmedia.com.br/java-e-domain-driven-design-na-pratica-java-magazine-87/19019 Devmedia.
Web Infrastructure
Contextualization Web infrastructure is prevalent in the vast majority of IT environments. This is because nowadays, when we publish or consume content, we do it through the Internet and connect with services and servers available in this environment, using browsers, e-mail or message readers, various applications on our cell phone, tablet or computer. Virtually everything we do on our cell phone, for example, which uses remote communication, is done via the Internet and, most of the time, using Web infrastructure. In some cases, depending on the phone operator, even the telephone connection uses this structure and no longer exclusively the conventional telecommunications network. In fact, considering only the cell phone media cited for use in academic environments, we have the information from the TIC Educação 2017 report (2018, p. 104 - 105) confirming that the smartphone was the main device for accessing the Internet in almost 80% of cases for students using the network. That is, the environment we are studying is accessible (and also its weaknesses) for a large number of people, without the need for special resources. This research began to be carried out since 2010, through interviews with students, teachers, pedagogical coordinators and directors. Other reports of Information and Communication Technology (ICT) also organized by Cetic.br (ICT Households, Health, Companies, among others) also show a high use of the Web. that we access various services from there for work, education and leisure. As the web infrastructure is so used, and several communication resources and content availability are offered through it, it is natural that when we talk about cyber attacks or security attacks information, this is also the most cited environment. For this reason, when addressing themes of attacks and defense for Web applications, it is important to understand that they are in this context because of the popularity and prevalence of the environment and therefore the relevance in understanding its effects. However, when you understand the concept, know that in most cases you can apply it in your IT professional life, even if in your role you deal with other specific infrastructures and networks not exposed to the Internet.
Basic Components of the Web Infrastructure
A few years after the popularization of the Internet, an article entitled Diameter of the World-Wide Web (ALBERT et al., 2009) became famous in academia trying to portray the size of the World-Wide Web. In it, the authors were interested in mapping the size of the Web in the form of a directional graph, where the vertices would be the documents (content) and the link to access it edges (website links). At the time, the number 8 × 10⁸ vertices seemed gigantic, but since then, with the increase in its use, the advent of Big-Data and Cloud Computing, we have seen that number grow exponentially. As is known, anyone can publish content and make it available on the network, increasing this number. With the advent of the Internet of Things (IoT), different devices for our home use, watches, clothes and other objects will also be connected, generating and consuming content from the Web. , but this preamble, in the text of the unit, serves to alert IT professionals of the fact that studying web attacks also involves recognizing their size and, consequently, the impossibility of wanting to protect this universe of assets in their entirety . Even accepting the fact that the information security professional, designated and responsible for maintaining a company's Web security, is naturally concerned with a reduced scope of this universe, the assets of the corporate Web infrastructure only, one must think that there are still a series of complications that make it difficult to control this environment. Three factors that I would like to highlight for our reflection are: equipment involved, components installed and constant configuration change. Regarding the equipment involved, I ask you to try to imagine a company that has some internal ICT resources, to provide access to common network resources (file sharing, name resolution (DNS), e-mail services, etc.), but that most of your web infrastructure assets are in a datacenter, a physical space for these content servers and services hired from a specialist company located outside your company. Thinking about the issue of equipment involved and the specific security issues involved (since each piece of equipment is made up of specific hardware and a specific operating system), imagine how complex it is to think of a strategy that satisfactorily meets all these elements. Imagine also that to keep your IT park updated, your company adopts a policy of purchasing and installing new equipment every three years. Imagine also that, for contractual reasons, your supplier also reserves the right to do so in the datacenter, but for reasons and internal decisions and at intervals determined by this supplier. Complex, isn't it? In general, the consensus and good practice of the corporate world has been to adopt a homologation policy, reducing the diversity of equipment and this complexity cited for a group known (homologated) by the company's information security specialists. In this scenario, these specialists test certain sets of equipment and ensure that the required functionalities are adequate and, above all, map known vulnerabilities (CVE) and risks associated with the use of that equipment. In order to replicate this certified set outside the company's domains, we seek to establish in contract this alignment of the company's information security policy with the infrastructure maintenance processes in the contracted datacenter, ensuring the homologation reflected there too.
"The concept of vulnerability has been addressed previously in course subjects. The term CVE used here, need not refer exclusively to the equipment involved, as it is a broader topic. This term Common Vulnerabilities and Exposures (CVE), broadly speaking, refers to everything we know about vulnerabilities about an equipment, system, software or set of associated elements. For example, a Windows Serverversion “X” server, with Oracle Fusion middleware version “Y”, has a known vulnerability and was categorized as serious. This generic example combines two components, which when together can offer a certain risk, since it is already known that one or more vulnerabilities can be exploited in a context. These notices are received daily and, therefore, we can count on a very updated CVE list. The notices have a specific ID for documentation purposes, which also identifies the year of their discovery (Ex .: CVE-2019-2414). When verifying the information contained in the CVE, in addition to the description of the discovered flaw, specific scenarios in which an attacker could execute a determined attack taking advantage of the vulnerability, there are also ways to remedy (mitigation). a series of databases available for consultation of published CVE, some even made available by the suppliers of equipment or operating systems that we have decided to use in our infrastructure. A source of data that I really like to use is provided by NIST, a North American agency responsible for IT standards for the United States."
To continue reflecting on the three factors of complexity, I would like to invite you now to think about the second factor: installed components. In a similar way to the first, realize that for the same homologated equipment, according to the function that it performs in our Web infrastructure, it needs one or another component installed. This obviously changes the information security context involved, as it is no longer possible to treat the two devices in the same way, as they do not have the same composition. Imagine as an example that in your infrastructure there is no heterogeneity in relation to equipment and neither in relation to operating systems. All your servers operate with hardware of a certain brand and on them you have installed Ubuntu Server version 18.04.01 LTS with OpenStack. However, as each has different purposes, in this example one of them has OpenSSH, Python 3 and Nginx components and in another there is PHP 7 and MySQL installed. It is easy to see that they offer different risks, isn’t it? To protect these different servers, it will be necessary to understand the vulnerabilities that the set of components, when together and working in a single asset, offer the equipment, even if it is the homologated and known, which we talked about earlier. Following a similar line with this second factor, note that to discuss the case of constant configuration change, we need to refer to the previous factors. When we analyze the equipment itself, its configurations are rarely stable during its use life cycle in a corporate environment, from the moment of its installation until its deactivation. This is because several modifications are required over time, for different reasons. For example, the simple fact that we configure priority in the operating system for a given application, because we perceive a dispute over memory resources on the server during its operation or even the fact of inserting a new network configuration so that it becomes accessible for a new branch or by employees who started using home-office resources, represent important changes that change the risk profile of that asset. When we observe a new CVE and to make the suggested correction, we change the settings and parameters of this server. When we perform the update routine suggested by the operating system and / or installed applications. When we enable an operating system component or install a new application. All of these situations generate changes in the infrastructure that can cause positive or negative impacts both in the functioning and in the attack possibilities to which that asset is susceptible. As a basic rule, supported even by the ITIL v3 Service Transition book, change management should be approved only after the validation of generated impacts. In addition, it must be conducted in test environments, before its application in a real environment, reducing the risk of negative impact on the infrastructure. During the approval process, the ITIL instructions also include an approval figure called Change Advisory Board (CAB) that is responsible for this risk assessment before the change is approved.
As you may have realized, knowing the existing infrastructure is a fundamental step for us to be able to talk about security, the risks we are exposed to, think about 329 / 5000 Resultados de tradução possible attacks and how we can defend this environment. So let's review some concepts before we talk about attacks and get a better understanding of web devices, web applications and some technical references that will be useful to us in the next units, when we will explore web attacks more directly.
General Concepts: • Information contains value, as it is integrated with processes, people and technologies; • Information is an asset that, due to its importance to the business, has value for the organization and therefore needs to be adequately protected; • Nor all information is crucial or essential to the point that it deserves special protections • IS is an area of knowledge dedicated to the protection of information assets against unauthorized access, aimed at meeting the principles of Authentication of origin, Confidentiality, Integrity and Availability of these; • Vulnerability: a failure or weakness in a System or network, in its procedures, design, implementation or internal controls, which can result in a security breach and breach of security policy; damage, whether intentionally or unintentionally • Control: actions taken to prevent, control, detect and minimize risks to integrity, confidentiality and availability • Vulnerability check (search for CVE): the process of identifying, quantifying, prioritizing or ranking vulnerabilities in a system.
Security pillars:
• Authentication of origin: proof that the source of the data received is the one it claims to be (eg, digital signature) • Confidentiality: service that can be used to protect data from unauthorized disclosure (eg .: symmetric encryption); • Integrity: ownership of data that has not been altered or destroyed in an unauthorized manner (eg, HASH algorithm: SHA-256); • Availability: ownership of being accessible and usable when required by an entity authorized.
"Note that, considering the first three concepts (general concepts), it is not the intention of the security professional responsible for identifying possible attacks in the environment and proposing defenses, covering the entire complex structure that we are contextualizing. Therefore, you must understand that there is a process of selecting priorities considering the risk and impact on the business. Observing the example of vulnerability illustrated in Figure 1, the professional could use the degree of severity pointed out, or even the assets involved that represent greater importance to the business. Another point that draws attention in the second sentence is the word "appropriately". That is, the protection process must be chosen in proportion to the degree of risk encountered and / or the importance of the asset. In information security, we often use two documents / activities to carry out this selection of importance and determine the appropriate protection: Classification of information and Business Impact Analysis (BIA) - Business Impact Analysis (SÊMOLA, 2014)."
Web Infrastructure
Well, now we will talk in more detail about the infrastructure and you will read terms such as client-side, server-side, URI and other technical terms. If you do not know them yet, here you will see them in a superficial context of how the Web works, so that later it becomes clearer how they are exploited by attackers, when we are studying the steps and anatomy of common attacks in this infrastructure. For those who are coming into contact with these terms and concepts for the first time, it is highly recommended that they read the additional reading materials and videos from this unit, suggested at the end of this material, in the Complementary Material section. Applications We will try to conceptualize the client-server paradigm (Web applications) and main IT resources involved in the communication and interaction of these entities. In general, an application can be defined as a type of software developed to adapt/operate in a specific architecture and operating resources (OS, interfaces and hardware resources) and has the function of performing specific tasks, associated with an intervention / interaction using, normally, the human-machine interface (HMI). Web applications are used on Web devices. Looking at a basic information system diagram (Figure 4), where we basically have an input, a processing and an output / delivery of data, an application can be seen as this central part, with the interfaces represented by a user-another user, user-server or server-server. In our case, referring to the Web environment, we can list on the client side applications for audio and video playback, PDF viewer and the browser itself. An application or app intended for a smartphone web device (cell phone), for example, to function may need a specific compatible operating system, in addition to allowing access to resources such as phonebook and Global Positioning System (GPS).
On the server side, applications to perform data queries, schedule management, conferences, among others, written in the programming language available on that specific server (Ex. .Net, PHP, ASP, etc.).
Often when we imagine this communication structure in the Web environment, we focus our attention on client and server communication. In fact, a commonly seen definition is that this environment is composed of an architectural structure that allows access to linked documents spread over millions of machines on the Internet (TANEMBAUM; WETHERALL, 2011 p.407). Which is not to say, however, that when requesting a resource or document through the browser, the client is answered / answered by the server responsible for the address that the client typed in the address tab of his browser. This is because there are usually several additional directions and / or queries and server-to-server communication before the document or service is made available to the user in response to their request. This scenario is common, for example, on a website that acts as a "portal" and has only partially the documents and services advertised locally. This understanding of communication flow is important for us to understand, from a security point of view, that sometimes it is not enough to fix vulnerabilities in the browser (updating or restricting access to personal data and browsing history) without we also think about the security of the client-server communication segment (network communication), the applications that provide the Web services available on the website, the applications that search for information and / or documents in local or external databases, or even security server-to-server communication. The very idea of the Web application that we started to discuss, illustrated by Figure 4, gives us the notion that we can apply protections at various points. For example, on input, selecting authenticated users and performing code injection counterattack filters. At the “core” of the application, applying authorization restrictions for that user's execution, establishing limits for memory allocation or processing. On output, applying viewing restrictions according to the confidentiality profile. Another phenomenon related to the concept of Availability that affects the protection work in the Web infrastructure is related to the number of servers allocated to respond for a given service. Important services, frequently used or linked to a contract that offers guarantees of a minimum percentage of operation, are normally provided with contingency measures. To prevent the service from becoming unavailable, other server (s) are allocated to “respond” to requests for these services if these servers fail. In some cases, even, the contingency operates jointly with the main server, in order to “split the load” of service requests, respecting load-balance rules. Note that when we verify the need to apply security correction or protection to a server in this infrastructure, this process must be repeated for all other servers in the set, under penalty of, when we need to activate / use the contingency server, it is not “as safe” as the main one. Furthermore, as we are talking about communication, it is not convenient to look only at the client or server entity, in isolation. A common example of communication between the customer and the server, through the browser, starts when the destination URL (Uniform Resource Locator) is typed or the path to the requested resource within the Web server. The next step, usually , involves communication with a server, but not necessarily with the destination server. I refer to the name resolution server, Domain Name Servers (DNS) since, most of the time, when we make requests for Web resources we use your name and not your IP address. After performing this first “query” to obtain the destination address, we will in fact do the communication with the Web server.
Note that in this context, we commonly see attacks exploiting the DNS query, with an interest in directing the client's browser to a fake server, with malicious intentions of acquiring his password, active session data that are in progress, among others. As the process of querying addresses by the machine, where the browser is installed, occurs in three phases / attempts, the attacks directed at the “poisoning” of this DNS service can occur in any one of them: • attempt of local access by reading the configuration file: hosts; • attempt to query the local DNS through recursive queries; • redirect these queries to other external servers that will perform interactive queries that will be answered by authoritative servers and / or Top Level Domain Servers ( Note that the attack involving changing data from the local DNS configuration file (c: \ Windows \ System32 \ Drivers \ etc \ hosts on So Windows and / etc / hosts on Linux OS) requires the attacker to have invaded the client machine and obtained privileges to edit the text contained in that file. The attack involving the observation and alteration of data in the communication between the client and the DNS server, depends on the attacker's ability to position itself on the network and capture the packets related to the query performed, manipulating response data to obtain the targeting effect. to the fake site. In the specialized literature, it is called this capacity of the attacker to observe the packages sent by the client (victim of the attack) and another entity, of Man in-the-middle (MITM).
In terms of protecting communication, note that there are two distinct sections that are vulnerable to MITM action, depending on where the attacker is positioned. A section where the client accesses the DNS services and Web server and another between the Web server and the database. Note that this division between the Web server and the database is not always present. That is, in some cases, the Web server will have its database / information and stored files that are accessed by the browser will access a link or view content on screen on the server itself. In this case, there is no interceptible network communication. A very common solution to mitigate the risk of an MITM making observation and alteration of data in the mentioned network communication stretches is the use of secure channels that encrypt data. Common protocols for this purpose are Transport Layer Security (TLS) - [RFC 8446] and Secure Socket Layer (SSL) - [RFC 6101]. These are currently in versions 1.3 and 3, respectively. In this scenario, even if MITM is able to position itself on the network segment of interest and observe the transit of packets, it will not have the intelligible data available to perform manipulations. We will see the SSL protocol, its relationship with the client (browser) or between servers, in more depth and examples of attacks on later units. We have already seen that it is quite common for a Web server to have connections with other servers, as the content displayed on your Web pages do not have (stored on the connected Web server or database) this stored data. We now have the notion that the client-server paradigm can also involve other server entities. In fact, this is one of the best security practices that we will address in later units.
The client-server Web paradigm occurs in a scenario where two or more Web applications communicate via the network (browser application and Web server application). In a request and response scheme (flow), users in different places access content available locally on that server or referenced there and obtained from other server (s). This paradigm arose from the need to share resources for several clients. The term “remote content” is often associated with the client-server paradigm, which assumes that the client seeks information remotely, published on the Web server (s). Note that, in the example shown in Figure 6, we have the server Web which responds to the request (address) made by the client's browser hosted in a datacenter on the Internet, but nothing prevents us from imagining the flow ending up on a Web server installed within the same local network where the customer is located. In both cases, we can use the concept of remote content and the paradigm. Taking advantage of the fact that we are analyzing this figure, I take the opportunity to introduce two terms from the specialized literature in this context, the “front-end” and the “back-end”. In the illustration, the front end is represented by the Web server (application), but it could also be represented by the load balancing service that we talked about earlier. Front-end, therefore, will be the network assets that we place in front of the structure, receiving requests. The back-end is represented by the database server.
This separate configuration of the entities, leads us to another important definition for our review of Web concepts, that of distributed systems. A distributed system can operate in this client-server configuration, but also point-to-point, since there is no distinction between servers and clients as in the client-server paradigm. The idea of distribution is decentralization. Services Web services are provided by the Web server (s), which use Web applications. Do not confuse with network services, because although they are necessary for us to use the resources of the servers, this are used as a vehicle in the context. For example, in addition to the DNS service we talked about, another important service for ensuring communication and access is IP addressing. Usually provided by a specialized network asset, such as routers or Dynamic Host Configuration Protocol (DHCP) servers, these are responsible for identifying the devices on the network and provide support for the Web infrastructure to function. Web services are made available on the network by servers through sockets, responsible for combining a specific port, identifiable by the Transmission Control Protocol (TCP) protocol in the transport layer (layer 4 of the Open Systems Inter-connection model - OSI or 3 of the Internet protocol suite model) and an IP address. Examples of Web services and respective ports (default and secure version) are:
• HTTP / HTTPS (80/443); • FTP / SFTP (21/22); • IMAP (143 / 993); • SMTP (25/465).
When receiving a service request in a socket, a Web server performs the following steps (TANENBAUM, 2011): 1. Accept a TCP connection request from a client (browser); 2. Get the path to the page (local or distributed); 3. Get the requested content; 4. Send the content to the customer; 5. Terminate the TCP connection.
Communication established by a client (browser) accessing an HTTP socket is normally carried out using GET or POST. The complete list of possible methods covers (LANE; WILLIAMS, 2004): • GET: Receives an appeal. The request can continue with data search parameters in the database, passing a variable name; for example.www.meusite.com.br?name=marcelocarvalho&ID=10;
• POST: Data is sent in the “body” of the HTTP request. Input user and password of an authentication form, for example
• HEAD: Returns only the header fields in the response, not the resource itself
• DELETE: Enables a resource identified by the URL to be removed from the server. For example, if the anonymous user has power to write to the server's folder, he can remove the main page by sending the command DELETE /index.php HTTP / 1.1; •
PUT: Similar to the POST method, it is used to designate a non-resource pre-exist on the server for later use. For example: PUT /novoindex.php HTTP / 1.1 Host: meuite.com.br
• TRACE: Used for diagnostics. For example: TRACE /index.html Response: Request has body No.
Example service response: HTTP / 1.1 200 OKDate: Wed, 2 Jan 2019 02:54:37 GMTServer: Apache / 2.4.38Last-Modified: Wed, 2 Jan 2019 02:53:08 GMTETag: “4445f-bf-39f4f994” Content-Length: 321Accept-Ranges: bytesConnection: closeContent-Type: text / html
<! DOCTYPE HTML PUBLIC “- // W3C // DTD HTML 4.0 Transitional / / EN ”“ http://www.w3.org/TR/html4/loose.dtd ”> <html> <head> <title> Grapes and Glass </title> </head> <body> <img src = ”Http://mysite.com.br”> <p> Hello world - example site <p> <img src = ”http://mysite.com.br”> </body> </html>
In the event of an error, however, the service may inform the user with standard or customized errors on the server. Instead of the status 200 shown in the example, the service could have returned 403, if the server had implemented a specific access control scheme for the default folder being accessed. In fact, permission issues with Web server folders are a reason for concern for information security specialists. Often, thinking about guaranteeing the functionality of a website, the programmer or IT administrator responsible for its implementation ends up assigning improper permissions, leaving it functional, but vulnerable. In general, HTTP status codes can be divided into (LANE; WILLIAMS, 2004): • 1xx - Informational. HTTP 1.1 uses this status class to indicate that the request was received by the server and is being processed; • 2xx - Success. Request received and successfully processed • 3xx - Redirection • 4xx - Error from the client. Request cannot be processed due to syntax failure, incompatibility or lack of the requested resource • 5xx - Error from the server. Failed to process a valid request.
Exploring a little bit of what we saw in services to talk about attacks again, you may have noticed that an important point of attention is sockets, right? Note that, in general, one of the first things you should do on a web server, thinking about your security is to leave active only the services that will be used on that server. This activity is known as the hardening process, necessary for servers who are “exposed” to external connections (bastion host). Thus, the available sokets will be only those that actually offer services related to the business or the function of that server. Realize that, notably, one of the initial tasks seen in the anatomy of any Web attack is the action of discovery (Discovery) of the active services. Using a tool that we will see with examples in the videos of the Unit below, an attacker can perceive that there is a socket relating to a database service and then, through a version banner for that service, finds that there is a known vulnerability and exploit (attack / test program that exploits that vulnerability) available that can be used to attack that server . Two other important points to note are the resource reservation process (demonstrated by the steps of responding to a browser request) and the implementation of HTTP methods that can cause risk. Speaking of the first case, one of the attacks that are carried out by attackers on Web infrastructures is the Denial of Service (DOS), or denial of service attack. This attack aims to exhaust the server's ability to handle service requests (leaving it “down”). For example, two sockets are open on the test server. When initiating a telnet attempt to the ports, it is discovered that it is an Apache Web server version 2.3.20 and that it is configured to support a recent version of PHP: 1. nmap -v meuite.com.brStarting Nmap 7.60 ( https://nmap.org) at 2019-01-24 16:07 -02Initiating Ping Scan at 16: 07Scanning Meusite.com.br (192.168.10.20) [2 ports] Completed Ping Scan at 16:07, 0.00s elapsed (1 total hosts) Initiating Parallel DNS resolution of 1 host. at 16: 07Completed Parallel DNS resolution of 1 host. at 16:07, 0.00s elapsed ... Discovered open port 80 / tcp on 192.168.10.20Discovered open port 443 / tcp on 192.168.10.20..PORT STATE SERVICE80 / tcp open http443 / tcp open https2. % telnet meuite.com.br 80Trying 192.168.10.20 ... Connected to meuite.com.br.Escape character is '^]'. HEAD / HTTP / 1.1HTTP / 1.1 200 OKDate: Wed, 2 Jan 2019 03:42: 32 GMTServer: Apache / 2.3.20 (Unix) PHP / 5.6P3P: policyref = ”http://www.w3.org/2001/05/P3P/p3p.xml” Cache-Control: max-age = 600Expires: Wed , 2 Jan 2019 03:52:32 GMTLast-Modified: Tue, 1 Jan 2019 21:08:00 GMTETag: “5b42a7-4b06-3bb0f230” Accept-Ranges: bytesContent-Length: 19206Connection: closeContent-Type: text / html; charset = us-asciiConnection closed by foreign host.% The attacker's next step would be, for example, to identify CVEs for this server and version and then locate available exploits. DOS attacks are based on the three - way-handshake, characteristic of protocols of the TCP type (syn-synack-ack). When requesting a web service from the server, the client sends a syn. Upon receiving it, the server allocates computational resources to respond appropriately to that request (memory, processing, etc.) and responds synack to the client, waiting for the connection to end, which in the case of the attack, never materializes.
Upon receiving several requests of this type, without due completion, use of the resource and release of it, the computational resources reserved by the server are being allocated, but not used and released, until a time when there are no resources for new requests. tions and, in some cases, not even for the server to continue working. This condition is called “frozen server or service”, and among the most common remedies, we have the implementation of firewall rules, limiting connection requests from the same host (client) or the limitation configured in the Web application itself. server (IIS or Apache, for example).
Client-Side and Server-SideNow that we have already reviewed basic concepts of Web applications, from the point of view of the basic structure that supports it, how the elements communicate and offer or consume services, we still need to observe some aspects of data structure and language programming, also to help us understand attacks. Aiming at differentiating these two sides of Web communication (client-side - client side and server-side - server side), it is important to note, for example, that the language that each side uses for the offer and consumption of a Web service is different. On the server side, we can have a Web service on the server that was produced using PHP (server-side) language, but which is delivered and interpreted by the client's browser using HyperText Markup Language (HTML) and JavaScript (client-side). These scripts are used, side by side, to compose and interpret dynamic behaviors on the site. The language differences, from the point of view of an attack, differ in relation to the power of interaction or modification that an attacker has when trying to create a situation where malicious behavior is possible, for example. As on the server side, the scripts are physically “farther away” from an attacker (since it is agreed that an attacker, at least 1000 / 5000 Resultados de tradução initially, it positions itself as if it were a customer or normal user of the service trying to find systemic vulnerabilities), and theoretically server-side scripts are executed by the user of the server linked to the Web application, it becomes less costly when attacking you to try modify behaviors on the browser side (client-side). Therefore, for us who want to protect these applications, it is important to know the differences between the navigators, the types of scripts that each supports, etc. On the client side, the interpretation and form of interaction with scripts can vary widely, causing compatibility failures, errors and vulnerable conditions. One of the examples that illustrates this difference is the usability features for users with physical limitations and disabilities. Although there are projects to standardize and unify this interaction and behavior of browsers, client - side resources end up depending a lot on what is available computationally on the client.
Looking at these two sides from the point of view of data structure, we also see important differences. On the server side, there is greater freedom for the programmer / developer in relation to the place where the codes, scripts, images and content in general will be stored, even if the web applications of the server (IISe Apache, for example) offer a standard directory structure for this “note”. This means that there is a certain freedom of choice, which on the one hand can represent a facility for the programmer, for example, when he wants to reference a resource that already exists in another repository of that server's OS. However, when doing so, and leaving the scope of Apache directories, for example, to another one of the user or the system, we have that the associated permissioning and access control scheme changes a lot, which can cause undue exposure of users. Excess data or permissions for those who visit that content (customers). In any case, the Web application must be able, when receiving a request for a resource or service from the customer, to find its location, internally or by means of redirection. exter-no (back-end or other server). Below, an example of this mapping, considering a resource request by the customer (absolute URL - [RFC1738]) and its respective effective address of the resource in the directories (Relative path - [RFC1808]):
On the client side, this organization is much more rigid. We have the Document Object Model (DOM), which is a valid Application Programming Interface (API) implementation for HTML and Extensible Markup Language (XML). This API serves, among other things, to promote an interface for manipulating and viewing documents and their specific parts (tags) through the scripts being executed by the browser. From the attacker's point of view, the fact that there are standard objects and functions in the client API , facilitates the induction of a desired malicious behavior. For example, making a code injection (we will see what it is about in the next Unit) in an input destined to insert a password or perform a “submit” in a form outside the will of the legitimate user accessing the resource.
Devices Even though the study of Web devices makes more sense for a developer, as it has to do with the media format that the equipment is ready to process or even standards of content representation, it is important to know the fundamentals involved, since several attacks are targeted at specific devices. For example, tablets or smartphones. As the devices became more popular and evolved, more computational resources leveraged new possibilities for navigation and use of Web resources. Thus, new equipment provides more and better interactions and some languages are obsolete or no longer fit the supports provided by the devices. devices. We've seen that happen with Flash in the last few years, haven't we? Chrome browsers, Microsoft Edge, and Safari have been blocking this type of content since 2016. Officially, Adobe, owner of Flash, announced that its definitive end should occur in the year 2020. See an interesting animation that demonstrates this evolution, as new and better devices became available for our use.
From the point of view of the amount of computational resources available in the devices, two client models stand out: Thick / Fat-Clients with large capacity and Thin Clients, with small capacity. Thick-clients have installed a good part of the resources necessary to perform the user's operations (do not confuse with having the desired content / information locally). Thin-clients, on the other hand, are dependent on connection to a server both to obtain the content / information and to carry out the requested operations and tasks, being responsible, in most cases only for the display operation. Each type of device, from the user's point of view, is best suited for one or the other task.
Considering the different capacities and characteristics of the devices, a trend has been the use of the Model-View-Controller (MVC) model, which separates presentation and content layers on the server, as recommended by the World Wide Web Consortium ( W3C). In this way, according to the "capacity" of the client device, a type of interaction is performed with the controller on the server device, which will result in a type of view that is appropriate and compatible with the requester (PRESSMAN; MAXIM, 2016).
From the point of view of information protection and security, depending on the type of device that your company's corporate security policy authorizes the use of, the concern will be related to the types of interfaces available, connection capacity, operating system and existing update and patch models, etc. On the server side, there is also a wide range of devices (hardware), associated with OS and specific Web applications, which together with their operating characteristics will require specific care from the point of view of security , whether they work locally, in datacenters or cloud computing. Web Infrastructure - Examples of Server InstallationMount your test Web infrastructure and observe the functioning and communication of the components we've talked about so far. In the following basic steps, you will see a little bit of the installation and details of the IIS and Apache interface, to provide web content to our test lab for the discipline. Currently, Microsoft, responsible for IIS, keeps it in version 10 , but depending on your server operating system, you may have to work with an earlier version. To configure your IIS server, install your virtual machine with Windows server OS and follow the steps below:
Enable the IIS service or install it. Click start, then open Server Manager and click Manage> Add roles and features. Select next until you reach the Server roles option and check the Web server (IIS) option for installation.1. Log on to the Web server computer as an administrator; 2. Click Start, point to Settings, and click Control Panel; 3. Double-click Administrative Tools and then Internet Service Manager; 4. Click the Site tab. Here you can continue configuring the sitedefault, or create a new one, by right-clicking and then a new website; 5. Click on the website you want to configure in the left panel and then click on basic settings in the right panel (actions); 6. Enter the path to the folder where the files to be viewed by the customer (content) will contain. The default path is inetpub / wwwroot. Close the configuration window;
Resultados de tradução
- Click on binding in the right panel (actions), select the http line and, in the IP address field, choose the IP address to be used for the website or leave the default setting All (Unassigned); 8. Modify the transmission control protocol (TCP) port as appropriate. Default, port 80. Close the configuration window; 9. Click explore, also in the right panel (actions); 10. To use a folder on your local computer, click a directory on this computer, then click Browse to find the folder you want to use. At this point, you can now create your default file to be displayed to customers who will access this site, for example, index.html, with content similar to that illustrated in Figure 11, changing the data to your name and course and enrollment information; 11. To use a folder that was shared from another computer on the network, click on a share located on another computer and enter the network path or click Browse to select the shared folder. Close the configuration window; 12. Click on edit permissions, also in the right pane (actions). Click on the security tab and edit the permissions of the IIS user to perform other operations besides reading, if necessary for your site; 13. Click OK to accept the properties of the site.
Testing the ServiceYour web service should now be available to customers. With another virtual machine and a desktop operating system on the same network, enter the IP address of the server machine in your browser. The display of the contents of the server's default file, or the one created in step 10/11, should occur in the browser. For Apache configuration, install your virtual machine with Ubuntu server OS and follow the steps below: 1. $ sudo apt-get install apache22. $ sudo apt-get install php53. $ sudo /etc/init.d/apache2 restart4. $ sudo chmod 664 / var / www / html5. $ sudo gedit /var/www/html/index.html At this point, you can now create your default file to be displayed to customers who will access this site, for example, index.html, with content similar to the one illustrated in Figure 12, changing the data for your name and course and enrollment information. Test the operation with a client browser, in the same way as we did after the IIS configuration steps.
Attacker Profiles and Attack Formats Throughout the text, we explored the infrastructure and as we progressed in understanding its components, we took the opportunity to learn about examples of attacks or related protection activities. Now, however, we are going to formally conceptualize the four main attack formats and what are the nomenclatures that differentiate the attacker profiles, which we will study in the next units. It is very important to know who is out there (or as research indicates, inside the company) with the intention of attacking us. Therefore, we will start by understanding the characteristics of the attackers a little: Attacker Profiles
• White Hat: Ethical Hacker - A hacker who uses his extensive experience and knowledge to test systems to increase their security
• Gray hat: At certain times acts as White hat, but in others in a malicious way (cracker)
• Black hat: Unethical hackers that invade networks and computers in an unauthorized way through direct attack, malware infection, etc.
• Hacktivist: Hacking activities hackers and crackers with the aim of getting the attention of society, usually related to a cause or ideology;
• Script Kidie: Amateur crackers who use programs developed by others (in general they don't even know how it works), using them with purpose to move or demonstrate their “power” to the public.
Attack formats Considering that we have a normal communication flow (Figure 13 - flow a) between two points (origin and destination), a message being sent, traveling a data transmission path and being received by the remote point, there are basically four scenarios of attack. deviation from this flow, which we will treat here as the main attack formats. In flow b, we have a variation of the normal scenario, in the sense that the message did not reach its destination. Considering that in this attack, the attacker acted to carry out this action of cutting off communication, we call this action of interruption. A typical example of this attack format is DOS, as we have already discussed in this unit. In flow c, notice that there is a new “character” involved in the communication. Again, if you remember, we have already talked about this definition, and we call it MITM. MITM, in flow c, observes the communication and uses programs to capture (“sniff”) packets on the network, analyzing its content. Examples of this attack involve network traffic watching programs (including Wi-Fi) called “network sniffers”.
In flow d, also with the presence of MITM in the circuit, an attack occurs very similar to that of flow c, including the use of similar attack tools. In this case, however, the attacker, in addition to observing the packages and their content, interferes with them in order to modify the original information. Upon receiving the information at the destination, the communication participant receives a message that has been tampered with. Examples of this scenario include buffer overflow and replay attacks. Lastly, the flow and represents fabrication attacks. Note that in this case there is also the participation of MITM but there is an important difference, there is no original message. In other words, the attacker generated a message that must be understood by the recipient as coming from the origin, whom he trusts. Also note that this attack is especially difficult, compared to the others, first because it involves other previous attacks. First, attacks of format b, observing normal behavior of the origin, by whom the attacker wishes to impersonate. Second, social engineering attacks so that the message, containing “phishing”, malicious information or other device, looks legitimate and is not simply discarded by fate.
By looking at these attack formats, it is possible to identify a basic difference between them. There are those that can be executed passively, and those that require various actions by the attacker, intervening in the communication, content or flow of the sending. For those who want to find out if an attack is taking place using specific monitoring tools, attacks where there is no active action by the attacker are more difficult to detect. In these cases, the attacker can spend hours and even days watching corporate communication, for example, without being noticed (especially in cases of Wi-Fi).
In this unit we talk about the Web infrastructure, in a general overview. We saw basic information security terms and definitions. We observe how fast the expansion of the Web is, the introduction of Big Data, cloud computing and IoT in this scenario. We've seen basic network components associated with how the Web works in the context of attacks, and you can see how complex it is to think about implementing security on this network. We saw Web applications and you can get to know the client-server paradigm, distributed processing and we thought about the different types of protection needed in a generic information system, both on the front-end and back-end. We saw Web services, sockets and TCP-based protocol flow. We observed characteristics of Web devices, client-side and server-side language, in addition to the MVC model. Finally, we conceptualized attacker profiles and attack formats.
Types of web attack
Vulnerabilities
Every day companies suffer from cases of invasion or security breaches and most of the time we do not know why there is no disclosure in the media. In 2016, companies like Snapchat, Verizon, LinkedIn and Dropbox had several vulnerability issues, from phishing to leaking emails, passwords and other sensitive information, forcing teams to find these breaches as quickly as possible. In 2017, the scenario has not changed much and companies like E-Sports, Gmail and even Washington State University continue to suffer from the same problems. These cases affected +20 million users, who had their data revealed. Do you have any idea how much it cost the giants? Too many zeros! OWASP (Open Web Application Security Project) Founded in December 2001, OWASP is an online community that creates and makes free articles, methodologies, documentation and tools available to educate developers, designers, architects and organizations about the consequences of security breaches. To help other organizations reduce the risks of their applications, in addition to producing free and open content, they also annually launch a list of the TOP 10 vulnerabilities, based mainly on data from 11 companies specializing in application security, totaling more than 50,000 applications. and APIs in use. The material produced and made available by OWASP can be divided into several categories, some of which are:
Cheat Sheet Series
It is a collection of valuable tips on specific topics about web applications, providing an excellent security guide that is easy to read and understand. Some topics covered are Ajax, Authentication, HTML5 Security, Session Management, among others. Enterprise Security API ESAPI is a free and open-source library that aims to make it easier to write applications with low risk of vulnerability. It was designed to adapt to the security of existing applications and can be implemented by several languages.
Broken Web Applications Project
Collection of known vulnerabilities in web applications, distributed and executed in a virtual machine, perfect for those who want to learn more about security in web applications, test some tools and observe how the flow of attacks works.
Top 10 Risks
The identification of risks is done by collecting information about the threat involved, the type of attack that will be used, the vulnerability involved and the impact of this vulnerability if the attacker succeeds. This analysis is calculated using the following formula:
risk = probability * impact The main security risks for 2017 have not yet been finalized, but let's talk about the ones that are being found the most so far. If you are interested in a specific subject, the names are in English to facilitate the search.
Denial of Service - DoS
Also known as denial of service, it is an attempt to make system resources unavailable, with web servers as the main target. When the attack comes from several sources it is called Distributed Denial of Service.
Password Guessing Attacks
As the name implies, it targets access passwords. The attacker uses several tools such as random password generators, lists with the most common passwords, hashes and combinations existing on the web to help in this brute force attack.
Cross-Site Scripting— XSS
This vulnerability consists of the insertion of malicious scripts that will be executed when the page is accessed. There are several approaches, the most used are through the URL or inputs. And a tip, be careful when using eval () and output escaping whenever possible. Insecure Direct Object References - Insecure DOR This type of attack happens when a malicious user gets access to information like userID, via the URL. Using a sequential ID, the user is able to gain access to other users' information by changing the URL.
Sensitive Data Exposure
This type of vulnerability can be discovered when the server does not adequately protect data, such as a password, credit card information and e-mails. Encryption is essential and two-factor authentication is the minimum. Learn from Github. Missing Function Level Access Control Defining an access control makes it impossible for unauthorized users to change inappropriate information. From the moment a user accesses information that he or she does not have permission, there is a security breach.
Cross-Site Request Forgery - CSRF
The attacker deceives the user and sends a link via email or chat in order to perform actions without their consent. In this way, it is possible to make a request to the server impersonating the user, using his session cookie. Avoid this type of attack using the CSRF Token.
Complementary material
https://github.com/chuckfw/owaspbwa https://lists.owasp.org/mailman/listinfo/owasp-cheat-sheets https://github.com/FallibleInc/security-guide-for-developers https://github.com/OWASP/Top10 https://nodesecurity.io/advisories https://www.identityforce.com/blog/2017-data-breaches https://stackoverflow.com/a/477578/4008711 https://speakerdeck.com/mathiasbynens/front-end-performance-the-dark-side-at-fronteers-spring-conference-2016 https://capec.mitre.org https://javascript.info/frames-and-windows https://blog.apiki.com/2016/09/09/cross-site-scripting-xss/ https://mkw.st/r/csp https://speakerdeck.com/mikewest/frontend-security-frontend-conf-zurich-2013-08-30 https://www.owasp.org https://www.exploit-db.com
Front end
Analysis of Algorithms and Computation Complexity
Computing models. Asymptotic analysis: tools and notation for analysis of algorithms. Algorithm design techniques: greedy algorithms, division and conquest, dynamic programming. Complexity of algorithms for sorting and selection. Complexity of algorithms for graph problems. Problem classes: P, NP, NP-difficult and NPcomplete.
Bibliography
AHO, A. V .; HOPCROFT, J. E .; ULLMAN, J. D. Data Structures and Algorithms. Reading: Addison-Wesley, 1982. AHO, A. V .; ULLMAN, J. D. Foundations of Computer Science. 1st Ed. New York: W. H. Freeman and Company, 1992. CORMEN, T .; LEISERSON, C .; RIVEST, R .; STEIN, C. Introduction to Algorithms. New York: MIT Press, 2004. MANBER, U. Introduction to Algorithms: A Creative Approach. Boston: Addison Wesley, 1989. HOROWITZ, E .; SAHNI S. Fundamentals of Computer Algorithms. Rockville: Computer Science Press, 1984. GAREY, M .; JOHNSON, D. Computers and Intractability: a guide to the theory of NP-completeness. New York: Freeman, 1979. PAPADIMITRIOU, C. H. Computational Complexity. Reading: Addison-Wesley, 1993. SEDGEWICK, R. Algorithms. Reading: Addison-Wesley, 1983. ZIVIANI, N. Algorithms Project with Implementation in Pascal and C. 2ª. Ed. São Paulo: Thomson, 2004. TOSCANI, L. V .; VELOSO, P. A. S. Complexity of Algorithms. 2nd Ed. Porto Alegre: Bookman, 2008.
Clean Architecture
Objective: The objective is to show that we can adapt any software design keeping its principles to arrive at a solution that can be suitable for each type of problem. Inspiration: This article is inspired by real situations and difficulties already experienced that made me have a slightly more comprehensive view on having an ideal of architecture. Clean Architecture was created by Robert C. Martin and promoted in his book Clean Architecture: A Craftsman’s Guide to Software Structure. Like other software design philosophies, Clean Architecture tries to provide a methodology to be used in coding, in order to facilitate code development, allow for better maintenance, updating and less dependencies. An important goal of Clean Architecture is to provide developers with a way to organize code in a way that encapsulates business logic, but keeps it separate from the delivery mechanism.

Clean Architecture was not the first software design concept that appeared, over time software architectures have been created with the same objective of solving a design principle known as SoC (separation of concerns). The advantages of using a layered architecture are many, but we can point out a few: Testable. Business rules can be tested without the user interface, database, server or any other external elements. Regardless of the user interface. The user interface can easily change without changing the rest of the system. A web UI can be replaced with a console UI, for example, without changing business rules. Database independent. You can exchange Oracle or SQL Server, for Mongo, BigTable, CouchDB or any other. Your business rules are not linked to the database. Independent of any external agent. In fact, your business rules simply do not know anything about the outside world, they are not linked to any Framework. Separating layers will save the developer many future problems with software maintenance, the well-applied dependency rule will make your system completely testable. When a framework, a database, or an API becomes obsolete, replacing a layer will not be a headache, in addition to ensuring the integrity of the project core. For more details on each layer of Clean Architecture we can see on Uncle Bob’s blog. “Good architecture makes the system easy to understand, easy to develop, easy to maintain, and easy to deploy. The ultimate goal is to minimize the lifetime cost of the system and to maximize programmer productivity. ”
- Robert C. Martin, Clean Architecture Uncomplicated Such an architectural solution proves to be very efficient, but for each bonus there is a burden, in practice the creation of a structural model of this size proves to be quite a job in the beginning, even more with the applications being reduced more and more to levels of micro-services. We also cannot allow any application to be built without a minimum of structure and respect for the principles of SOLID. “Good software systems begin with clean code. On the one hand, if the bricks aren’t well made, the architecture of the building doesn’t matter much. On the other hand, you can make a substantial mess with well-made bricks. This is where the SOLID principles come in. ”
- Robert C. Martin, Clean Architecture What is wrong? Imagine an application with a well-known design and that I believe that every software developer has used: First of all, the most glaring problem with this design is the non-use of a business layer, concentrating the entire rule on services or even on other points such as entities or, as incredible as it seems in controllers, is a major architectural flaw. As well-written as it is, this coupling can cost a lot to maintain in the future. Possibly the entities have direct dependencies with business rules and their ORM, bringing to them a great responsibility and a great point of failure with this mix of low and high level policies. With this structure, how could we migrate a technology or a Framework without changing practically all the code? “If you think good architecture is expensive, try bad architecture.”
- Brian Foote and Joseph Yoder Is the Ideal complicated? Studying the different architectures and concepts, going through Hexagonal, Onion and finally Clean Architecture, which presented the ideal of a layered, modular and relatively low maintenance software after its complete implementation, he and others generated a problem of knowledge and confusion between the teams, some with difficulties in implementing a project from scratch, or others forgetting the trivial in the case of configuring a dependency injection or failing to understand how all those modules work. When we go through these difficulties we evolved a lot in knowledge, but is it worth it to lose (or gain) a good part of our productivity in the definition of an extremely ideal architecture? I remember going through several problems until I came up with a suitable build solution for a multi-module project implemented from end to end and then I wondered, was all the effort worth it? Does any and all software need this effort? A good architect serves precisely to try to define these limits, having a more comprehensive view of when, what to implement, what the project needs at the moment and how far it can go. Is the ideal complicated? You shouldn’t, so always remember the famous YAGNI (You aren’t gonna need it). “Architectural refactoring is hard, and we’re still ignorant of its full costs, but it isn’t impossible.”
- Martin Fowler, Patterns of Enterprise Application Architecture How can we make it uncomplicated? With a more simplistic view of architecture, following all good concepts, mainly that of maintaining the total isolation of the core, but with a single external layer for the application, simulating a physically modular division by packages with config, entrypoint and dataprovider. To illustrate a little more the model based on Clean Architecture and Ports and Adapters, here is an illustration to visualize the dependencies of each layer and the connections with its components, making its responsibilities very clear.

See how the premises always go to the center, and how the core is fully protected from any external interference, allowing the development of the implementation details to be fully contract-based, never exposing the high-level details directly. We prove this with the following class diagram:
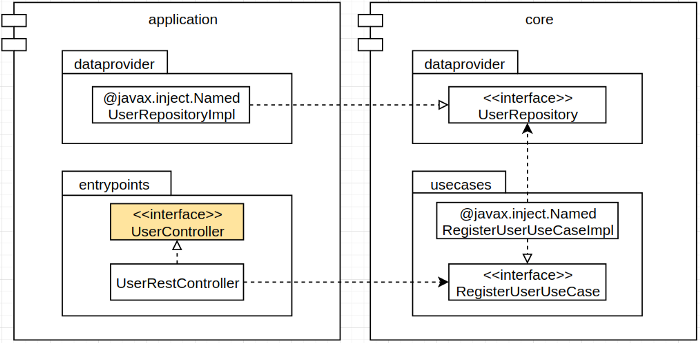
Note: It is observed that in the class diagram shown, the notation @ javax.inject.Named was inserted in the classes that implement the interfaces, this notation for those who do not know it, or use another language, is a notation of the dependency injection specification. of Java (JSR-330). It is used as a dependency on the core so that it does not have any direct dependency on Framework, thus containing only the trivial, as specifications. In Java applications using the Spring Framework, this notation allows our application to configure dependency injection automatically, just insert the package you want to scan in the scanBasePackages property of the @SpringBootApplication notation of your main class and if your core package is the even from your application, nothing needs to be done (really magical). This model is also briefly presented in Robert C. Martin’s book as “Périphérique anti pattern of ports and adapters” for its potential trade-off if access modifiers are not given importance, however if we use the package-private access modifier correctly in our implementations, this would be discarded, as your application (eg entry points) would not directly call your infrastructure (dataprovider), so the only available contracts that make sense are the use case contracts. “Architecture is a hypothesis, that needs to be proven by implementation and measurement.”
- Tom Gilb Conclusion The solution of an adequate architecture is trivial in any system. Regardless of any architecture or method for telling how you should or should not build your software, I believe that first we have to respect some principles, such as SOLID and the principles of cohesion and coupling. Robert C. Martin said that software architecture means knowing how to draw clear boundaries of its classes and components to minimize the human resources needed for its construction and maintenance. Your model has these very well defined limits but in this article I tried to show that not everything needs to be done as an ideal step by step, each problem can have one or more appropriate solutions, the important thing when defining a software architecture is to be able to anticipate some decisions for that it’s not too late. “The only way to go fast, is to go well.”
- Robert C. Martin References Uncle Bob Blog: https://blog.cleancoder.com/uncle-bob/2012/08/13/the-clean-architecture.html Book: Clean Architecture: A Craftsman’s Guide to Software Structure — ISBN: 0134494164
[Clean Architecture] Book
Java Engineer, What you need to know?
Step by step guide to becoming a modern backend developer
This guide will absolutely assist you in answering different such consuming inquiries, for example, the innovations that the Java engineer must learn? You ought to likewise realize what are the apparatuses that cause you to be the better Java Developer? Likewise, which sort of structure the Java Developer should learn. Anyway, we should encounter this Software Engineer RoadMap to understand how to come to be a Java Developer. Btw, you in no way, shape or form require to fathom everything on this guide to wind up being a software engineer. All things considered, you don’t likewise require to pay attention to them that on the off chance that you would prefer not to. Rather, utilize these maps as a start show help your understanding as you go.
Principals skills — Design Patterns, YAGNI, KISS, SOLID
When I started programming I was happy that my program was compiling and was working as I expected it to work, but as I wrote more and more code over time I’ve started to appreciate design patterns. Design patterns not only make my code better, more readable and easier to maintain, but also save me a lot, and I mean A LOT of debugging hours. That is why I wanted to share some with you. This design patterns originated from so called “gang of four”, authors of a DesignPatterns Book. They introduced this principles that are extremely useful especially in object-oriented programming. Probably you are already using all that, but it is always good to refresh your knowledge.
These are the concepts that you need to know before starting any training:
YAGNI — Ya Ain’t Gonna Need It — The philosophy that most of the code you think you’ll need to write and the features you’ll need to implement will actually turn out to be unnecessary KISS — Keep it simple, silly! — The simpler you keep your projects the easier your life will be when it comes to maintenance. SOLID — This is a mnemonic for “Single responsibility,Open–closed, Liskov substitution, Interface segregation, Dependency inversion”. Yeah — not beginner’s stuff, but look into this if you’re curious.
Mandatory Skills for Java Software Engineers

What does “To know Java” mean? The most accurate, albeit very general answer to this question would be “be able to solve the problem using Java.” Such a problem may be the goal of “passing an exam” or “getting a job”. Or it can be a technical task, either a big one “to create my own project good enough for Play Market”, for example, or a small one such as “understand how to write code that does what you need.” Java students usually learn the next topics: Core Java or Core Java + JUnit or Core Java + DataBases or Core Java + Tools or Core Java + Libraries or Core Java + Spring + SpringBoot + Hibernate or …and all of the above combinations. All these topics have one thing in common. It is Core Java, the basics. So if you don’t know Core Java, you definitely don’t know Java at all. Therefore, to learn Core Java is step#1 for every future Java Software Developer. Core Java covers the fundamental concepts of the language: Basic types and objects Basic constructions (Special Operators, Loops, Branches) OOPs Concepts Wrapper Classes Collections Multithreading I/O Streams Exception Handling So Core Java contains basic types, objects, constructions, and principles as well as the most important libraries and frameworks. In addition Core Jav covers classes for networking, security, database access, graphical user interface (GUI) development, and XML parsing. Mostly all packages of “Core Java” started with ‘java.lang..’ Good ratio for theory and practice You can’t learn how to swim without trying to swim, just by a book. The same story with programming. You can’t learn Programming without writing code. Programming is a practical activity. It is important to start writing code as early as possible. You don’t need to learn too much theory at once, especially in the first months of study. It is better to study it in small portions, and then immediately fix it in practice. So, 20% of your time is for theory research and 80% for practice. Here is the right place to return to the very first question “What does it mean to know Java” and clarify the answer. To know Java means to be able to code in Java. Not “know about Java” but be able to write programs of varying complexity and have some experience in such coding. Be able to ask questions Beginners often hesitate whether they should ask questions on forums and communities, because they think that their questions could be stupid. Well, they definitely could! But it is ok, there is no reason to worry! Every software developer was in your shoes and needed an answer on a rookie question. So what? Programming communities are somewhat collaborative. Software developers usually work as a team and all of them were beginners once.
Best forums to ask questions or look for answers:
This selection is 6 books that will either make you a better coder in general or an essential book you will need at some point in your career, such as during interviews. Or, see a complete list of programming book recommendations.
Clean Code by Robert C Martin
The Pragmatic Programmer by Andrew Hunt & David Thomas
The Effective Engineer by Edmund Lau Cracking the Coding Interview by Gayle Laakmann McDowell
The Art of Computer Programming by Donald Knuth
Design Patterns: Elements of Reusable Object-Oriented Software
If you are learning to web development, there is also a high likelihood you’re interested in startups.
Conclusions
How to learn Java fast? Try not to take long stops, or procrastinate while you’re learning. It is extremely important, because during long stops, you don’t just stand still, but roll back little by little. Daily practice, perseverance and motivation — you’ll definitely need all of these if you decide to learn Java and related technologies. If you follow a set schedule, observe the right balance of theory and practice, and practice daily for at least 1–3 hours, not be afraid to ask questions, it is quite possible to learn Java to the level that will allow you to find your first Job in 6–12 months. … And then continue your learning as a Software Engineers professional to infinity and beyond!
[EN-US] DevOps Roadmap